Advanced
Control with HDMI
Setup menu
AV2
Q-Link
TOP
On
AV2 out
TV
Off
Side panel
SD card LED
Tuning menu
OSD language
Teletext
Text language
West
Off timer
Off
On
Power save
Off
M a i n m e n u
P i c t u r e m e n u
S o u n d m e n u
S e t u p m e n u
H o m e t h e a t r e
DIRECT
TV REC
DIRECT
TV REC
24
25
Select "On"
(default is On)
M a i n m e n u
P i c t u r e m e n u
S o u n d m e n u
S e t u p m e n u
H o m e t h e a t r e
Q-Link interlocks the TV and VCR / DVD recorder, enables easy recording and playback.
■
Condition
■
Features available
What you
see is
What you
record
Information
/ Message
Power
on link
and Easy
playback
Power off
link
Recording information or if recording is not possible, a message is displayed.
(Only when the programme number is "0" or "AV mode" for some equipment.)
Insert a videocassette or DVD in the recording equipment and it is operated, TV
is turned on and input mode is switched automatically so that you can view the
content. (Only when TV is in Standby mode.)
When TV is set to Standby mode, the recording equipment is also automatically
set to Standby. (Only when the videocassette or DVD is not active.)
•
Use the VCR / DVD recorder with the following logos:
"Q-Link", "NEXTVIEWLINK", "DATA LOGIC", "Easy Link", "Megalogic", or "SMARTLINK"
•
Connect the equipment to this TV’s AV2 or AV3 terminal via a "fully-wired" SCART cable. (p. 26)
•
Q-Link terminal setup in Setup menu (Q-Link, AV2/AV3 out). (p. 16)
Q-Link
Direct TV Recording:
Recording the current programme in VCR / DVD
recorder immediately.
•
When Direct TV Recording is performed, the
recording equipment is automatically turned on if
it is in Standby mode.
•
The recording equipment is recording from
its own tuner. You can turn the TV off during
recording.
•
Do not turn the TV off during recording AV
source. Otherwise the recording will be stopped.
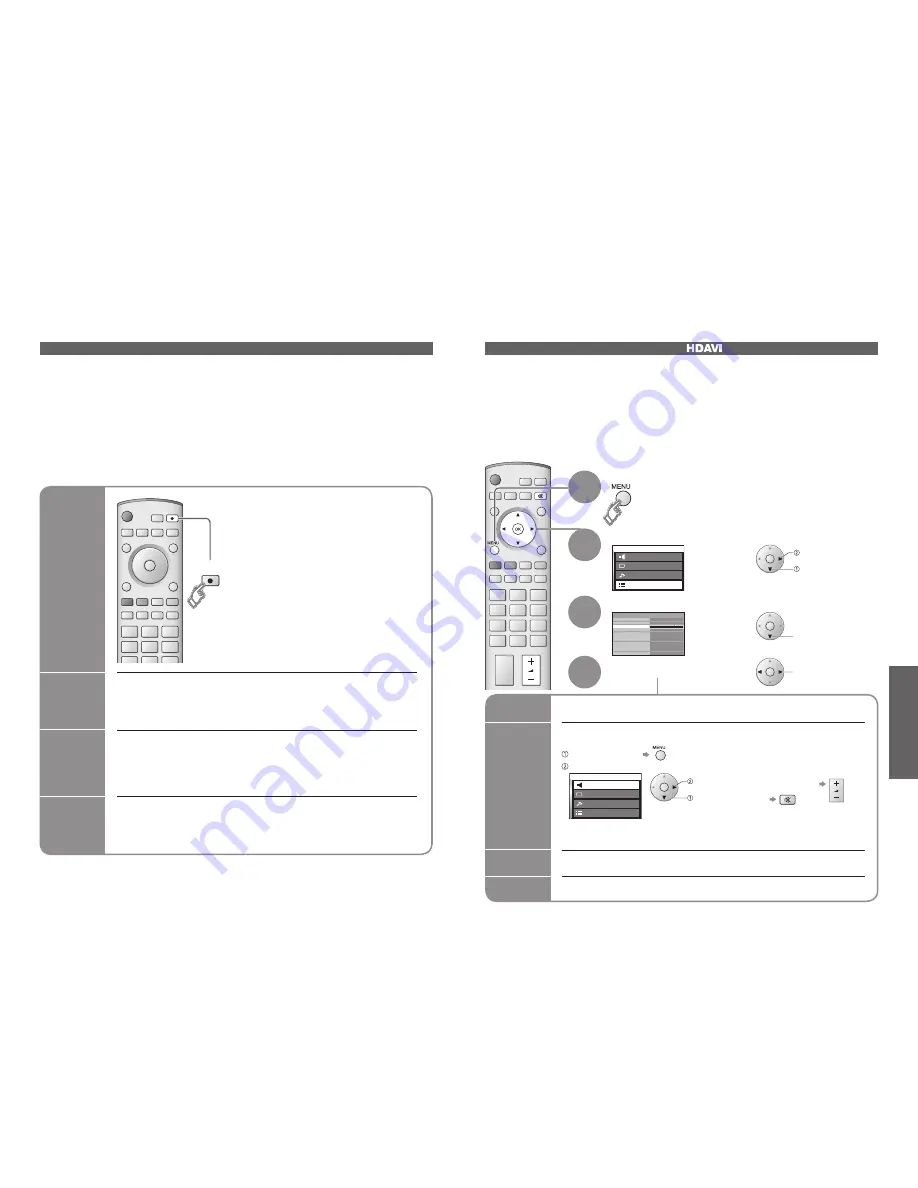
Select "Setup menu"
Select "Control with HDMI"
2
1
3
Display the menu
∗
Enjoy additional HDMI Inter-Operability with Panasonic products which have "HDAVI Control" function.
HDMI connections to some Panasonic equipments (Panasonic DVD Recorder DIGA, Panasonic Player
theatre, Panasonic Ampli
fi
er, etc.) allow you to enjoy the easy playback or home theatre.
About connections, see "Connections" (p. 27). Read the manuals of the equipment too.
Non-HDMI-compliant cables cannot be utilized.
About applicable equipments, consult your local Panasonic dealer.
next
select
select
Easy
playback
Automatic Input switching-When the connected Panasonic equipment is operated, input
mode is switched automatically. When it is stopped operating, input mode is returned.
Power on
link
When the connected Panasonic equipment is operated, TV is also automatically
turned on and the content is reproduced. (Only when TV is in Standby mode.)
Power off
link
When TV is set to Standby mode, the connected Panasonic equipment is also
automatically set to Standby.
select
Theatre
speaker
You can control the theatre speaker with TV’s remote control.
This function is available when Panasonic Ampli
fi
er or Player theatre is connected.
set
Display the menu
Select "Home theatre" or "TV speaker"
■
Home theatre:
•
When selecting "Home theatre", the sound of TV speakers is mute.
•
When the equipment is turned off, TV speakers will be active.
Volume up / down
Mute
■
TV speaker:
Control with HDMI "
Control
TM
"
∗
Preparations
(For the
fi
rst time / When adding new equipment, reconnecting equipment or changing setup)
After connection turn the equipment on and then switch the TV on.
Select the input mode to HDMI1, HDMI2 or HDMI3 (p. 12), and make sure that an image is
displayed correctly.
4
select
• "DATA LOGIC" (a trademark of Metz Corporation) • "Megalogic" (a trademark of Grundig Corporation)
• "Easy Link" (a trademark of Philips Corporation) • "SMARTLINK" (a trademark of Sony Corporation)
Read the manuals of the equipment too.
Some recording equipments are not applicable. Read the manuals of the equipment.
•
External Equipment
Adjustment for equipment (automatically
turned on if it is in Standby mode)
TV speakers are active.
■
Download channel settings
•
Perform Auto setup. (p. 20)
When
fi
rst using this TV, see "Auto Setup". (p. 9)
•
Perform download to the equipment. (p. 18)
External Equipment


