background image

4

5

Safety Precautions

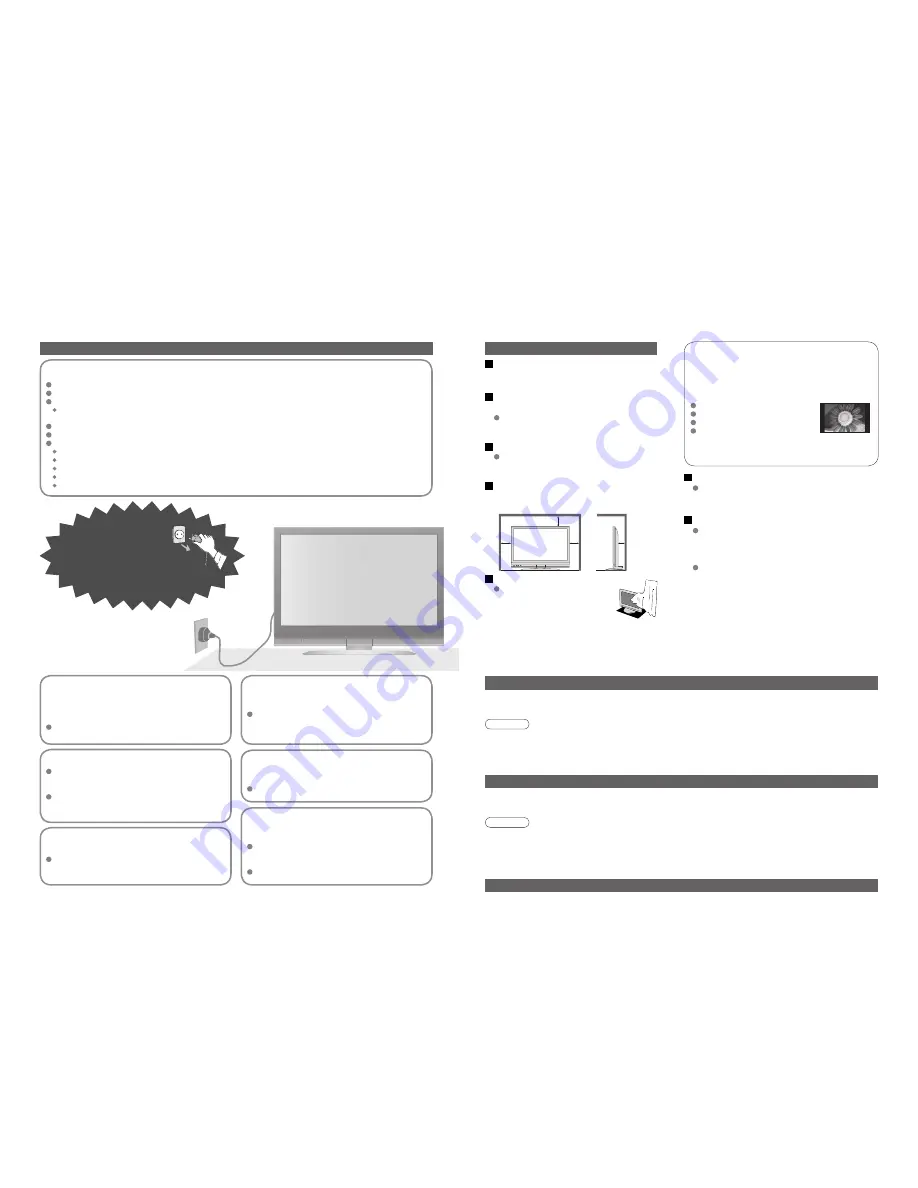
If you 

fi

 nd any

abnormality, 

remove the mains plug 

immediately!

Do not remove covers

NEVER modify the TV yourself

Keep liquids away from the TV

To prevent damage which may result in 

fi

 re or 

shock hazard, do not expose this appliance to 

dripping or splashing.

Do not place containers with water (

fl

 ower vase, 

cups, cosmetics, etc.) above the TV. (including on 

shelves above, etc.)

(High-voltage components may cause serious

electrical shock.)

Have the TV checked, adjusted, or repaired at your 

local Panasonic dealer.

AC 220-240 V

50 / 60 Hz

(Cleaning an energized TV may cause electrical shock.)


When cleaning the TV, remove the 

mains plug

Do not expose to direct sunlight 

and other sources of heat

Avoid exposing the TV to direct sunlight and other 

sources of heat. To prevent 

fi

 re never place any 

type of candle or naked 

fl

 ame on top or near the TV.

Handling the mains plug and lead

Insert the mains plug fully into the socket outlet. (If the mains plug is loose, it could generate heat and cause 

fi

 re.)

Ensure that the mains plug is easily accessible.

Ensure the grounding pin on the mains plug is securely connected to prevent electrical shock.


 An apparatus with CLASS I construction shall be connected to a mains socket outlet with a protective 

earthing connection.

Do not touch the mains plug with a wet hand. (This may cause electrical shock.)

Do not use any mains lead other than that provided with this TV. (This may cause 

fi

 re or electrical shock.)

Do not damage the mains lead. (A damaged lead may cause 

fi

 re or electrical shock.)

Do not move the TV with the lead plugged in the socket outlet.

Do not place a heavy object on the lead or place the lead near a high-temperature object.

Do not twist the lead, bend it excessively, or stretch it.

Do not pull on the lead. Hold onto the mains plug body when disconnecting lead.

Do not use a damaged mains plug or socket outlet.

Warning

Caution

Blocked ventilation by curtains, 

etc. may cause overheating, 

fi

 re 

or electrical shock.

Do not block the rear air vents

Notes

Maintenance

Display panel

Cabinet

Mains plug

Regular care: Gently wipe the surface clean of dirt by using a soft cloth.

Major contamination: Wipe the surface clean using a soft cloth dampened with clean water or diluted neutral 

detergent by 100 times of water. Then, using a soft dry cloth, evenly wipe the surface clean until it is dry.

Regular care: Wipe the surface clean using a soft dry cloth.

Major contamination: Dampen a soft cloth with clean water or water containing a small amount of neutral detergent. 

Then, wring the cloth and wipe the surface clean with it. Finally, wipe the surface clean with a dry cloth.

Wipe the mains plug with a dry cloth at regular intervals. (Moisture and dust may lead to 

fi

 re or electrical shock.)

First, remove the mains plug from the socket outlet.

Caution

• 

The surface of the display panel has been specially treated and may be easily damaged.

Do not tap or scratch the surface with your 

fi

 ngernail or other hard object.

• 

Use care not to subject the surface to bug repellent, solvent, thinner, or other volatile substances

(this may degrade surface quality).

Caution

• 

Use care not to subject the TV's surfaces to detergent.

(A liquid inside the TV could lead to product failure.)

• 

Use care not to subject surfaces to bug repellent, solvent, thinner, or other volatile substances

(this may deteriorate the surface by peeling the paint).

• 

Do not allow the cabinet to make contact with a rubber or PVC substance for a long time.


When TV will not be used for a 

long time, remove the mains plug

This TV will still consume some power even 

in the Off mode, as long as the mains plug is 

still connected to a live socket outlet.

Electronic equipment
In particular, do not place video equipment near the 

TV (electromagnetic interference may distort images 

/ sound).
Equipment with an infrared sensor
This TV also emits infrared rays (this may affect 

operation of other equipment).


Keep the TV away from these equipment

Do not place foreign objects

inside the TV

Do not let metal or 

fl

 ammable objects drop into the 

TV through the air vents (

fi

 re or electrical shock 

may result).

Use only the dedicated stands 

/ mounting equipment

Do not place the TV on sloped 

or unstable surfaces

The TV may fall off or tip over.

Using an unauthorized stand or other 

fi

 xtures may 

make the TV shaky, risking injury. Be sure to ask 

your local Panasonic dealer to perform setup.

Use optional stands / mounts (p. 6).

If no signal is received and no operation is 

performed in TV mode for 30 minutes, the TV will 

automatically go to standby mode.


Auto power standby function

Transporting the TV with its display panel 

facing upright or downward may cause 

damage to the internal circuitry.


Transport only in upright position

Do not display a still picture for a long time

This causes the image to remain on the plasma 

screen (“image retention”).

This is not considered a malfunction and is not 

covered by the warranty.

To prevent image retention, contrast is lowered 

automatically after a few minutes if no signals are 

sent or no operations are performed. (p. 41)

Typical still images

Channel number and other logos

Image displayed in 4:3 mode

Video game

Computer image

Allow suf

fi

 cient space around the 

TV for radiated heat

Minimum distance

10

10

10

7

(cm)

Содержание Viera TH-37PX70E

Страница 1: ...further information Information on Disposal in other Countries outside the European Union This symbol is only valid in the European Union If you wish to discard this product please contact your local authorities or dealer and ask for the correct method of disposal Printed in Czech Republic Model No TH 42PX74E Matsushita Electric Industrial Co Ltd Web Site http www panasonic europe com 2007 Matsush...

Страница 2: ... Labels 30 Displaying PC Screen on TV 31 Q Link Functions 32 HDMI Functions 33 HDMI terminal VIERA Link External Equipment 36 Basic Features Watching TV 12 Watching Videos and DVDs 14 Viewing Teletext 16 Enjoy your TV Technical Information 38 FAQs 41 Specifications 43 Licence 44 FAQs etc Accessories Options 6 Identifying Controls 7 Basic Connection 8 Auto Setup 10 Quick Start Guide Notice for DVB ...

Страница 3: ...tergent Then wring the cloth and wipe the surface clean with it Finally wipe the surface clean with a dry cloth Wipe the mains plug with a dry cloth at regular intervals Moisture and dust may lead to fire or electrical shock First remove the mains plug from the socket outlet Caution The surface of the display panel has been specially treated and may be easily damaged Do not tap or scratch the surf...

Страница 4: ...PV3W angle TY WK42PR2W TY WK42PR3W TY ST42D1 WG TY ST42D1 WK TY ST42D2 WG TY S42PX70WK Operating Instructions Pan European Guarantee Card Clamper 2 Mains Lead Pedestal ST 42D2 WK TBL0E0007 Read the manual of the pedestal for installation Increases or decreases the programme position by one When a function is already displayed press to increase or decrease the selected function When in Standby mode...

Страница 5: ...ng the mains lead be absolutely sure to disconnect the mains plug at the socket outlet first Example 1 Connecting aerial Example 2 Connecting DVD Recorder VCR TV only TV DVD Recorder or VCR Note Connect to AV1 2 for a DVD Recorder VCR supporting Q Link p 32 Example 3 Connecting DVD Recorder VCR and Set top box TV DVD Recorder VCR and Set top box DVD Recorder or VCR SCART cable fully wired RF cable...

Страница 6: ...Auto Setup is now complete and your TV is ready for viewing You can now use the remote control to turn On the TV or turn the TV to standby mode Power LED On To edit channels Editing Channels p 24 Analogue Programme Edit p 27 ON SCREEN HELP Instructions box Open the main menu Return to the previous menu Move the cursor select the menu Move the cursor adjust levels select from a range of options Acc...

Страница 7: ...e language for DVB Preferred Subtitles p 21 If available Turn power on Note To watch pay TV p 23 To select from the Programme Guide Display the current programme status OPTION Check or change the current programme status instantly To change Subtitle Language DVB mode Possible if the programme has some languages of subtitles Multi Audio DVB mode Possible if the programme has some languages of sound...

Страница 8: ...PC HDMI1 HDMI2 TV 2 Display the Input select menu select watch VCR DVD selection buttons Select VCR to operate Panasonic VCR or DVD equipment Select DVD to operate Panasonic DVD equipment or Player home theatre Standby Set to Standby mode Turn on Play Playback videocassette DVD Stop Stop the operations Rewind Skip Search VCR Rewind view the picture rapidly in reverse DVD Skip to the previous track...

Страница 9: ...s It may take some time for searching during which time you can watch TV Enter the 4 digit number example P6 Appears at upper left corner of the screen To view specific sub page blue View sub page Only when teletext is more than one page Watch TV while waiting for update P108 yellow yellow Appears when updating is completed You cannot change the channel Teletext automatically updates itself when n...

Страница 10: ...Picture Menu example Picture Menu Changed Number and positions of alternatives Moved Choose from among alternatives Adjust using the slide bar 1 Displays the next screen Go to the next screen To change menu pages up down Overview VIERA Link Control Speaker Selection VIERA Link Menu Home Cinema Recorder p 35 Main Menu VIERA Link Picture Sound Setup The menu of the accessed equipment 1 2 Viewing Mod...

Страница 11: ...5 DVB Service List Skips the unwanted DVB channels p 25 Q Link Settings Q Link Selects which AV terminal is to be used for data communication between this TV and a compatible recording equipment AV1 AV2 p 32 AV1 AV2 out Chooses the signal to be transmitted from the TV to Q Link Analogue DVB AV1 AV2 Monitor Monitor Image displayed on screen Component PC and HDMI signals cannot be outputted Download...

Страница 12: ...g with CI standard Off 2 of 2 Common Interface Slot 1 Module inserted Access Common Interface select go Coloured characters red green yellow blue Follow the on screen instructions example On screen operation guide may not correspond to the remote control buttons Caution Turn Off Mains power On Off switch whenever inserting or removing the CI module If a view card and a card reader come as a set fi...

Страница 13: ... by entering the PIN number you can watch the channel Appears when the channel is locked Enter the PIN number 4 digits Select Service List To cancel Select the locked channel To lock all channels yellow To cancel all channel locks blue Select the channel to be locked Note Setting Shipping Condition p 29 erases the PIN number and all settings Enter the PIN number twice at first setting Make a note ...

Страница 14: ...BC Radio Wales DVB 10 62 BBC Radio Cymru DVB 10 62 E4 DVB 10 62 Cartoon Nwk DVB 10 CH 29 Analogue CH 33 BBC1 Analogue Settings are made automatically 3 4 5 2 1 access select access select access select Edit Analogue channels Delete Add Move Change name Change sound system Change colour system Analogue Programme Edit Analogue Programme Edit 1 CH33 2 CH21 3 CH21 4 CH60 5 CH21 Prog Chan Name 1 2 3 X ...

Страница 15: ...vice found Press OK to add new service Press EXIT to lgnore Selects whether to give a notification message when a new DVB service is found Off On set Set DVB channel manually Normally use Auto Setup or Add New DVB Services for the DVB channel setting If tuning has not done completely use this function DVB Manual Tuning Signal Quality Stopped 0 10 Signal Strength 0 10 Frequency MHz CH21 474 00 Prog...

Страница 16: ...el Off OPTION DIRECTTVREC RETURN INPUT EXIT TV Input Labels AV1 DVD AV2 AV2S AV2 AV2S COMPONENT COMPONENT PC PC HDMI1 HDMI1 HDMI2 HDMI2 30 31 Displaying PC Screen on TV Input Labels To return to TV Displaying PC Screen on TV Select the external input Select PC The screen of the PC connected to the TV can be displayed on the TV You can also listen to PC sound with the audio cable connected To conne...

Страница 17: ...th an HDMI or DVI output terminal such as a set top box or a DVD player can be connected to the HDMI terminal using an HDMI compliant fully wired cable About connections see External Equipment p 36 Note HDMI is the world s first complete digital consumer AV interface complying with a non compression standard If the external equipment has only a DVI output connect to the HDMI1 terminal via a DVI to...

Страница 18: ...ly set to Standby This function will work even if the TV enters standby mode automatically by Off Timer function or auto power standby function Preparations Setup the equipment to enable this function Read the manuals of the equipment About connections see External Equipment p 37 Read the manuals of the equipment too For the first time When adding new equipment reconnecting equipment or changing s...

Страница 19: ...piece of equipment the table below and the specifications p 43 External Equipment Easy playback Easy control only with VIERA remote control Home Cinema Panasonic DVD Recorder HD Video Camera etc Panasonic Amplifier Panasonic DVD Recorder Speaker system Panasonic Player theatre HD Video Camera Use fully wired HDMI compliant cable Read the manuals of the equipment too VIERA Link p 34 Speaker system ...

Страница 20: ...nds when the playback starts Image or sound may not be available for the first few seconds when Input mode is switched Volume function will be displayed when adjusting the volume of the equipment Easy playback is also available by using the remote control for Amplifier or Player theatre Read the manuals of the equipment If you connect the same kind of equipment at once for example one DIGA to HDMI...

Страница 21: ... connector signal FAQs Before requesting service or assistance please follow these simple guides to resolve the problem If problem still persists please contact your local Panasonic dealer for assistance White spots or shadow images noise Check the position direction and connection of the aerial Neither image nor sound is produced Is the TV in AV mode Is the mains lead plugged into the socket outl...

Страница 22: ...mp No image can be displayed Is Colour or Contrast in the Picture Menu set to the minimum p 20 Check Colour system p 27 Blurry or distorted image no sound or low volume Reset channels p 27 No sound is produced Is Sound mute active p 7 Is the volume set to the minimum Sound level is low or sound is distorted Sound signal reception may be deteriorated Set MPX p 20 in the Sound Menu to Mono Analogue ...

Отзывы: