background image

VQT3M88

63

B

A

S

IC OPERA

T

ION/PLA

Y

B

A

CK

DELETING FILES

Deleted files cannot be restored, so delete files only after carefully checking 
the contents.

Delete single/delete all/delete folder
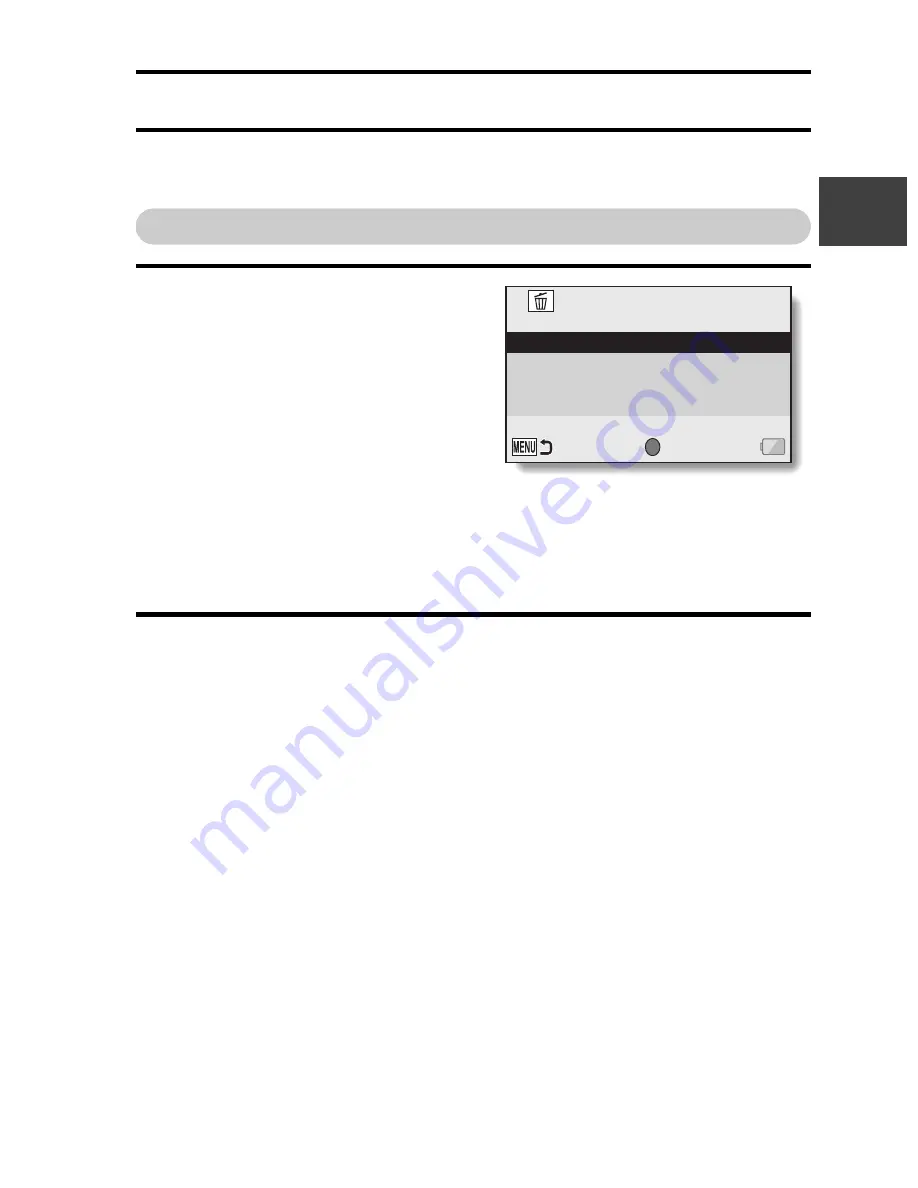
Display the Playback Menu 1 
(page 38), select the delete 
setting, and press the SET 
button.
DELETE SINGLE:

Deletes one file at a time.

DELETE SELECTED:

Deletes the selected files  
(page 64).

DELETE ALL:

Deletes all files.

DELETE FOLDER:

Delete the folder and all the files in the folder.

Select the desired delete mode, and press the SET button.

h

The Delete Confirmation Screen appears.

<DELETE SINGLE>

h

Toggle the SET button to the left or right to select the file you wish to 
delete.

h

There is no confirmation screen when deleting single files. 
Please make sure that the displayed image is one you wish to 
delete.

<DELETE ALL>

h

Toggle the SET button to the left or right to confirm the files to delete.

<DELETE FOLDER>

h

Toggle the SET button up or down to select the folder you wish to 
delete, and press the SET button.

SET


DELETE

DELETE SINGLE

DELETE SELECTED
DELETE ALL
DELETE FOLDER

ENTER

Содержание Viera HX-DC1

Страница 1: ... HX DC10 HX DC1 Before connecting operating or adjusting this product please read the instructions completely For USA and Puerto Rico assistance please call 1 800 211 PANA 7262 or contact us via the web at http www panasonic com contactinfo P VQT3M88 ...

Страница 2: ...ess Dealer Phone No Model No Serial No WARNING TO REDUCE THE RISK OF FIRE ELECTRIC SHOCK OR PRODUCT DAMAGE i DO NOT EXPOSE THIS APPARATUS TO RAIN MOISTURE DRIPPING OR SPLASHING AND THAT NO OBJECTS FILLED WITH LIQUIDS SUCH AS VASES SHALL BE PLACED ON THE APPARATUS i USE ONLY THE RECOMMENDED ACCESSORIES i DO NOT REMOVE THE COVER OR BACK THERE ARE NO USER SERVICEABLE PARTS INSIDE REFER SERVICING TO Q...

Страница 3: ...en the equipment and receiver i Connect the equipment into an outlet on a circuit different from that to which the receiver is connected i Consult the dealer or an experienced radio TV technician for help FCC Caution To assure continued compliance follow the attached installation instructions and use only shielded interface cables with ferrite core when connecting to computer or peripheral devices...

Страница 4: ...e the specified unit to recharge the battery pack i Do not use the battery pack with equipment other than the specified unit i Do not get dirt sand liquids or other foreign matter on the terminals i Do not touch the plug terminals and with metal objects i Do not disassemble remodel heat or throw into fire If any electrolyte should come into contact with your hands or clothes wash it off thoroughly...

Страница 5: ...lent type recommended by the manufacturer Dispose of used batteries according to the manufacturer s instructions Product Location Dual Camera Battery holder A lithium ion battery that is recyclable powers the product you have purchased Please call 1 800 8 BATTERY for information on how to recycle this battery U S A CANADA CONSUMERS ATTENTION ...

Страница 6: ...UN AS THIS MAY CAUSE DAMAGE TO THE INTERNAL PARTS OF THE EVF i DO NOT EXPOSE YOUR CAMERA TO EXTENDED HIGH TEMPERATURE Such as in direct sunlight inside a closed car next to a heater etc This action could permanently damage the internal parts of your camera i AVOID SUDDEN CHANGES IN TEMPERATURE If the unit is suddenly moved from a cold place to a warm place moisture may form on the SD card and insi...

Страница 7: ...emical products such as sunblock as it may damage the finish If you see this symbol Information on Disposal in other Countries outside the European Union This symbol is only valid in the European Union If you wish to discard this product please contact your local authorities or dealer and ask for the correct method of disposal ...

Страница 8: ...t including any other non built in memory HDD related component k Handling of built in memory This unit is equipped with an built in memory HX DC10 Approx 80 MB HX DC1 Approx 80 MB When using this component pay attention to the following points i The status indicator page 21 illuminates while the SD card or built in memory is being accessed reading recording playback deleting etc Do not perform th...

Страница 9: ...le Format Files which do not comply with the DCF standard cannot be played back i The file format of images supported by this unit is JPEG Not all JPEG format files will be played back i This unit may degrade or not play back images recorded or created on other products and other products may degrade or not play back images recorded on this unit k About the battery pack i Never place the battery p...

Страница 10: ...oint the camera at the subject and it automatically ascertains the scene and captures the images with the optimum settings Shoot movies page 53 Take photos page 54 Play back videos and photos page 59 353 000 15 53 16M S 1080 30p 1080 30p 000 00 09 000 00 09 000 00 09 2M 16M S F3 5 F3 5 1 30 1 30 F3 5 1 30 DEC 20 DEC 20 2011 2011 DEC 20 2011 ...

Страница 11: ...nternet connected VIERA via an HDMI mini cable sold separately you can press the VIERA s remote control Menu button and from the resulting menu select User guide on the Internet to see easy to understand explanations of the camera s operation and convenient functions on the VIERA screen i Applicable to VIERA units sold from December 2010 i To connect the camera to the VIERA via an HDMI mini cable ...

Страница 12: ... 154 It is not possible to directly insert in the card slot an SD card recorded with this camera and play back or dub from it It is not possible to connect the camera to the USB connector and play back or dub from it Recording with HD image quality on a Blu ray disc recorder is not possible On a computer pages 123 to 148 ...

Страница 13: ...ME SETTING 34 Date and time backup 36 SWITCHING BETWEEN THE RECORDING MODE AND PLAYBACK MODE 37 MENU SCREEN 38 Accessing exiting the Menu Screen 38 Using the Menu 39 Overview of the Menu Screen 40 INTELLIGENT AUTO MODE HX DC10 48 BASIC OPERATION SHOOTING BEFORE TAKING PICTURES 51 For best results 51 How to use the accessories 52 VIDEO RECORDING 53 TAKING PHOTOS 54 Shoot a photo while recording a v...

Страница 14: ...G MENU 3 78 Exposure setting HX DC10 page 45 78 Subject tracking settings page 45 80 Shortcut setting page 45 82 Exposure compensation 85 PLAYBACK PLAYBACK MENU 1 86 Slideshow settings page 46 86 File protect setting page 46 87 Rotate page 46 89 Resize page 46 89 PLAYBACK MENU 2 90 Correcting red eye page 47 90 Editing videos page 47 91 Copy page 47 100 FILE INFO DISPLAY 102 OPTION SETTINGS DISPLA...

Страница 15: ...0 Using as a webcam 131 WHAT YOU CAN DO WITH A COMPUTER 132 Contents of the supplied CD ROM 132 End User License Agreement 134 OPERATING ENVIRONMENT 136 Operating environment for HD Writer VE 1 0 136 To use the HD Writer VE 1 0 139 Operating environment for the card reader function mass storage 140 INSTALLATION 141 Uninstalling HD Writer VE 1 0 144 STARTING HD WRITER VE 1 0 145 Reading the owner s...

Страница 16: ...amera 164 Restrictions concerning the Scene Mode and Color Mode features 171 ABOUT COPYRIGHT 174 CAUTIONS FOR USE 175 RECORDING MODES APPROXIMATE RECORDABLE TIME 181 APPROXIMATE NUMBER OF RECORDABLE PICTURES 183 SPECIFICATIONS 185 OPTIONAL ACCESSORIES 191 Limited Warranty ONLY FOR U S A AND PUERTO RICO 193 Spanish Quick Use Guide Guía española para el uso rápido 196 ...

Страница 17: ...ge Battery pack VW VBX070 AC adaptor VSK0750 USB cable VFA0544 AV cable VFA0543 Lens cap VFC4701 Lens cap strap VFC4702 CD ROM Software Handstrap To prevent the camera from dropping be sure to attach the handstrap page 52 VFC4627 i Please dispose of packing materials properly i Keep the battery pack and the lens cap out of reach of children to prevent swallowing ...

Страница 18: ...mory card SDXC memory card in different device please confirm that it is compatible with the respective memory card Card type Capacity Video recording Photo shooting SD Memory Card 8 MB 16 MB 32 MB 64 MB 128 MB 256 MB Operation is not guaranteed Operation is not guaranteed 512 MB 1 GB 2 GB Can be used Can be used SDHC Memory Card 4 GB 6 GB 8 GB 12 GB 16 GB 24 GB 32 GB SDXC Memory Card 48 GB 64 GB ...

Страница 19: ... SDXC logo are not based on SD Memory Card specifications i Cards with capacity larger than 64 GB cannot be used i When the write protect switch on the SD card is locked no recording deletion or editing will be possible on the card i Keep the Memory Card out of reach of children to prevent swallowing Write protect switch ...

Страница 20: ...nal stereo microphone i The flash unit becomes very hot and may cause a burn Avoid touching the flash unit when shooting Status indicator The tripod mounting hole is on the bottom Speaker Attaching to a tripod having a screw length longer than 5 5 mm 0 22 may damage the camera ...

Страница 21: ...rating status Status indicator status Camera status Color Lit flashing Red Lit Accessing built in memory or SD card Flashing Faster Battery charge error Flashing Fast Self timer is operating Flashing Slow Battery is charging Flashing Slower Green Lit USB connection Flashing During sleep mode Orange Lit AV cable HDMI mini cable connection Status indicator ...

Страница 22: ...ENU button button Photo shooting button button O button SET button REC button Video recording button MENU button ZOOM RANGE button HX DC10 Zoom switch Hand strap eyelet page 52 HDMI terminal USB AV terminal k Operation pad During recording zoom photography W T page 57 During playback volume adjustment page 60 and 70 image magnification page 67 playback display switching page 66 ...

Страница 23: ...ar to the genuine product are made available to purchase in some markets Some of these battery packs are not adequately equipped with protective devices to meet the requirements of appropriate safety standards There is a possibility that these battery packs may lead to fire or explosion Please be advised that we are not liable for any accident or failure occurring as a result of use of a counterfe...

Страница 24: ...See page 121 concerning the remaining battery pack charge i Always use genuine Panasonic batteries VW VBX070 i If you use other batteries we cannot guarantee the quality of this product i Do not heat or expose to flame i Do not leave the battery in an automobile exposed to direct sunlight for a long period of time with doors and windows closed Battery model number voltage capacity minimum Charging...

Страница 25: ...ion of Camera Imaging Products Association i Using the supplied battery i Using a Panasonic SD Memory Card 2 GB Number of recordable images Approx 170 images By CIPA standard Recording time Approx 85 min Playback time Approx 180 min Number of recordable images Approx 180 images By CIPA standard Recording time Approx 90 min Playback time Approx 180 min ...

Страница 26: ...d 1 Push out 3 Open Connector markings 5 Close 4 Insert by matching the connector markings To remove the battery pack i Be sure the turn off the camera by pressing the power button until the status indicator page 21 turns off before removing the battery pack i Raise the end of the battery pack to remove it Battery pack Battery cover 2 6 Close firmly until you hear a click ...

Страница 27: ...0 5 second intervals if the battery pack is defective or is not installed correctly Make sure that the battery pack is correctly installed h If the battery pack still fails to recharge it is possible that there is a malfunction in the camera the battery pack or the AC adaptor In case the status indicator is flashing fast or slow please see page 173 h When charging is completed the status indicator...

Страница 28: ...ering or label removed i Doing so may result in malfunction When not using the camera for a long time remove the battery pack i A small amount of power is still used even if the camera is turned off and it is therefore recommended that the battery pack be removed from the camera if it is not going to be used for a long time Note that when the battery pack is removed for a long period the time and ...

Страница 29: ...s still possible to record and play back even when the icon is lit however it is advised that you discontinue use as soon as possible and turn the camera off h If the temperature rises further the icon will start to flash and the camera will turn off automatically The camera cannot be turned on until the temperature has dropped or as long as the icon remains flashing Please wait until the temperat...

Страница 30: ...tted card is used the card itself may become unusable When removing the card h To remove the card press it in and then release The card will protrude slightly and you can then pull it out Card s label side 2 Insert the card 1 Open 3 Close i Push straight in until you hear a click 4 Close firmly until you hear a click 1 Push the middle part of the card 2 Pull the card out straight ...

Страница 31: ...to forcibly remove the card i Doing so may damage the card or the stored files If the status indicator is lit red i Never remove the card when the status indicator is flashing red as doing so may result in loss of files stored in the card ...

Страница 32: ...SETUP TURNING THE CAMERA ON AND OFF Turning on the camera 1 Open the monitor unit and press the power button h The LCD monitor turns on How to open the monitor unit Monitor unit Power button LCD monitor 180 105 90 ...

Страница 33: ...s pressed i When the AC adaptor is connected the ECONOMY mode will become active about 5 minutes after the camera is turned on factory preset setting i The user can specify the time elapsed before the sleep mode is activated page 105 HINT About the standby mode i The camera goes into the standby mode if you close the monitor unit or if you leave it in the sleep mode for about 1 hour The standby mo...

Страница 34: ...a page 32 and display Option Setting Menu 1 page 103 2 Select CLOCK SET and press the SET button h The Clock Set Screen appears h Follow the procedures below to enable or disable the date display during playback to set the display format for the date and to set the date and time 3 Set the date 1 Select DATE 2 Press the SET button h The Set Date Screen appears 3 Set the date to DEC 20 2011 h The da...

Страница 35: ...the order in which the date is displayed during playback 1 Select DISP 2 Press the SET button h The Set Date Format Screen appears 3 Toggle the SET button up or down h The order of the date display changes 4 Press the SET button 6 Press the MENU button h The date and time setting is completed h To display the Recording or Playback Screen press the MENU button SET 07 30 PM CLOCK SET TIME ENTER SET ...

Страница 36: ...o file recording date time information JAN 01 2011 00 00 00 Date and time backup Under normal conditions while the battery pack is being replaced an internal battery will maintain the date and time settings However there is a small chance the settings may be lost the backup will last for about 7 days It is recommended to check that the date and time settings are still correct after replacing the b...

Страница 37: ...ND PLAYBACK MODE Switch between the recording mode for recording and the playback mode for viewing your recorded images 1 Turn on the camera page 32 2 Press the REC button h The mode changes h The mode changes each time the REC button is pressed REC button ...

Страница 38: ...E SIZE SCENE MODE COLOR MODE FLASH SELF TIMER ENTER RECORDING MENU 1 MENU button Option tab Tab SET button k To display a different Tab Menu h The Menu Screen consists of the Tabs Menu tabs 1 2 and 3 and the Option Tabs Menu tabs 1 2 and 3 h To switch from the active tab menu to the other tab menu while the screen shown above is displayed toggle the SET button to the left then toggle the SET butto...

Страница 39: ...ting mode s for which the selected setting is effective i O This setting is effective during photo shooting i O This setting is effective during video recording i O This setting is effective during photo shooting and video recording 4608x3456 4608x3456 4608x2592 16 9 1920x1080 16 9 1600x1200 1280x720 16 9 1 3 2 2 3 1 16M S 16M S 16M H 2M 2M 0 9M 12M 1080 30p RECORDING MENU 1 REC MODE PICTURE SIZE ...

Страница 40: ...1080 pixels 60i Record at 1920 1080 pixels 30p Record at 1280 720 pixels 60p Record at 1280 720 pixels 30p Record at 960 540 pixels 30p Record at 640 480 pixels 30p Make an audio recording HX DC10 A Image size is 4608 3456 pixels low compression B Image size is 4608 3456 pixels normal compression Image size is 4608 2592 pixels 16 9 aspect ratio HX DC1 6 Image size is 4352 3264 pixels low compressi...

Страница 41: ... do not appear dark even in bright sunlight Capture the vibrant reds in sunrise and sunset shots Record fireworks in the night sky When recording a landscape focus on the distant subject Beautiful shots of evening and night scenes Light up both the subject and the background Shoot in darkened surroundings such as at dusk Color mode is deactivated Enhanced color saturation Reduce sharpness to produ...

Страница 42: ...42 VQT3M88 SETUP Tab 2 3 2 1 2 3 1 7 5 6 4 3 2 1 RECORDING MENU 2 E I S FOCUS FOCUS MODE METERING MODE ISO WHITE BALANCE ENTER ...

Страница 43: ... normal The focus can be set manually The camera focuses on the subject within a range of 1 cm 0 4 to macro 9 point range finder focus Spot focus A focus mark appears in the center of the LCD monitor n Multi metering W Center weighted light measuring Y Spot light measuring A metering spot mark appears in the center of the LCD monitor Sensitivity is set automatically Sets sensitivity to ISO 50 u Se...

Страница 44: ...DC1 3 2 1 2 3 1 P 1 7 6 5 4 3 2 1 RECORDING MENU 3 EXPOSURE SUBJECT TRACKING DIGITAL ZOOM WIND CUT AUTO REVIEW SHORTCUTS ENTER 3 2 1 2 3 1 1 7 6 5 4 3 2 RECORDING MENU 3 SUBJECT TRACKING DIGITAL ZOOM WIND CUT AUTO REVIEW SHORTCUTS ENTER ...

Страница 45: ... button is pressed The image is shown on the LCD monitor for about 1 second after capture The image is shown on the LCD monitor for about 2 seconds after capture The image is not shown on the LCD monitor after capture 6 Shortcuts setting page 82 h Assign operation shortcuts to the SET button 7 Remaining battery power indication page 121 HX DC10 The exposure is set automatically T Set the shutter s...

Страница 46: ...layback 3 Protect page 87 h File protect setting delete prohibited 4 Delete page 63 h Delete files 5 Rotate page 89 h Rotate a photo 6 Resize page 89 h A captured image can be resized to a smaller size and saved as a separate image 7 Remaining battery power indication page 121 2 1 2 3 1 7 5 6 4 3 2 1 PLAYBACK MENU 1 SLIDESHOW PLAY VOLUME PROTECT DELETE ROTATE RESIZE ENTER ...

Страница 47: ...the red eye caused by the flash photos only 2 Edit video page 91 h Edit videos 3 Copy page 100 h Copy files from the built in memory to the card 4 Remaining battery power indication page 121 2 1 2 3 1 4 3 2 1 PLAYBACK MENU 2 RED EYE CORRECT EDIT VIDEO COPY ENTER ...

Страница 48: ...n the subject is a person Faces are detected and focused automatically and the brightness is adjusted so it is recorded clearly Landscape Recording outdoors The whole landscape will be recorded vividly without whiting out the background sky which may be very bright 1 Spot light Under a spotlight Very bright subject is recorded clearly 1 Low light Dark room or twilight It can record very clearly ev...

Страница 49: ... may not be detected depending on the recording conditions such as when faces are of certain sizes or at certain tilts 2 Night scenery Recording night scenery You can record night scenery vividly by slowing the shutter speed 2 Macro Recording zooming in on a flower etc This allows recording at very close proximity to the object of recording 1 2 Normal Other situations Contrast is adjusted automati...

Страница 50: ...s not functioning normally adjust the white balance manually page 77 Auto focus The unit focuses automatically i Auto focus does not work correctly in the following situations Record pictures in the Manual Focus Mode page 75 h Recording distant and close up objects at the same time h Recording a subject through a dirty or dusty window h Recording a subject that is surrounded by objects with glossy...

Страница 51: ...ens or flash Holding the camera Example 1 Grip the camera by wrapping the fingers of the right hand from the little finger to the middle finger around the camera and hook the index finger above the lens Example 2 Grip the camera by wrapping the fingers of the right hand from the little finger to the index finger around the camera i To avoid dropping the camera be sure to attach a handstrap If the ...

Страница 52: ...52 VQT3M88 BASIC OPERATION SHOOTING How to use the accessories k Handstrap k Lens cap 1 2 3 4 ...

Страница 53: ... the remaining recording time appears on the display h When the file size of the current recording exceeds 4 GB the file is saved once and recording begins in a new file 4 GB files are automatically created page 181 h HX DC1 When the file size of the recording exceeds 4 GB recording pauses from a few seconds up to 10 seconds and then resumes 3 End the recording h Press the button again to stop rec...

Страница 54: ... O button 1 Press the O button halfway h The autofocus operates and the image is focused focus lock 2 Continue to gently press the O button all the way h The shutter releases and the image is captured h You can view the captured image on the LCD monitor by keeping the O button depressed when you capture the image For shooting hi speed burst see page 71 16M S F3 5 F3 5 1 30 1 30 F3 5 1 30 Target ma...

Страница 55: ...cus lock and AE lock are released The shutter speed and aperture are displayed i The shutter speed and aperture settings are shown on the Recording Screen If the camera shake icon appears i During photo shooting if the shutter speed is slow and the possibility that the image may be blurred due to camera shake becomes high the camera shake icon may appear on the LCD monitor In this case use a tripo...

Страница 56: ...e becomes approximately 30 seconds it will no longer be possible to capture a photo while recording a video The exact remaining recording time at which this occurs will differ depending on the subject and on the recording size page 71 as well as on the recording mode setting page 68 About the recording size of photos i The size of a photo captured during video recording depends on the video record...

Страница 57: ...to compose the desired image T Zoom in on the subject W P Zoom out h When the zoom switch is pushed the zoom bar appears on the LCD monitor 3 Take the picture For video recording see page 53 For shooting photos single see page 54 For shooting hi speed bursts see page 71 Zoom switch Zoom bar When both optical and digital zoom are enabled Digital zoom blue Optical zoom When optical zoom only is enab...

Страница 58: ...ecording videos at a high magnification i When the digital zoom is used the picture quality becomes grainier as the magnification increases i See page 186 regarding zoom magnification When the ZOOM RANGE button is pressed HX DC1 i The magnification is approximately doubled double range zoom Press the button again to return to normal magnification i The W icon is shown on the Recording Screen durin...

Страница 59: ... is shown at the bottom of the LCD monitor 3 Press the SET button h The image you selected in step 2 is displayed on the LCD monitor h If a video was selected playback begins Photo file To return to the screen to select playback files Toggle the SET button down HINT i Photos can be rotated when they are played back pages 46 and 89 i If you close the monitor unit playback stops and the camera switc...

Страница 60: ... hold the SET button to the right During reverse playback After pausing playback press and hold the SET button to the left To accelerate playback Forward playback Maximum 15 During forward playback toggle the SET button to the right h The forward playback speed changes each time the SET button is toggled to the right Toggle the SET button to the left to resume normal playback speed Reverse playbac...

Страница 61: ...VQT3M88 61 BASIC OPERATION PLAYBACK HINT If the appears on the Playback Screen i The icon appears when playing back a file that was saved in segments page 182 ...

Страница 62: ... 3 you cannot select 16 9 h The latest image number is assigned to the photo when it is saved HINT The file size for a video is very large i Therefore be aware that if the video is uploaded to a computer to be played back the computer may not be able to play back the video fast enough making it appear jerky The video will always be displayed properly on the camera LCD monitor or a television If no...

Страница 63: ...d all the files in the folder 2 Select the desired delete mode and press the SET button h The Delete Confirmation Screen appears DELETE SINGLE h Toggle the SET button to the left or right to select the file you wish to delete h There is no confirmation screen when deleting single files Please make sure that the displayed image is one you wish to delete DELETE ALL h Toggle the SET button to the lef...

Страница 64: ...tton If DELETE FOLDER was selected select YES again and press the SET button and the files will be deleted Delete selected Delete selected files 1 Display the Playback Menu 1 page 38 select the delete setting and press the SET button 2 Select DELETE SELECTED and press the SET button h The screen to select files to delete appears 3 Select an image you wish to delete h Toggle the SET button left rig...

Страница 65: ...a file move the yellow frame to the marked file and press the SET button 5 Press the O button or button h The Delete Confirmation Screen appears 6 Select YES and press the SET button h The selected files are deleted HINT i Files that are protected from accidental delete cannot be deleted To delete protected files set the protect setting for the files to off page 87 and then follow the file delete ...

Страница 66: ...ard the T side to change to the single image display 3 Select the image to play back h Toggle the SET button left right up or down to move the yellow frame to the desired image and press the SET button h If the zoom switch is pushed toward the W P side while the 21 image display is shown the display changes to the screen to select the playback folder page 115 HINT Photo playback In step 2 press th...

Страница 67: ...t right up or down to view different parts of the magnified image To magnify Magnification increases each time the zoom switch is pushed toward the T side To return to normal size Magnification decreases each time the zoom switch is pushed toward the W P side h Press the SET button to return to the normal 100 view HINT The magnified portion of the image can be saved as a separate image i Press the...

Страница 68: ... this mode when using a Mac computer for playing back and editing When editing videos i In order for videos to be spliced they must have been recorded in the same mode i Videos that were recorded in different modes cannot be spliced Playback of a video that was recorded in the mode i In some cases it may not be possible to play back videos recorded in this mode even on other devices equipped with ...

Страница 69: ...cording time appears on the display 3 End the audio recording h Press the button again to stop recording h The elapsed recording time returns to 000 00 00 each time recording is stopped HINT You can capture a photo during an audio recording i Press the O button during audio recording to capture a photo Maximum audio recording time i When the recording mode setting is set to audio and the recording...

Страница 70: ...verse Fast forward Maximum 15 During playback toggle the SET button to the right Each time the SET button is toggled to the right the speed increases If the SET button is toggled to the left during fast forward the speed decreases Fast reverse Maximum 15 During playback toggle the SET button to the left Each time the SET button is toggled to the left the speed increases If the SET button is toggle...

Страница 71: ...tinues as long as the O button is kept pressed HINT What is the maximum number of images in a hi speed burst sequence HX DC10 C 8 shots t 20 shots HX DC1 9 shots t 12 shots i If you continue shooting even after the maximum number of images has been captured recording does not stop i If you continue shooting after the maximum number of images has been captured the photos are saved extending backwar...

Страница 72: ...ed etc for specific shooting conditions HINT i To return to normal photography select from the scene mode menu and press the SET button i A table showing the limitations for settings corresponding to scene mode icons other than is on page 171 Scene mode characteristics Low light mode iThe shutter speed will be faster than 1 15 sec when recording video Sunset fireworks landscape night scenery night...

Страница 73: ...self timer is automatically reset to off N after recording is ended and the camera turned off When x is selected i When the O button or button is pressed the status indicator will blink for about 10 seconds and then the image is captured Also the countdown indication shown in the illustration to the right appears on the LCD monitor When y is selected i When the O button or button is pressed the st...

Страница 74: ...e digital zoom page 45 is being used the large magnification factor may make it difficult for the motion compensation function to work correctly i When the scene mode function is set to night portrait low light night scenery or fireworks the motion compensation effect may be insignificant i When the optical zoom is used or when the autofocus is operating the image may appear to waver but this is n...

Страница 75: ...ss the SET button h The focus is set and you are returned to the Recording Screen HINT About the macro mode i When the focus range is set to macro the zoom is temporarily set to the wide end i By assigning an operation shortcut to the SET button page 82 you can change the focus setting from the Recording Screen i In some cases it may be difficult for the auto focus to work 340 000 15 17 340 000 15...

Страница 76: ...bject However the ISO sensitivity can be set to a fixed setting HINT i By setting a higher ISO sensitivity you can set faster shutter speeds and capture images in darker locations but noise in the captured images may increase or the images may be irregular i By assigning an operation shortcut to the SET button page 82 you can change the ISO setting from the Recording Screen ...

Страница 77: ... the icon shows on the Recording Menu it indicates that the white balance setting was completed HINT To cancel the white balance setting i Select and then press the SET button If the color or brightness of the screen changes if bands appear on the screen or if the LCD monitor flickers during indoor photography i When shooting under fluorescent lighting sodium vapor lighting mercury lighting etc th...

Страница 78: ...elect aperture value or shutter speed 2 Toggle the SET button to the left or right to change the setting for the selected parameter Setting ranges Aperture F3 5 to F8 0 Shutter speed 2S 2 sec to 1 1500 1 1500 sec When the aperture is other than F8 0 the shutter speed range is 2S to 1 1000 When the aperture priority g is set to F8 0 the shutter speed range is 2S to 1 1500 Depending on the zoom magn...

Страница 79: ...e image may be increased i If the exposure setting is set to T g or H by assigning an operation shortcut to the SET button page 82 you can select the T g or H exposure setting from the Recording Screen i The exposure setting automatically becomes if the scene mode function is active When shooting a hi speed burst i The shutter speed will be faster than 1 30 sec When recording a video i Even if the...

Страница 80: ...ther faces is framed by a single green frame When shooting photos HX DC10 HX DC1 2 Press the O button halfway h The double green frame changes to orange 3 Press the O button h Gently press the O button all the way to capture the photo When recording videos HX DC10 2 Press the button h Recording begins HINT About recording with the subject tracking i The tracking function may not work when the subj...

Страница 81: ...rimposed on the subject To cancel the color tracking operation h While the target frame icon is displayed press the SET button If the subject is not successfully targeted h The target frame icon red continues to be displayed Press the SET button once more and try to engage the target again 3 Press the O button h The image is captured at the moment the O button is pressed HINT If the target frame t...

Страница 82: ...ign the function and press the SET button h The screen to assign a function to the key appears AF LOCK Lock the focus page 55 AE LOCK Lock the exposure setting page 55 FOCUS Set the focus page 75 This operation shortcut can be assigned only to the or key m FLASH Set the flash operation page 41 EXP COMPENSATION Adjust the exposure page 85 s ISO Set the ISO sensitivity pages 43 and 76 O SELF TIMER S...

Страница 83: ...ress the SET button h The selected function is assigned to the key and you are returned to the Shortcuts Screen h To assign functions to the other keys repeat steps 2 through 4 Video view Video recording area Photo view SET SHORTCUTS FOCUS PHOTO VIEW FLASH SELF TIMER RECOMMENDED SETTINGS ENTER When RECOMMENDED SETTINGS is selected ...

Страница 84: ... to confirm the shortcut settings appears and then you are returned to the Recording Menu h This completes the shortcuts setting To confirm the assigned shortcuts h On the screen in step 1 press the MENU button and the screen to confirm the shortcut settings appears SHORTCUTS ...

Страница 85: ...n numerical value is shown at the left end of the exposure compensation bar h The exposure compensation can be set to a value from 1 8 to 1 8 h The exposure compensation bar is canceled when the MENU button or the SET button is pressed HINT The exposure compensation setting is canceled in the following cases i When the pointer is set to 0 0 i When the camera is set to the playback mode i After the...

Страница 86: ...hange and press the SET button 2 Toggle the SET button up or down to change the setting 3 Press the SET button Begin the slideshow 1 Select START and press the SET button h Slideshow playback begins h To stop slideshow playback press an operation button Playback also stops if the zoom switch is pushed HINT BGM for videos i When videos are played back in a slideshow the recorded audio track is play...

Страница 87: ...ady been enabled for the file then UNLOCK appears 4 Select LOCK and press the SET button h The protect mode is set for the file h The protect mark indicates that the file is locked HINT i Even if the protect mode is set for certain files they will be deleted if the card is reformatted To select a different image in step 3 i Toggle the SET button to the left or right To cancel the protect mode for ...

Страница 88: ...and press the SET button h Toggle the SET button left right up or down to move the yellow frame to the file you wish to protect 4 Press the SET button h The selected file is marked with the protect icon h To cancel a protect selection and remove the protect icon from a file move the yellow frame to the marked file and press the SET button SET 1080 60i DEC 20 2011 2 25 PM 51 6MB LOCK 100 0006 00 00...

Страница 89: ...ed image cancel the protect mode before beginning the rotate image procedure page 87 Resize page 46 A captured image can be resized to a smaller size and saved as a separate image You can set the size to 1600 1200 pixels or 640 480 pixels The latest image number is assigned to the photo when it is saved HINT Why can t the image be resized i An image can be resized only to a smaller or the same siz...

Страница 90: ...ar more natural In the case of SAVE AS NEW the latest image number is assigned to the photo when it is saved HINT If the Red eye correction not successful message appears i The camera was not able to successfully repair the image i The correction function works to automatically edit flaws that the camera detects in captured images In some cases the camera may fail to correctly repair a flaw ...

Страница 91: ...e them as one separate clip splicing Procedure to trim extract a portion of a video J Extract the specified portion 1 2 A B C Specify the frames 1 2 where the video is to be split Two ways to split the video i Trim away portions A and C and save portion B i The original video is not affected You can also choose to erase the original video when the new is saved i Delete portion B and join portions ...

Страница 92: ... become full making it impossible to edit or save the videos In this case you will need to free some of the memory on the card by deleting files that are no longer necessary pages 46 and 63 Specify the video that will come first J J Splice the videos Specify the video clip that you wish to append splice i The videos are spliced i The original videos are not affected You can also choose to erase th...

Страница 93: ...from the 8 image display h Move the yellow frame to the video you wish to trim page 59 2 Display the Playback Menu 2 page 38 select EDIT VIDEO and press the SET button 3 Select SPLIT and press the SET button h The Split Screen appears SET EDIT VIDEO SPLIT SPLICE ENTER 00 00 10 SPLIT SAVE Start point ...

Страница 94: ...video is also the start point of the extract proceed to step 5 Procedure Play After pausing playback press and hold the SET button to the right for about 2 seconds for forward playback or to the left for reverse playback Pause During playback press the SET button Accelerated playback During playback toggle the SET button to the left or right to change the playback speed Single frame After pausing ...

Страница 95: ...e frame following the end point of the extract will be the start point of the latter portion to be joined 6 Press the O button or button h A screen appears for you to select either to save the edited video as a new separate file or to delete the original video and replace it with the edited video SAVE AS NEW The edited video will be saved as a new file The original video remains unchanged OVERWRIT...

Страница 96: ...mory by deleting files that you do not need to keep i Audio files cannot be trimmed Playback volume i Adjust the volume before beginning editing page 60 In case of prolonged recording i During the editing of lengthy videos the time to process the large amount of data can become quite long To avoid problems caused by the battery pack becoming depleted in the middle of video editing before starting ...

Страница 97: ...frame to the video you wish to splice and press the SET button h The specified video is labeled with a number h Up to 9 videos can be selected h The splice order follows the order in which the numbers are assigned h To cancel a selection and remove the number label from a video select the video and press the SET button SET EDIT VIDEO SPLIT SPLICE ENTER DEC 20 2011 8 53 PM 1080 60i SET OK 100 0016 ...

Страница 98: ...will be saved as a new file The original videos remain unchanged OVERWRITE The original videos will be deleted Only the joined video will be saved REVIEW CLIP Play back the spliced video before saving it 5 Select the desired option and press the SET button h Editing starts h When editing videos do not turn off the camera as doing so may erase the original video h When editing ends you are returned...

Страница 99: ...me of the memory by deleting files that you do not need to keep i Audio files cannot be spliced Playback volume i Adjust the volume before beginning editing page 60 In case of prolonged recording i During the editing of lengthy videos the time to process the large amount of data can become quite long To avoid problems caused by the battery pack becoming depleted in the middle of video editing befo...

Страница 100: ...ED Copy selected files page 101 COPY ALL Copy all the files If COPY SINGLE was selected h Toggle the SET button left or right to select the file you wish to copy h Proceed to step 3 If COPY ALL was selected h Press the SET button to begin copying h When copying is completed you are returned to the Playback Menu 3 Select COPY and press the SET button h Copying begins h To continue copying files tog...

Страница 101: ...p or down to move the yellow frame to a file you wish to copy and press the SET button h A checkmark is superimposed on the selected file h To deselect a file move the yellow frame to the file and press the SET button 4 Press the O button or button h Copying begins h When copying is completed you are returned to the Playback Menu HINT i To make optimum use of the capacity of the SD card or built i...

Страница 102: ...he Information Screen is canceled 1 Recording mode recorded pixels settings 2 Image or sound number 3 Protect setting 4 File size 5 Video or audio recording time 6 Exposure compensation setting 7 Aperture value 8 Shutter speed 9 Remaining battery charge 0 Date and time of image A ISO sensitivity setting B Indicates location of saved file SD card or built in memory 100 0001 7 3MB 00 00 03 DEC 20 20...

Страница 103: ...n to the right the screen to select a setting to change appears To access a Setting Screen 3 Toggle the SET button up or down to select the item you wish to set and press the SET button h The Setting Screen for the selected item appears h To return to the Menu Screen press the MENU button SET 1 2 3 1 3 2 16M S 1080 30p REC MODE PICTURE SIZE SCENE MODE COLOR MODE FLASH SELF TIMER ENTER RECORDING ME...

Страница 104: ...104 VQT3M88 OPTION SETTINGS INTRODUCTION TO THE OPTION SETTING MENU Tab 1 3 2 1 2 3 1 6 5 4 3 2 1 OPTION MENU 1 CLOCK SET ALERT SOUND DISPLAY ECONOMY BRIGHTNESS ENTER ...

Страница 105: ... information to display on the LCD monitor ON Display the capture date and playback time videos OFF Do not display the capture date or playback time 4 ECONOMY setting page 33 h Specify the elapsed period of inactivity before the sleep mode to conserve battery power is activated BATTERY REC Set the elapsed time before the sleep mode is activated in the recording mode when using power from the batte...

Страница 106: ...106 VQT3M88 OPTION SETTINGS Tab 2 3 2 1 2 3 1 5 4 3 2 1 OPTION MENU 2 LANGUAGE TV OUTPUT INITIAL SET FORMAT ENTER ...

Страница 107: ...eset the camera settings to the factory preset settings h The following settings do not change with this procedure Date and time setting Language setting 4 FORMAT page 118 FORMAT Logical format of the SD card or the built in memory is executed DELETE DATA Physical format of the SD card or the built in memory is executed 5 Remaining battery charge display page 121 ...

Страница 108: ...108 VQT3M88 OPTION SETTINGS Tab 3 3 2 1 2 3 1 OPTION MENU 3 4 3 1 2 ENTER REC FOLDER FILE NO CONT D ...

Страница 109: ...page 114 when the recording mode is active h Select a folder to record to 2 PLAYBACK FOLDER setting page 115 when the playback mode is active h Select a folder to play back 3 FILE NO CONT D setting page 116 4 Remaining battery charge display page 121 ...

Страница 110: ...or the selected setting appears If TV SYSTEM is selected NTSC Outputs NTSC video signals PAL Outputs PAL video signals If TV ASPECT is selected 16 9 Use this setting when a TV having an aspect ratio of 16 9 is connected 4 3 Use this setting when a TV having an aspect ratio of 4 3 is connected If HDMI is selected AUTO The camera automatically determines the appropriate setting 720p Choose this sett...

Страница 111: ...IERA Link is selected ON Use the VIERA Link OFF Do not use the VIERA Link 3 Toggle the SET button up or down to select the desired parameter 4 Press the SET button 5 Press the MENU button 2 times h This completes the TV output setting ...

Страница 112: ...is output when the TV ASPECT setting is changed However note that for some TVs that have an auto detect function the output may not conform to the table or the TV display may not change at all TV ASPECT setting TV type to be connected Image file to be displayed TV display 4 3 4 3 Photo 4 3 Video in SD mode Video in HD mode ...

Страница 113: ...he screen size setting on your TV To change the screen size setting on your TV please refer to the instruction manual for your TV The aspect ratio of the output photo does not change to 16 9 i The photo output will be 4 3 for images captured in the 4 3 photo mode 16 9 16 9 Photo 4 3 Video in SD mode Video in HD mode TV ASPECT setting TV type to be connected Image file to be displayed TV display ...

Страница 114: ...ect CREATE NEW FOLDER Select an existing folder h Select the desired folder number 3 Press the SET button h This completes the create select folder setting h If you created a new folder it automatically becomes the selected recording folder HINT When an existing folder cannot be selected or a new one created i A folder cannot be selected if it was created using a different device or if it already ...

Страница 115: ...play back 1 Set the camera to the playback mode and display the Option Setting Menu 2 Select PLAYBACK FOLDER and press the SET button 3 Toggle the SET button up or down to select the desired playback folder and press the SET button h The files in the selected folder are displayed in the Playback Screen 100CDPFP 101CDPFP 102CDPFP PLAYBACK FOLDER ENTER ...

Страница 116: ...card is used the file names again begin from 0001 File number continued function ON By setting the file number continued function to ON even if the card is reformatted or the card is replaced with another card the consecutive numbering of file names continues from the last number recorded by the camera File name image number Card A 0001 0002 0012 0013 Card B 0001 0002 0012 0013 File name image num...

Страница 117: ...e next recorded image continues from last file name recorded on Card B HINT When the built in memory is used i If the file number continued function is ON file name numbering continues just the same as when an SD card is used even if the built in memory is formatted or the medium is switched to the SD card At the end of a photography session i Until the file number continued function is set to OFF...

Страница 118: ...disposing of or transferring the SD card execute the DELETE DATA procedure from the Format Menu i If a card is reformatted or the data is erased from the card using the camera or a computer the card s control data may be merely modified and the data itself may not be completely erased from the card i In some cases it may be possible to recover the data from a reformatted card using special softwar...

Страница 119: ... Checking the remaining number of images and video recording time 1 Set the camera to the recording mode page 37 h The remaining number of images appears in the upper left of the LCD monitor h The remaining video recording time appears in the upper right of the LCD monitor h The remaining number of images and video recording time will differ depending on the resolution and compression settings 374...

Страница 120: ...e images either install a new card or save the images to a computer and then delete them pages 46 and 63 from the card i Even when the remaining number of images or the remaining video recording time becomes 0 it may be possible to continue recording by changing the recording size recording mode or recorded pixels setting pages 40 68 and 71 i The display of the remaining number of images video rec...

Страница 121: ...cteristics when the ambient temperature is low may appear early for an incorrect indication of the remaining charge Also depending on the conditions of use of the camera or the ambient conditions temperature etc the indicated remaining charge may change Therefore this indication can only be used as a general approximation of the remaining charge h When the battery charge is low the battery pack re...

Страница 122: ... can be saved on a fully charged battery pack will vary greatly i It is recommended that you prepare an extra battery pack s when taking pictures at a wedding or while traveling for example so you don t miss capturing images of important moments due to the battery pack power running out The same is recommended for taking photos in cold environments In a ski area for example the battery pack can be...

Страница 123: ... the computer s USB terminal 2 Turn on the camera page 32 h The screen to select the computer connection mode appears CARD READER Use the camera as an external drive of the computer card reader mode WEB CAMERA Use your camera as a webcam webcam mode i Do not use any other USB cables except the supplied one 3 Select the desired connection mode and press the SET button SET USB CONNECTION CARD READER...

Страница 124: ...iented and that they match the shapes of the terminal sockets on the devices Push the plugs in straight when connecting them If undue force is used to connect a cable it may permanently damage the connector pins in the terminal socket i Do not use excessive force when connecting and disconnecting cables i Please connect the USB cable to your computer s USB terminal Do not connect it to the USB por...

Страница 125: ...CAM_SD E window appears automatically select the desired procedure from the window 3 Copy the files from your camera to the computer Dismounting the camera HINT i To disconnect your camera be sure to follow the procedure below Failure to follow this procedure may cause faulty operation of your computer or loss of card data 1 Left click on the icon for safely removing hardware in the task tray h A ...

Страница 126: ...mes are determined are explained below Consecutive numbers assigned in the order the files were saved Type of file File format File name structure Photo JPEG File name begins with IMGA Extension is jpg IMGA jpg Video MPEG 4 File name begins with IMGA Extension is mp4 IMGA mp4 Audio recording MPEG 4 Audio AAC compression File name begins with IMGA Extension is m4a IMGA m4a ROOT DCIM 100CDPFP 101CDP...

Страница 127: ...ted with the camera and Removable disc for a card that was formatted with a computer About videos recorded with this camera i You can use Apple s QuickTime to play back videos on a computer Playback may be possible using other software that supports the ISO standard MPEG 4 AVC H 264 AAC audio Video playback operating environment Limited to models with preinstalled OS Windows Mac OS OS Windows XP W...

Страница 128: ...cess i The drive name for the built in memory is CAM_MEM E h The drive name E may be different on your computer We recommend using HD Writer VE 1 0 to copy or write back video data Using Windows Explorer or other programs on the PC to copy move or rename files and folders recorded with this unit will result in them being unusable with HD Writer VE 1 0 ...

Страница 129: ...d to the PC with Explorer or other programs 1 Double click the folder that contains the still pictures DCIM _ 100CDPFP etc 2 Drag and drop the files into the destination folder on the PC s HDD HINT i Do not delete the SD card s folders Doing so may make the SD card unusable in this unit i When data not supported by this unit has been recorded on a PC it will not be recognized by this unit i Always...

Страница 130: ...oft Windows Vista 32 bit Ultimate Service Pack 1 Service Pack 2 Microsoft Windows Vista 32 bit Enterprise Service Pack 1 Service Pack 2 Microsoft Windows 7 32 bit Starter Microsoft Windows 7 32 bit 64 bit Home Basic Microsoft Windows 7 32 bit 64 bit Home Premium Microsoft Windows 7 32 bit 64 bit Professional Microsoft Windows 7 32 bit 64 bit Ultimate CPU Intel Pentium 4 1 7 GHz or more RAM Windows...

Страница 131: ...computers even if the recommended system requirements are fulfilled Operation is not guaranteed for NEC PC 98 series and their compatible devices Windows 3 1 Windows 95 Windows 98 98SE Windows Me Windows 2000 and Windows NT are not supported Operation on an upgraded OS is not guaranteed Computer Mac OS Mac OS X 10 6 6 CPU Intel Core Duo or better RAM 512 MB or more Required software iChat Interfac...

Страница 132: ...n this camera However they cannot be edited with this camera Files that are larger than 4 GB are automatically divided into 4 GB files and saved Smart wizard The Smart wizard screen is automatically displayed when you connect this unit to a computer with HD Writer VE 1 0 installed page 123 Copy to PC You can copy video photo data to the HDD of a computer Copy to disc You can copy to disc in conven...

Страница 133: ...r family and friends Playing back on a computer Play back the video data in high definition picture quality on a computer Playing back on a computer Photo HD Writer VE 1 0 or Standard Windows picture viewer or a commercially available picture viewer Copying videos to a computer page 129 Windows Explorer Refer to page 147 if using a Mac Important Notice i When using an SDXC Memory Card check the fo...

Страница 134: ... opening the CD ROM package please read the following You Licensee are granted a license for the Software defined in this End User License Agreement Agreement on condition that you agree to the terms and conditions of this Agreement If Licensee does not agree to the terms and conditions of this Agreement promptly return the Software to Panasonic Corporation Panasonic its distributors or dealers fr...

Страница 135: ...e engineering decompiling or disassembly of the Software Article 6 Indemnification The Software is provided AS IS without warranty of any kind either expressed or implied including but not limited to warranties of non infringement merchantability and or fitness for a particular purpose Further Panasonic does not warrant that the operation of the Software will be uninterrupted or error free Panason...

Страница 136: ...PC AT compatible device equipped with Intel Pentium 4 2 8 GHz or better CPU including compatible CPU h If using the playback function Intel Core 2 Duo 2 16 GHz or higher or AMD Athlon64 X2 Dual Core 5200 or higher is recommended h If using the editing function Intel Core 2 Quad 2 6 GHz or higher is recommended OS Microsoft Windows XP 32 bit Home Edition Service Pack 3 Microsoft Windows XP 32 bit P...

Страница 137: ...ears Select the Display tab and check Direct3D Acceleration under DirectX Features Free hard disk drive space Ultra DMA 100 or more Available hard disk capacity of 450 MB or more for installation i When writing to disk DVD or card at least twice the amount of free disk space as the disk or card being created is required In addition when exporting to multiple disks while automatically partitioning ...

Страница 138: ...ltimate or Windows Vista Ultimate when the multilingual user interface MUI function is used to change the language is not guaranteed i This software cannot be used simultaneously with other time shifting motion picture editing software or video capture products Note that other software running background processes timer recording in particular may cause this software to malfunction i Unsupported f...

Страница 139: ...ment of the computer used Refer to the operating environment and notes HINT i Operation during the playback may become slow if the CPU or memory is not fulfilling the requirements of the operating environment i Always use the most current driver for the video card i Always make sure there is enough capacity on the HDD in the computer It may become inoperable or the operation may stop suddenly if t...

Страница 140: ...mate Service Pack 1 Service Pack 2 Microsoft Windows Vista 32 bit Enterprise Service Pack 1 Service Pack 2 Microsoft Windows 7 32 bit Starter Microsoft Windows 7 32 bit 64 bit Home Basic Microsoft Windows 7 32 bit 64 bit Home Premium Microsoft Windows 7 32 bit 64 bit Professional Microsoft Windows 7 32 bit 64 bit Ultimate CPU Windows Vista Windows 7 1 0 GHz or higher Windows XP Intel Pentium III 4...

Страница 141: ...r while the software is being installed i Explanation of operations and screens is based on Windows Vista 1 Insert the CD ROM into the computer h The following screen is displayed automatically Click Run setup exe Continue h If Windows 7 is in use or the following screen is not displayed automatically select Start Computer or double click on Computer on the desktop and then double click Panasonic ...

Страница 142: ...appears click Yes 5 Select where the application is to be installed then click Next 6 Select Yes or No to create shortcut h A message regarding the playback in the environment used may be displayed depending on the performance of the computer used Click OK after confirming 7 Click Next h When installation is complete some notes will appear 8 Check the contents then close the window Click Click ...

Страница 143: ...VQT3M88 143 CONNECTING TO A COMPUTER 9 Select Yes I want to restart my computer now then click Finish The computer must be rebooted for the application to work Click ...

Страница 144: ...l any software applications that you no longer require 1 Select Start Control Panel Programs and Features 2 Select HD Writer VE 1 0 then click Uninstall h Proceed with the uninstallation by following the on screen instructions h After uninstalling the software be sure to reboot the computer Click Click ...

Страница 145: ...plications i When using HD Writer VE 1 0 on Windows Vista Windows 7 log on to your computer as Administrator or with a login name equally authorized or with the user name for a standard user account If you log on with a user name for a guest user account the software cannot be used On the computer Select Start All Programs Panasonic HD Writer VE 1 0 HD Writer VE i For details on how to use the sof...

Страница 146: ...eading the owner s manual of the software applications i You will need Adobe Acrobat Reader 5 0 or later or Adobe Reader 7 0 or later to read the PDF owner s manual Select Start All Programs Panasonic HD Writer VE 1 0 Operating Instructions ...

Страница 147: ... via the supplied USB cable h The USB function selection screen will appear on the camera s LCD monitor h Do not use any other USB cables except the supplied one 2 On the camera s LCD monitor select CARD READER and press the SET button h This unit is automatically recognized as an external drive of Mac 3 Double click CAM_SD or CAM_MEM displayed on the desktop h Files are stored in the 100CDPFP fol...

Страница 148: ...EM on the Desktop to the Trash and then disconnect the USB cable HINT About the USB cable i Use only the supplied USB cable Operation is not guaranteed if a different USB cable is used i Do not remove the SD card from this unit when this unit is connected to the computer using a USB cable ...

Страница 149: ... used to connect a cable it may permanently damage the connector pins in the terminal socket i Do not use excessive force when connecting and disconnecting cables About image output The image output destination differs depending on the camera status page 110 m Images are output n Images are not output i HDMI the HDMI logo and High Definition Multimedia Interface are trademarks or registered tradem...

Страница 150: ...le to connect to a TV i Always use a genuine Panasonic HDMI mini cable RP CDHM15 RP CDHM30 optional AV cable supplied To USB AV terminal Set the input to VIDEO White plug To Audio Input L terminal Red plug To Audio Input R terminal Yellow plug To Video Input terminal Insert the plugs as far as they will go HDMI mini cable optional To HDMI terminal To HDMI terminal on the TV Set the input to HDMI I...

Страница 151: ...nput terminals on the TV i VIERA Link must be activated on the connected TV Read the owner s manual of the TV for how to set etc i Always use a genuine Panasonic HDMI mini cable RP CDHM15 RP CDHM30 optional What is the VIERA Link i This function allows you to use your remote control for the Panasonic TV for easy operations when this unit is connected to a VIERA Link compatible device using an HDMI...

Страница 152: ...ff If you use the remote control for the TV to turn off the power this unit also turns off Automatic input switching If you connect with a HDMI mini cable and then turn on this unit the input channel on the TV automatically switches to this unit s screen If the TV s power is in standby status it will turn on automatically if Set has been selected for the TV s Power on link setting i Depending on t...

Страница 153: ...V HINT i If you are unsure whether or not the TV and AV amplifier you are using are compatible with VIERA Link read the owner s manual for the devices i Operation is not possible with a cable that is not based on the HDMI standard ...

Страница 154: ...rt recording on the connected device h To stop recording dubbing stop playback on this unit after stopping recording on the recorder h It is not possible to directly insert in the card slot an SD card recorded with this camera and play back or dub from it Change the video input on the video device and TV that this unit is connected to i The channel set will differ depending on the terminal to whic...

Страница 155: ... dub from it as of December 2010 h For information on how to display SD card images on your Panasonic TV please refer to the Users Manual for your TV HINT i If the date and time display and function indication are not wanted cancel them before dubbing page 105 i If the dubbed images are played back on a widescreen TV the images may be stretched vertically In this case refer to the owner s manual f...

Страница 156: ...xpired If a battery becomes depleted quickly even after it was sufficiently charged it should be assumed that the battery has reached the end of its service life Please replace it with a new battery Why doesn t recharging end The battery pack life has expired Replace with a new battery pack If this is not effective consult your dealer Why does the icon appear The remaining battery pack power is lo...

Страница 157: ... turned off Which resolution setting should I use Select the resolution setting according to the intended use Picture quality E or better Appropriate for printing letter size or larger and for printing a close up of part of a photo trimming G t For printing standard photo photo service sizes For photos displayed on a web page or sent as e mail attachments Concerning the image quality of video reco...

Страница 158: ...an I get the distant view into focus Set the scene mode function to the landscape mode when photographing The video appears to freeze for an instant HX DC1 The ZOOM RANGE button was pressed during video recording Not a malfunction During the very brief span that the zoom lens is changing the recording appears as a photo The zoom range does not change when the ZOOM RANGE button is pressed HX DC1 Th...

Страница 159: ...s Why does the displayed image contain some red blue and green dots or why are black spots visible Viewing images Why is the image too bright The subject was too bright When capturing an image devise a way to compensate for a bright subject for example by changing the shooting angle Why is the image out of focus The focus is not locked properly Hold the camera correctly and slowly press the O butt...

Страница 160: ...tored on a card from a different digital camera Play back images that were recorded on a card using this camera Why is the playback image distorted If the subject moves or the camera is moved during recording a distorted image may sometimes occur Not a malfunction This is a characteristic of the MOS sensor Question Answer Action ...

Страница 161: ...annot be guaranteed Why is there a motor like sound during video playback The sound of the camera s mechanical action was recorded the sound of the optical zoom movement or the autofocus sound Not a malfunction Round white spots that look like bubbles are appear in photos When the flash is used indoors or in dark surroundings dust in the air may reflect the light from the flash and appear as round...

Страница 162: ...is no more available memory on the card or in the camera s built in memory Delete unnecessary files or use a card that has more memory available Why does the Card is protected message appear The lock switch on the card is in the locked protect position Move the lock switch to the unlocked position Why can t the camera be operated A temporary internal circuitry problem may be the cause Remove the A...

Страница 163: ... THEN TURN ON AGAIN message appear A problem has occurred within the camera or card Check the following items 1 Remove the card and then install it again 2 Remove the battery pack and then install it again 3 Install a different card If ERROR OCCURRED PLEASE TURN UNIT OFF THEN TURN ON AGAIN still appears after performing the above steps then take the camera to the dealer for service Question Answer...

Страница 164: ...ck is dead Recharge the battery pack or replace with a fully charged battery pack Or connect the AC adaptor 23 The battery pack has not been inserted correctly Insert the battery pack correctly A blinking temperature warning icon is shown and the camera does not turn on The battery pack is too hot Wait for the battery pack to cool down 29 The camera turns off by itself The camera has switched to t...

Страница 165: ...ess the power button to turn it on 32 33 The maximum number of images that can be captured or the maximum video recording time has been reached Install a new card 30 Delete the images that are not necessary 63 The flash does not operate The flash mode is set to Set the flash mode to k or m 41 The battery pack is dead Recharge the battery pack or replace with a fully charged battery pack Or connect...

Страница 166: ...ng to 45 57 There is noise in the captured image The ISO sensitivity setting is too high Set the ISO sensitivity to a lower setting 43 76 The icon appears and shooting is not possible The camera s internal temperature is high Discontinue shooting and wait for the camera to cool down before using it again 29 Problem Cause Action Reference page ...

Страница 167: ... finger or other object Hold the camera correctly and make sure the flash is not obstructed 51 The subject was too far away Capture the image in the range of operation of the flash 188 The subject was lit from behind Set the flash mode to m 41 Use the exposure compensation function 85 Use the spot Y light measuring mode 43 There is not enough light Adjust the ISO sensitivity setting 43 76 Problem ...

Страница 168: ...ocus The subject is too close to the camera Capture the image with the subject within the appropriate distance range Select the correct focus setting for your needs 43 75 The focus setting is not correct The camera moved when the O button was pressed camera shake Hold the camera correctly and slowly press the O button halfway to lock the focus Then press the O button all the way to capture the ima...

Страница 169: ...ens Hold the camera correctly and make sure the lens is not obstructed 51 No image is shown There is no file in the built in memory or in the installed card Play back after capturing images or making audio recordings During audio playback there is no sound The play volume setting on the camera is too low Adjust the play volume 46 60 70 151 Connecting to a TV There is no color in the image The imag...

Страница 170: ... 46 87 Charging The battery pack is not charging The AC adaptor is not connected properly Connect the AC adaptor correctly 27 Misc The This file is protected message appears and the file cannot be deleted You have attempted to delete a file that is protected from accidental erasure Set the protect setting for the file to UNLOCK 46 87 The recording capacity is less than that shown in the tables on ...

Страница 171: ...at Portrait Spot light Snow Color mode Fixed at Focus Fixed at Exposure setting HX DC10 Fixed at White balance Fixed at Beach Sunset Fireworks Color mode Fixed at Focus Fixed at Flash Fixed at ISO sensitivity Fixed at Subject tracking Fixed at Exposure compensation Fixed at 0 0 Exposure HX DC10 Fixed at White balance Fixed at Landscape Color mode Fixed at Focus Fixed at Subject tracking Fixed at E...

Страница 172: ...shutter speed will be 1 30 sec Color Mode restrictions Night scenery Color mode Fixed at Flash Fixed at Focus Fixed at Subject tracking Fixed at Exposure HX DC10 Fixed at Night portrait Color mode Fixed at Focus Fixed at Exposure HX DC10 Fixed at Low light Color mode fixed at Focus Fixed at Flash Fixed at ISO sensitivity Fixed at Exposure HX DC10 Fixed at Setting Restrictions Monochrome Scene mode...

Страница 173: ...ent conditions the status indicator may flash at 4 second intervals until the battery is fully charged Flashing at about 0 5 second intervals 0 25 seconds on 0 25 seconds off faster i The battery pack cannot be charged Remove the battery pack from the camera once and reinsert it then begin charging it again i Check to see that there is no dust grime or foreign matter adhering to the camera or batt...

Страница 174: ...AT are registered trademarks of International Business Machines Corporation of the U S i Intel Core Pentium and Celeron are the registered trademarks or trademarks of Intel Corporation in the United States and other countries i AMD Athlon is a trademark of Advanced Micro Devices Inc i iMovie and Mac are trademarks of Apple Inc registered in the U S and other countries i PowerPC is a trademark of I...

Страница 175: ... unit on Do not use this unit near radio transmitters or high voltage lines i If you record near radio transmitters or high voltage lines the recorded pictures and or sound may be adversely affected Make sure to use the supplied cords and cables If you use optional accessories use the cords and the cables supplied with them Do not extend the cords and the cables Do not use insecticides or volatile...

Страница 176: ...n you are not going to use the camera for an extended time i When storing the camera in a cupboard or cabinet it is recommended that you place a desiccant silica gel in with it When disposing of or transferring the camera i Using this camera s FORMAT or DELETE function only changes the file management information and does not completely delete the built in memory data It may be possible to recover...

Страница 177: ... damage the battery i If storing the battery for an extended period of time it is recommended that you charge it once a year use it until it is depleted and store it again Remove any dust adhering to the battery terminals Prepare spare batteries when going out i Prepare enough batteries to last for 3 to 4 times the period you are planning to record for Cold places such as a ski resort can shorten ...

Страница 178: ...shock Caution when disposing of or transferring SD cards i Using this camera or a computer to format an SD card only changes the file management information and does not completely delete the card data i It is recommended that the SD card be physically destroyed or that this camera be used to physically format the card if giving it to someone else To physically format the SD card connect the AC ad...

Страница 179: ... the camera may not work properly Make every effort to ensure that condensation does not form or if it does form take appropriate action Causes of condensation i Condensation occurs when the ambient temperature or humidity has changed as in the following h When the camera is brought inside from the cold for example a ski slope to a warm room h When the camera is moved from an air conditioned car t...

Страница 180: ...a plastic bag remove as much air as possible from the bag then seal the bag Leave the camera for about an hour to allow the temperature of camera to adjust to the ambient temperature of the room before using it Treating a foggy lens Remove the battery and AC adaptor and leave the camera for about 1 hour The cloudiness will dissipate naturally when the camera adjusts to the ambient temperature ...

Страница 181: ...g mode is i If a recording with a lot of action is recorded the recordable time is less i The recordable time may be less if recording mostly short videos When using a Mac for playback editing Recording mode 1 1 1 1 2 Picture size 1920 1080 1920 1080 1280 720 1280 720 640 480 960 540 Voice memo SD card 4 GB 20 min 30 min 30 min 50 min 2 h 20 min 20 min 32 h 16 GB 1 h 50 min 2 h 10 min 2 h 10 min 3...

Страница 182: ...ly created The recording session continues until you stop recording i For model HX DC1 about 30 seconds before the 4 GB capacity is reached the countdown indication appears When the countdown indication reaches 0 the SAVING message appears and the file is saved and then video recording continues in a new file i Even with cards of the same capacity the amount of data that can actually be stored may...

Страница 183: ...ossible continuous recording times k Photo recording single shot HX DC10 Recording pixels A 4608 3456 B 4608 3456 4608 2592 SD card 4 GB 400 700 900 16 GB 1900 2900 3900 64 GB 7900 12000 15900 Built in memory Approx 80 MB 10 15 20 HX DC1 Recording pixels 6 4352 3264 7 4352 3264 4352 2448 SD card 4 GB 500 800 1000 16 GB 2200 3300 4300 64 GB 8900 13300 17600 Built in memory Approx 80 MB 10 15 20 ...

Страница 184: ...B 21200 22100 40600 97600 64 GB 82300 82300 164700 247100 Built in memory Approx 80 MB HX DC10 110 110 200 500 Approx 80 MB HX DC1 110 110 200 500 Recording pixels HX DC10 HX DC1 HX DC10 HX DC1 C 4608 3456 4352 3264 t 1600 1200 SD card 4 GB 700 800 5400 16 GB 2900 3300 22100 64 GB 12000 13300 82300 Built in memory Approx 80 MB HX DC10 15 110 Approx 80 MB HX DC1 15 110 ...

Страница 185: ...X DC10 1 2 3 MOS image sensor Total Approx 16 790 000 pixels 16 79 megapixels Effective pixels Video Approx 16 Mpx 4 3 Approx 11 9 Mpx 16 9 Photo Approx 16 Mpx 4 3 Approx 11 9 Mpx 16 9 HX DC1 1 2 33 MOS image sensor Total Approx 14 400 000 pixels 14 4 megapixels Effective pixels Video Approx 14 3 Mpx 4 3 Approx 11 9 Mpx 16 9 Photo Approx 14 3 Mpx 4 3 Approx 11 9 Mpx 16 9 Power source DC 5 0 V when...

Страница 186: ...HX DC1 Auto iris 5 power zoom Macro F3 5 to F3 7 f 6 8 mm to 34 0 mm 35 mm equivalent Video Wide 39 2 mm to 235 2 mm 4 3 40 1 mm to 240 6 mm 16 9 Tele 80 9 mm to 485 4 mm 4 3 82 4 mm to 494 4 mm 16 9 Photo 38 6 mm to 193 0 mm 4 3 39 9 mm to 199 5 mm 16 9 Minimum focus distance Normal Approx 10 cm 3 9 Wide Approx 80 cm 31 Tele Macro Approx 1 cm 0 4 Wide Approx 80 cm 31 Tele Zoom HX DC10 Photo 5 opt...

Страница 187: ...rd illumination 1 400 lx Minimum required subject illumination HX DC10 Approx 3 lx 1 15 sec in the scene mode low light setting Approx 9 lx 1 30 sec in the scene mode OFF setting HX DC1 Approx 5 lx 1 15 sec in the scene mode low light setting Approx 17 lx 1 30 sec in the scene mode OFF setting AV multi connector video output 1 0 Vp p 75Ω HDMI mini connector video output HDMI 1080i 720p 480p AV mul...

Страница 188: ...ge Approx 80 cm to 2 1 m 2 6 feet to 6 9 feet Dimensions excluding projecting parts 86 2 mm W 120 8 mm H 38 1 mm D 3 40 W 4 76 H 1 50 D Mass weight HX DC10 Approx 161 g Approx 0 355 lbs without battery and SD card HX DC1 Approx 163 g Approx 0 360 lbs without battery and SD card Mass weight in operation HX DC10 Approx 179 g Approx 0 395 lbs with battery and SD card HX DC1 Approx 181 g Approx 0 399 ...

Страница 189: ... 18 for details concerning SD cards that can be used in this unit Built in memory Approx 80 MB HX DC10 Approx 80 MB HX DC1 Compression MPEG 4 AVC H 264 iFrame Recording modes Approx 17 Mbps VBR Approx 15 Mbps VBR Approx 15 Mbps VBR Approx 9 Mbps VBR Approx 3 Mbps VBR Approx 24 Mbps VBR Refer to page 181 for recordable times Picture size 1920 1080 60i 1920 1080 30p 1280 720 60p 1280 720 30p 640 480...

Страница 190: ...1 Compression JPEG DCF Exif2 2 standard Picture size Photo recording single shot HX DC10 A 4608 3456 pixels B 4608 3456 pixels 4608 2592 pixels HX DC1 6 4352 3264 pixels 7 4352 3264 pixels 4352 2448 pixels HX DC10 HX DC1 1920 1080 pixels G 1600 1200 pixels 1280 720 pixels 640 480 pixels Hi Speed Burst HX DC10 C 4608 3456 pixels HX DC1 4352 3264 pixels HX DC10 HX DC1 t 1600 1200 pixels Refer to pag...

Страница 191: ... CDHM30 HDMI mini cable RP SDN16GU1A RP SDN08GU1A RP SDN04GU1A RP SDN02GU1A Class 4 16 GB SDHC Memory Card Class 4 8 GB SDHC Memory Card Class 4 4 GB SDHC Memory Card Class 4 2 GB SD Memory Card RP SDW64GU1K RP SDW48GU1K RP SDW32GU1K RP SDW16GU1K RP SDW08GU1K RP SDW04GU1K Class 10 64 GB SDXC Memory Card Class 10 48 GB SDXC Memory Card Class 10 32 GB SDHC Memory Card Class 10 16 GB SDHC Memory Card...

Страница 192: ...Ship To Mr Mrs Ms First Last Street Address City State Zip Phone Day Night 4 Shipping information UPS delivery requires complete street address Please photocopy this form when placing an order 3 Method of payment check one Check of Money Order enclosed NO C O D SHIPMENTS VISA MasterCard Make Check or Money Order Payable to PANASONIC ACCESSORIES Please do not send cash 2 Items Ordered Quantity Acce...

Страница 193: ...parts This Limited Warranty excludes both parts and labor for non rechargeable batteries antennas and cosmetic parts cabinet This warranty only applies to products purchased and serviced in the United States or Puerto Rico This warranty is extended only to the original purchaser of a new product which was not sold as is Carry In or Mail In Service To find a service center please visit http www pan...

Страница 194: ...e that is attributable to acts of God THERE ARE NO EXPRESS WARRANTIES EXCEPT AS LISTED UNDER LIMITED WARRANTY COVERAGE THE WARRANTOR IS NOT LIABLE FOR INCIDENTAL OR CONSEQUENTIAL DAMAGES RESULTING FROM THE USE OF THIS PRODUCT OR ARISING OUT OF ANY BREACH OF THIS WARRANTY As examples this excludes damages for lost time travel to and from the servicer loss of or damage to media or images data or oth...

Страница 195: ...m Saturday Sunday 10am 7pm EST For hearing or speech impaired TTY users TTY 1 877 833 8855 Accessory Purchases United States and Puerto Rico Purchase Parts Accessories and Instruction Books online for all Panasonic Products by visiting our Web Site at http www pstc panasonic com Or send your request by E mail to npcparts us panasonic com You may also contact us directly at 1 800 332 5368 Phone 1 8...

Страница 196: ...especial atención para insertarla en su orientación correcta 2 Inserte la tarjeta SD Tapa del compartimiento de la batería 1 Tire hacia afuera 3 Abra 2 Marcas del conector Batería 4 Inserte haciendo coincidir las marcas de conexión 3 Cierre 1 Abra 2 Inserte la tarjeta h Empuje recto hasta que escuche un sonido de clic Lado etiquetado de la tarjeta 4 Cierre firmemente hasta que escuche un sonido de...

Страница 197: ...del indicador de estado parpadea a intervalos de 0 5 segundos Asegúrese que la batería está instalada correctamente i Si la batería aún no se puede recargar es posible que haya un fallo de funcionamiento en la cámara la batería o el adaptador de C A i Cuando se completa la carga se apaga el indicador de estado i El tiempo de carga es de aproximadamente 120 minutos h Use sólo el cable USB suministr...

Страница 198: ...DO Y APAGADO DE LA CÁMARA Encendido de la cámara 1 Abra la unidad de pantalla y presione el interruptor h El monitor LCD se enciende Apertura de la unidad de pantalla Pantalla LCD Unidad de pantalla Interruptor 180 105 90 ...

Страница 199: ...os 1 segundo h La cámara se apaga h Si pulsa ligeramente el interruptor una vez la cámara pasará al modo de reposo CAMBIO ENTRE EL MODO DE GRABACIÓN Y EL DE REPRODUCCIÓN 1 Presione el botón REC h Cambia el modo h El modo cambia cada vez que se presiona el botón REC Botón REC ...

Страница 200: ...á la pantalla para seleccionar un ajuste para modificar 3 Seleccione LANGUAGE y presione el botón SET h Se abre la pantalla para seleccionar el idioma 4 Seleccione el idioma de la pantalla deseado y presione el botón SET SET 1 2 3 1 3 2 16M S 1080 30p REC MODE PICTURE SIZE SCENE MODE COLOR MODE FLASH SELF TIMER ENTER RECORDING MENU 1 Pestaña de opciones 3 2 1 2 3 1 OPTION MENU 2 LANGUAGE TV OUTPUT...

Страница 201: ...o efectivo llega a 30 segundos o menos en la pantalla aparece una cuenta regresiva del tiempo de grabación restante 2 Termine la grabación h Vuelva a presionar el botón para detener la grabación h El tiempo de grabación transcurrido retorna a 000 00 00 cada vez que se detiene la grabación 1080 30p 000 00 09 000 00 09 5 5 000 00 09 5 2M Botón Tiempo de grabación restante disponible segundos Tiempod...

Страница 202: ...namiento y se enfoca la imagen bloqueo de enfoque 2 Presione suavemente el botón O hasta el final h El obturador se dispara y la cámara captura la imagen h Usted puede ver la imagen capturada en la pantalla LCD manteniendo presionado el botón O cuando capture la imagen 16M S F3 5 F3 5 1 30 1 30 F3 5 1 30 Botón O Marca de destino 1 2 ...

Страница 203: ...ntalla 3 Presione el botón SET h La imagen seleccionada en el paso 2 aparece a pantalla LCD h Si se seleccionó un vídeo empieza la reproducción Archivo de fotografía Para volver a la pantalla y seleccionar archivos para su reproducción Mueva el botón SET hacia abajo CONSEJO i Las fotografías se pueden rotar durante la reproducción i Si usted cierra la unidad de pantalla la reproducción se detiene ...

Страница 204: ...n soltarlo Durante la reproducción hacia atrás Después de hacer una pausa en la reproducción presione y mueva el botón SET hacia la izquierda sin soltarlo Para acelerar la reproducción Reproducción hacia adelante Máximo 15 Durante la reproducción hacia adelante mueva el botón SET hacia la derecha h La velocidad de reproducción hacia adelante cambia cada vez que se mueve el botón SET hacia la derec...

Страница 205: ...VQT3M88 205 CONSEJO Si aparece en la pantalla de reproducción i El icono aparece cuando se reproduce un archivo guardado en segmentos ...

Страница 206: ...anasonic Consumer Electronics Company Division of Panasonic Corporation of North America One Panasonic Way Secaucus NJ 07094 VQT3M88 M0411 0 1AG6P1P6280 S Panasonic Corporation 2011 Printed in Indonesia ...

Отзывы: