background image

Others

With a computer

With other products

Disc and card management

Editing

Playback

Recording

Setup

Before using

(VDR-D300)

For USA assistance, please call: 1-800-211-PANA(7262) or, contact us via the web at: http://www.panasonic.com/contactinfo

For Canadian assistance, please call: 1-800-561-5505 or visit us at www.panasonic.ca

LSQT1011 B

P PC

Operating Instructions

DVD Video Camera

Model No.

VDR-D300

VDR-D250

Cover

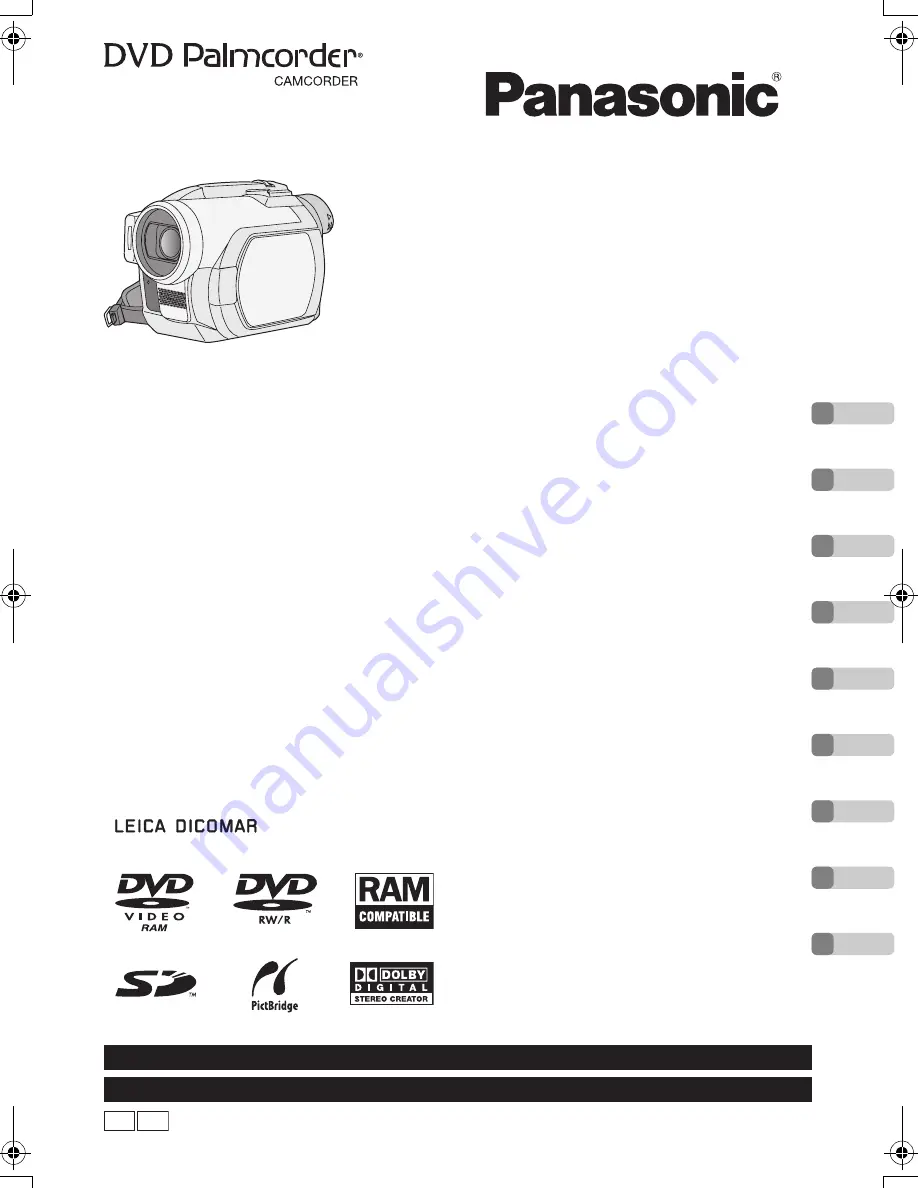
The illustration shows VDR-D300.

VDR-D250 does not have a built-in flash.

Before connecting, operating or adjusting this 
product, please read the instructions completely.
Spanish Quick Use Guide is included.
Guía para rápida consulta en español está incluida.

D250&300(P_PC)eng.book  1 ページ  2006年1月20日 金曜日 午後2時3分

Содержание VDR-D300 (English, Spanish)

Страница 1: ...ctinfo For Canadian assistance please call 1 800 561 5505 or visit us at www panasonic ca LSQT1011 B P PC Operating Instructions DVD Video Camera Model No VDR D300 VDR D250 Cover The illustration show...

Страница 2: ...AUTION DANGER OF EXPLOSION IF BATTERY IS INCORRECTLY REPLACED REPLACE ONLY WITH THE SAME OR EQUIVALENT TYPE CAUTION USE OF CONTROLS OR ADJUSTMENTS OR PERFORMANCE OF PROCEDURES OTHER THAN THOSE SPECIFI...

Страница 3: ...sult the dealer or an experienced radio TV technician for help FCC Caution To assure continued compliance follow the attached installation instructions and use only shielded interface cables with ferr...

Страница 4: ...t consult an electrician for replacement of the obsolete outlet 10 Protect the power cord from being walked on or pinched particularly at plugs convenience receptacles and the point where they exit fr...

Страница 5: ...e may form on the disc and inside the unit DO NOT LEAVE YOUR CAMERA OR THE POWER SUPPLY TURNED ON WHEN NOT IN USE STORAGE OF YOUR CAMERA Store and handle your camera in a manner that will not subject...

Страница 6: ...countries IBM and PC AT are registered trademarks of International Business Machines Corporation of the U S Intel Pentium and Celeron are the registered trademarks or trademarks of the Intel Corporati...

Страница 7: ...in fade out function 59 Soft skin mode 61 Tele macro function 62 MagicPix function 63 Self timer recording 64 Wind noise reduction function 65 Wide mode 66 Image stabilizer function 67 Built in flash...

Страница 8: ...ith a computer 130 Contents on provided CD ROM 131 Operating environment 133 Installation Macintosh 135 Reading the operating instructions of the software applications 136 Software application uninsta...

Страница 9: ...l not overwrite any previously recorded scene Easy playback l 76 Recorded scenes are displayed as thumbnails You can easily search for the scenes you want to watch Editing scenes l 81 85 You can creat...

Страница 10: ...ble with 8 cm 3z discs to play back the scenes recorded with this unit on it If you have a DVD recorder with hard disk you can copy dub scenes recorded on a disc with this unit to the hard disk Using...

Страница 11: ...tery holder and slide it until it clicks Removing the battery While sliding the BATTERY RELEASE lever slide the battery to remove it How to turn on off the power While pressing the button A set the OF...

Страница 12: ...Recording motion pictures Rotate the mode dial to select 1 Press the recording start stop button to start recording 2 Press the recording start stop button again to pause recording Recording still pi...

Страница 13: ...lect 1 Select the file to be played back 2 Press the joystick 3 Move the joystick to operate 1 Playback Pause Move Skip playback backward Move and hold Review playback 9 Move Skip playback forward 9 M...

Страница 14: ...DC cable K2GJ2DZ00018 CD ROM LSFT0643 AV S cable K2KZ9CB00001 8 cm 3z DVD RAM disc Single sided LM AF30UB VDR D250 only Lens cap VYF3031 CAUTION This unit will operate on 110 120 220 240 V AC An AC pl...

Страница 15: ...se switch to battery for power supply and noise will stop 11 Viewfinder l 19 12 Delete button l 81 92 94 13 LCD monitor open part OPEN l 19 14 Battery DC cable holder l 28 30 15 Power switch OFF ON l...

Страница 16: ...compartment l 32 38 Grip belt l below 39 Shoulder strap fixture l 17 Adjust the belt length so it fits your hand Adjust the belt length and the pad position 1 Flip the belt 2 Adjust the length 3 Fix...

Страница 17: ...Extend part 3 by at least 2 cm 1z Put the opposite end of the strap through A and attach it in the same way In order to remove the lens hood rotate it counter clockwise A In order to attach it place...

Страница 18: ...es of the lens cap with the tips of your finger and thumb During recording The lens cap removed can be attached to the lens cap fixture This is a hole for attaching the unit to the optional tripod Ple...

Страница 19: ...r The brightness and color level of the LCD monitor can be adjusted from the menu l 47 If it is forcibly opened or rotated the unit may be damaged or fail If the LCD monitor is rotated by 180x towards...

Страница 20: ...part number CR2025 The battery is normally expected to last about 1 year but it depends on operation frequency Keep the button type battery out of the reach of children Using the remote control ZOOM...

Страница 21: ...tance between the remote control and the unit s remote control sensor A Within approx 5 m 16 feet Angle Approx 10o up and 15o down left and right The remote control is intended for indoor operation Ou...

Страница 22: ...Wire Remote Control to the unit Plug the Magic Wire Remote Control into the REMOTE MIC terminal as far as it goes If the pin plug of the remote control is not inserted securely into the REMOTE MIC te...

Страница 23: ...deo format Characteristic Rewritable disc Rewritable disc One time recording disc 1 1 By formatting the disc it can be used repeatedly l 98 One time recording disc Display on the screen Indication in...

Страница 24: ...only Discs recorded on this unit may not be playable on other products Recording on DVD R in DVD Video Recording format is not supported When using DVD RW or DVD R do not perform the following as doin...

Страница 25: ...DVD RW is inserted in this unit the screen on the right appears Select YES then press the joystick 2 Select format type then press the joystick 3 When the confirm screen appears select YES then press...

Страница 26: ...We recommend that you use a Panasonic brand SD card Be sure to insert miniSD Cards in the dedicated card adaptor before use Inserting a card in this unit without the adaptor may damage the unit or the...

Страница 27: ...hinner static electricity prevention liquids or any other solvent Do not use scratch proof protectors or covers Do not expose the terminals of the card to water garbage or dust Do not drop stack or im...

Страница 28: ...hing The battery is over discharged discharged excessively In a while the lamp will light up and normal charging will start When the battery temperature is excessively high or low the CHARGE lamp flas...

Страница 29: ...the LCD monitor frontward to record yourself using the 0 Lux MagicPix function etc When you use this unit with the LCD monitor lit up by pressing the POWER LCD button The batteries heat up after use...

Страница 30: ...250 only When recording remove the lens cap before turning the unit on If the unit is turned on with the lens cap attached the automatic white balance adjustment l 163 may not function properly While...

Страница 31: ...e recording on a disc even if the LCD monitor is closed and the viewfinder is retracted How to turn off the power A B When the power is turned on for the first time after changing the disc or battery...

Страница 32: ...release it A few moments after the ACCESS PC lamp blinks the cover of the disc compartment will open slightly 2 Open the cover of the disc compartment by hand and insert remove the disc Inserting disc...

Страница 33: ...it with its recording playback side facing the inside Do not allow the recording playback side to become dirty or scratched Do not remove the battery pack or disconnect the AC adaptor while removing t...

Страница 34: ...card slot cover Concerning the SD card Electrical noise static electricity or failure of this unit or the SD card may damage or erase the data stored on the SD card We recommend saving important data...

Страница 35: ...he desired mode pictograph to the position shown in the illustration Do not forcefully turn the dial Disc recording mode l 50 Use this to record motion pictures on a disc Disc playback mode l 76 Use t...

Страница 36: ...ess the joystick to set it Menu screen operations l 42 Rotate the mode dial to select or 1 Press the center of the joystick and icons will be displayed on the screen When the center of the joystick is...

Страница 37: ...pressed the operation icon appears or disappears About auto mode and manual mode l 49 The shaded operation icons are not displayed while recording Operations during playback About the operations icon...

Страница 38: ...pause 77 9 1 Fast forward skip during playback 76 1 Forward slow frame playback during pause 77 Card recording mode Icon Direction Function Page 1 2 3 Backlight compensation 58 2 Self timer 64 1 Help...

Страница 39: ...ayback and show thumbnails 79 E 2 Playback previous picture 79 D 1 Playback next picture 79 Card playback mode When SLIDE SHOW is selected Icon Direction Function Page 1 3 Slide show start pause 79 4...

Страница 40: ...lect 3 Move the joystick up left or right to select the desired icon An explanation of the selected icon is displayed on the screen Each time the joystick is moved down the indication changes To exit...

Страница 41: ...itching the language Switching the language You can switch the language on the screen display or the menu screen 1 Press the MENU button then select LANGUAGE and press the joystick 2 Select English an...

Страница 42: ...splayed differs depending on the position of the mode dial Do not switch the mode dial when the menu is displayed 2 Move the joystick up or down in order to select the desired top menu A 3 Move the jo...

Страница 43: ...wn in order to select the desired item 7 Press the joystick to enter the selection To get back to the previous screen Move the joystick left To exit the menu screen Press the MENU button The menu scre...

Страница 44: ...the buttons on the main unit are used 1 Press the MENU button 2 Select a menu item Use the direction buttons 3 4 2 1 and ENTER button in place of the joystick on the main unit 3 Press the MENU button...

Страница 45: ...ust it Rotate the mode dial to select or 1 Press the MENU button then select BASIC CLOCK SET YES and press the joystick 2 Move the joystick left or right to select the item to be set Then move the joy...

Страница 46: ...check the time before recording If the time display becomes the built in lithium battery has run down Use the following steps to charge the battery When you turn on the power for the first time after...

Страница 47: ...rds the lens the brightness and color level of the LCD monitor cannot be adjusted These settings will not affect the images actually recorded In order to increase the brightness of the entire LCD moni...

Страница 48: ...r hand through the grip belt 3 Do not cover the microphones or sensors with your hands 4 Keep your arms near your body 5 Slightly open your legs When you are outdoors record pictures with the sunlight...

Страница 49: ...VDR D300 only This function prevents unnecessary recording when you forget to pause recording and walk with the unit tilted upside down while recording continues If the unit continues to be tilted up...

Страница 50: ...operly 1 Turn the unit on 2 Rotate the mode dial to select VDR D300 only The lens cover opens automatically 3 Open the LCD monitor or extend the viewfinder 4 Press the recording start stop button to s...

Страница 51: ...n then select BASIC REC MODE desired item and press the joystick This unit records in VBR VBR is an abbreviation for Variable Bit Rate VBR recording automatically varies the bit rate amount of data in...

Страница 52: ...automatically 3 Open the LCD monitor or extend the viewfinder 4 Press the PHOTO SHOT button halfway in order to adjust focusing For auto focusing only The shutter speed and the iris gain value are fix...

Страница 53: ...following operations The SD card or the recorded data may be damaged Turn the unit off Remove the SD card Operate the mode dial Another product may degrade or not play back still pictures recorded on...

Страница 54: ...ene is filled with only horizontal lines When the scene lacks contrast Concerning the focusing area When there is a contrasting object ahead or behind the subject in the focus area the subject may not...

Страница 55: ...pictures with a high picture quality are recorded Priority is given to the number of still pictures recorded Still pictures are recorded in normal picture quality You can add a shutter sound when rec...

Страница 56: ...m speed does not vary when operating with the remote control or the Magic Wire Remote Control When the zoom speed is high the subject may not be focused easily RAM RW VR RW V R If the zoom magnificati...

Страница 57: ...ge Rotate the mode dial to select or Rotate the LCD monitor towards the lens side The image is horizontally flipped as if you see a mirror image However the image recorded is the same as a normal reco...

Страница 58: ...joystick Then move the joystick down to display the icon shown in the illustration 2 Move the joystick up to select The image on the screen will become brighter To return to normal recording Select a...

Страница 59: ...s the recording start stop button Start recording fade in When you start recording the image audio gradually appears Once the fade in is complete the fade setting is canceled To fade out 1 During reco...

Страница 60: ...in To select the color for fade in out The color which appears in fading pictures can be selected Press the MENU button then select ADVANCED FADE COLOR WHITE or BLACK and press the joystick If you tur...

Страница 61: ...ick down to display the icon shown in the illustration 2 Move the joystick left to select To cancel the soft skin mode Select again If the background or anything else in the scene has colors similar t...

Страница 62: ...en move the joystick down to display the icon shown in the illustration 2 Move the joystick right to select If the magnification is 10k or less then it is automatically set to 10k To cancel the tele m...

Страница 63: ...wfinder and rotate the LCD monitor towards the lens side When the LCD monitor is reversed the screen is lit in white Extend the viewfinder and view the images while recording The light of the LCD moni...

Страница 64: ...rded After recording the self timer is canceled If you press the PHOTO SHOT button halfway and then fully the subject is focused when the button is pressed halfway When you press the PHOTO SHOT button...

Страница 65: ...IC WIND CUT OFF and press the joystick This function s default setting is ON Depending on the wind strength the wind noise is reduced If this function is activated in strong winds the stereo effect ma...

Страница 66: ...9 aspect ratio Rotate the mode dial to select Press the MENU button then select BASIC ASPECT 16 9 and press the joystick Recording images with a 4 3 aspect ratio Rotate the mode dial to select Press t...

Страница 67: ...S EIS OFF and press the joystick This function s default setting is ON VDR D300 only In the card recording mode pressing the PHOTO SHOT button halfway increases the effect of the image stabilizer fun...

Страница 68: ...hat the flash is necessary the indication lights up in yellow When the i j indication or the A Ai Aj indication is displayed the flash can be lit If the indication is flashing or not displayed the fla...

Страница 69: ...Do not move until the second flash is finished Use this when you take pictures of people in dark places Red eye phenomenon may appear depending on the recording conditions Press the MENU button then...

Страница 70: ...e MENU button then select BASIC SCENE MODE desired item and press the joystick Scene mode This is for recording in various situations Display Mode Recording conditions 5 Sports To record sports scenes...

Страница 71: ...tness of the playback image may change If you record a subject illuminated with strong light or a highly reflective subject vertical lines of light may appear If the brightness is insufficient the spo...

Страница 72: ...s indication 1MF and the icon shown in the illustration appear 3 Move the joystick left or right to bring the subject into focus When focused with a wide angle the subject may not be in focus when zoo...

Страница 73: ...ect the white balance mode To restore to the automatic adjustment Set the white balance mode to You can also restore the automatic adjustment by setting the AUTO MANUAL FOCUS switch to AUTO White bala...

Страница 74: ...cally adjusts the black when the white balance is set in the manual adjustment mode When the black balance is adjusted the screen will temporarily be black The black balance cannot be adjusted manuall...

Страница 75: ...utter speed adjustment Avoid recording under fluorescent light mercury light or sodium light because the color and brightness of the playback image may change If you increase the shutter speed manuall...

Страница 76: ...en The operation icon is automatically displayed on the screen 4 Move the joystick to operate Press the 6 or 5 button on the remote control During playback the recording time is not displayed on the s...

Страница 77: ...ection when you move the joystick left Normal playback is restored when you move the joystick up Operating with the remote control 1 Press the button 2 Press the E or D button Adjust the speaker volum...

Страница 78: ...in the following cases When the number of scenes exceeds 99 RAM RW VR RW V R When the disc is removed RW V R When the ASPECT setting is changed RW V R When the disc is repaired RW V R When the mode di...

Страница 79: ...he joystick If you move and hold the joystick up or down you can advance 8 files at a time The screen will not change at this time but the file numbers and scroll bar display will change so release th...

Страница 80: ...and another product may degrade or not play back data recorded on this unit Do not operate the mode dial during the slide show While this unit accesses the SD card the access lamp is lit do not remov...

Страница 81: ...he scenes on the disc When PLAY MODE is set to BY DATE All the scenes selected by date 2 Only when SELECT is selected in step 1 Select the scene to be deleted then press the joystick The selected scen...

Страница 82: ...ete the unnecessary part l 83 In case of ALL the deletion may take time if there are many scenes on the disc Do not turn off this unit while deleting When you delete scenes use a battery with sufficie...

Страница 83: ...ystick The selected scene is played back 3 When you reach the area where you want to divide the scene move the joystick down to set the dividing point Using slow motion playback or frame by frame play...

Страница 84: ...e are combined If you wish to combine scenes that are not next to each other or scenes with different recording dates first create a playlist and then combine the scenes on the playlist l 86 91 3 When...

Страница 85: ...of the disc capacity by making a playlist If you create or delete playlists the original scenes will not be modified Editing scenes on a playlist will not affect the original scenes The maximum numbe...

Страница 86: ...lected scene will be canceled Up to 8 scenes can be set in succession The scenes are registered in the playlist in the order that they were selected After creating a playlist the order of the scenes i...

Страница 87: ...selected playlist are displayed as thumbnails 3 Select the scene to start playback then press the joystick To select a different playlist When the first scene is selected in the playlist thumbnail vi...

Страница 88: ...ed scene is encircled by a yellow frame When the joystick is pressed again the selected scene will be canceled Up to 8 scenes can be set in succession The scenes are added to the playlist in the order...

Страница 89: ...be edited then press the joystick 3 Select MOVE then press the joystick 4 Select the scene to be moved then press the joystick The selected scene is encircled by a yellow frame and the position to ins...

Страница 90: ...ess the joystick 4 Select the scene to be divided then press the joystick The selected scene is played back 5 When you reach the area where you want to divide the scene move the joystick down to set t...

Страница 91: ...select EDIT and press the joystick 2 Select the playlist to be edited then press the joystick 3 Select COMBINE then press the joystick 4 Select the scene to be combined then press the joystick The sel...

Страница 92: ...mode l 87 steps 1 and 2 1 Press the MENU button then select EDIT and press the joystick 2 Select the playlist to be edited then press the joystick 3 Select DELETE SELECT or ALL and press the joystick...

Страница 93: ...eting other scenes Repeat steps 4 6 To complete editing Press the MENU button Deleting scenes on a playlist will not increase the remaining capacity for recording The playlist itself is deleted if you...

Страница 94: ...2 Only when SELECT is selected in step 1 Select the file to be deleted then press the joystick The selected file is encircled by a yellow frame When the joystick is pressed again the selected file wil...

Страница 95: ...cannot be played back on this unit may be erased In case of ALL the deletion may take time if there are many files on the SD card Do not turn off this unit while deleting When you delete files use a b...

Страница 96: ...e mode dial to select 1 Press the MENU button then select PLAY SETUP LOCK YES and press the joystick 2 Select the file to be protected then press the joystick display appears and the selected file is...

Страница 97: ...of prints to 0 You can also select multiple files in succession To complete the settings Press the MENU button To cancel all DPOF settings Press the MENU button then select PLAY SETUP DPOF SET CANCEL...

Страница 98: ...press the MENU button to exit the message screen In the case of a double sided disc format each side It may not be possible to format a disc with many scratches or dirt Such discs cannot be used Duri...

Страница 99: ...s the joystick When formatting is complete press the MENU button to exit the message screen Use this unit to format SD cards If an SD card is formatted on other products such as a computer the time sp...

Страница 100: ...enes will be displayed as separate titles on the top menu Depending on the condition of the disc the time it takes for finalizing will differ It may take up to 15 minutes If this unit becomes hot or i...

Страница 101: ...nalizing is complete press the MENU button to exit the message screen DVD RW VR format cannot be un finalized DVD RW VR format after finalization can be recorded and edited in the same way as DVD RW V...

Страница 102: ...NU button then select SETUP DISC PROTECT and press the joystick 2 When the confirmation message appears select YES then press the joystick To release disc protection 1 Press the MENU button then selec...

Страница 103: ...W V R Information such as the number of recorded scenes the remaining space and whether or not the disc is finalized or protected is displayed Rotate the mode dial to select Press the MENU button then...

Страница 104: ...rminal to which the unit is connected 4 Start playback on this unit The image and audio are output on the TV If the image or audio from this unit is not output on the TV Check that the plugs are inser...

Страница 105: ...etting the pictures may not be displayed correctly For more information please read the operating instructions of your TV Press the MENU button then select SETUP TV ASPECT 4 3 and press the joystick E...

Страница 106: ...ze the disc on this unit l 100 You cannot record images that allow One time only recording on a 8 cm 3z disc RW V R 1 Finalize the disc on this unit l 100 2 Insert the disc in the DVD recorder player...

Страница 107: ...d In this case finalize the disc on this unit l 100 Do not insert a DVD RW Video format or DVD R that has not been finalized into a DVD recorder the disc may be unusable Also a message asking you to f...

Страница 108: ...more beautiful pictures 2 Turn on this unit then rotate the mode dial to select 3 Change the input channel on the video device and TV The channel set will differ depending on the terminal to which th...

Страница 109: ...rinter The indication appears on this unit s screen If the indication does not appear or continues to flash disconnect and then reconnect the USB cable or check the printer SD card and settings on thi...

Страница 110: ...turns to step 3 Avoid the following operations during printing These operations disable proper printing Disconnecting the USB cable Removing the SD card Switching the mode dial Turning off the power C...

Страница 111: ...eration of this unit if you use software other than that supplied with this unit to read write data to the unit What you can do with a computer Can do Software used Playing back on a computer DVD Movi...

Страница 112: ...ures By using DVD MovieAlbumSE with this unit it is possible to perform playback and editing of the DVD RAM or DVD RW VR format It is also possible to transfer exported data to DVDfunSTUDIO Playing ba...

Страница 113: ...B DVD menus created Arrange the motion pictures exported from DVD MovieAlbumSE in the DVD menu and edit the menu design C Burning button The contents start being written to disc 3 A DVD Video disc is...

Страница 114: ...for example frame dropout may occur the audio may be intermittent or the software may run slowly when you play back recorded images DVD RAM and DVD RW VR format can be used if you insert them in the c...

Страница 115: ...lti boot environment If your computer does not satisfy the above system requirements an error may occur when writing data to disc Set the display resolution to 1024k768 16 bits color or higher Select...

Страница 116: ...the driver installed as standard in OS Personal computer IBM PC AT compatible personal computer OS Microsoft Windows 2000 Professional Microsoft Windows XP Home Edition Microsoft Windows XP Professio...

Страница 117: ...verse Engineering Decompiling or Disassembly Licensee may not reverse engineer decompile or disassemble the Software except to the extent either of them is permitted under law or regulation of the cou...

Страница 118: ...OM into the computer The Setup Menu screen will appear If the Setup Menu screen does not appear double click the CD ROM drive icon in My Computer 2 Click DVD RAM Driver The software application may no...

Страница 119: ...a message that prompts you to reboot will appear Click Yes If any trouble has occurred while installing DVD RAM Driver When the Block is selected in the Driver Signing Options in the System Propertie...

Страница 120: ...ing on the operating environment you may be required to install DirectX 9 0b If so click Yes and install it If you install the software in a computer that is not compatible with DirectX 9 0b or 9 0c t...

Страница 121: ...the operating environment you may be required to install DirectX 9 0b If so click Yes and install it If you install the software in a computer that is not compatible with DirectX 9 0b or 9 0c the com...

Страница 122: ...Manual DVDfunSTUDIO Select start All Programs Programs Panasonic DVDfunSTUDIO Operating instructions Follow the steps below to uninstall any software applications that you no longer require 1 Select s...

Страница 123: ...o finalize DVD RW VR format DVD RW Video format and DVD R on this unit before using them on the computer Un finalized discs will not be recognized by the computer Connect this unit to the AC adaptor 1...

Страница 124: ...me When the unit is connected to a computer it is recognized as an external drive Depending on the operating environment of the computer the shape of the drive icon and the drive name Example E will d...

Страница 125: ...ay no longer be possible for this unit to read the SD card Always use this unit to format SD cards When data not supported by this unit has been recorded on a computer it will not be recognized by thi...

Страница 126: ...XP MATSHITA DVD RAM LMXK1931 USB Device is displayed at DVD CD ROM drives USB Mass Storage Device is displayed at Universal Serial Bus controllers Windows 2000 Professional MATSHITA DVD RAM LMXK1931...

Страница 127: ...r you cannot use the applications The End User License Agreement is displayed when the software is first started so read carefully through its terms and conditions then click I agree Connect this unit...

Страница 128: ...ngs displayed on the screen 7 When export is complete a message will appear Check the small box for Eject the disc being used and then click Yes DVD MovieAlbumSE automatically closes and DVDfunSTUDIO...

Страница 129: ...drive icon for this unit and select Eject Title names set using DVD MovieAlbumSE cannot be displayed on this unit Also the names of playlists created on this unit cannot be displayed on DVD MovieAlbu...

Страница 130: ...t Playback is not possible DVD RW Video format or DVD R Standard OS or commercially available DVD Video playback software Saving motion pictures on a computer Pixe VRF Browser EX supplied Editing moti...

Страница 131: ...on pictures imported to the computer can be edited with MPEG Editor The motion pictures saved on the computer with this software become the contents of the DVD Video or Video CD disc created with Imag...

Страница 132: ...e is required To create a Video CD disc a separate CD RW CD R drive is required 1 Save the motion pictures from the disc to the computer with Pixe VRF Browser EX A Save button 2 Create a DVD or Video...

Страница 133: ...t supported CPU iMac G4 iMac G5 iBook G4 PowerBook G4 Power Mac G5 eMac Mac mini Series with USB 2 0 port as a standard equipment PowerPC G4 or above Memory 256 MB or more 512 MB or more recommended G...

Страница 134: ...quired for installation approx 200 MB 1 GB or more space in Startup Disk is required when operating application When creating a disc or disc image you will need three times as much space as the size o...

Страница 135: ...sert the CD ROM into the computer PANASONIC CD ROM icon appears 2 Double click PANASONIC Imx for Panasonic ImageMixer pkg The installer setup screen appears 3 Click Continue 4 Read carefully through t...

Страница 136: ...DVD2 After starting ImageMixer VCD DVD2 click the icon at top right of ImageMixer VCD DVD2 screen Follow the steps below to uninstall any software applications that you no longer require Drag the fol...

Страница 137: ...on Connect this unit to the AC adaptor 1 Remove the disc from the unit turn on the unit and then rotate the mode dial to select 2 Connect this unit and a computer Do not use any other USB cables excep...

Страница 138: ...ser EX Quit Pixe VRF Browser EX from the Menu Bar to exit Pixe VRF Browser EX The disc cover on this unit opens You can remove the disc and disconnect the USB cable 8 Prepare a DVD RW DVD R rRW rR dri...

Страница 139: ...ff In this case disconnect the USB cable l below When the unit is connected to a computer in disc playback mode no image will appear on the LCD monitor or viewfinder When this unit is connected to a c...

Страница 140: ...s Do not use any other USB cables except the supplied one Operation is not guaranteed with any other USB cables When the unit is connected to a computer the operation mode cannot be changed and its po...

Страница 141: ...orded in the 100CDPFP or other such folder The DPOF setting files are recorded in the MISC folder Do not use the computer to delete the SD card s folders Otherwise it may no longer be possible for thi...

Страница 142: ...l 144 LCD SET l 47 EVF SET l 47 INITIAL SET l 144 JOYSTICK LED l 144 DEMO MODE l 144 LANGUAGE l 41 Still picture recording menus BASIC SCENE MODE l 70 PICTURE SIZE l 54 PICT QUALITY l 55 CLOCK SET l...

Страница 143: ...92 SETUP FORMAT DISC l 98 FINALIZE l 100 UN FINALIZE l 101 DISC PROTECT l 102 INFORMATION l 103 DISPLAY l 144 DATE l 46 DATE FORMAT l 46 POWER SAVE l 144 BEEP SOUND l 144 LCD SET l 47 EVF SET l 47 TV...

Страница 144: ...he computer or the printer etc 2 Beeps When you pause recording When you turn off the power 2 Beeps for 4 times When an error occurs e g recording not starting Check the sentence displayed on the scre...

Страница 145: ...hite Fade Black MagicPix function 0 Lux MagicPix function Zoom microphone Wind noise reduction Motion picture recording mode 5 Sports mode Portrait mode Low light mode Spotlight mode Surf snow mode WI...

Страница 146: ...der file number display When a printer compatible with PictBridge is connected Accessing the card When connected to a computer 1 DPOF already set to more than 1 Locked still pictures Number of recordi...

Страница 147: ...RW Video format or DVD R has been inserted After finalizing the discs become play only and cannot record If you un finalize a DVD RW Video format it can be used for recording l 101 CANNOT RECORD DISC...

Страница 148: ...so no further data can be recorded Delete unnecessary files l 94 or insert a new SD card PUSH THE RESET SWITCH An irregularity in the unit has been detected Press the RESET button to restart the unit...

Страница 149: ...used Cannot set or cancel When the iris gain is set Soft skin mode Set and cancel While recording to a disc Tele macro Set and cancel Help mode Image stabilizer When the MagicPix function is used VDR...

Страница 150: ...not be erased Is playback possible on a DVD player By finalizing a DVD RW Video format or a DVD R in this unit it can be played back on a DVD player DVD RAM or DVD RW VR format can be played back on a...

Страница 151: ...d Use picture viewer software Is editing possible on a computer Macintosh Use MPEG Editor in Pixe VRF Browser EX You can save the edited data to your computer and then write it to disc with ImageMixer...

Страница 152: ...u using the battery in an extremely cold place The battery is affected by ambient temperature In cold places the operating time of the battery becomes shorter Has the battery worn out The battery has...

Страница 153: ...ion l 102 If the DVD RAM or DVD RW VR format was protected on another device release the protection on the same device Has the DVD RW Video format or DVD R been finalized After finalizing the discs be...

Страница 154: ...dication and adjust it l 77 Although this unit is correctly connected to a TV playback images cannot be seen The playback images are squeezed horizontally Have you selected video input on the TV Pleas...

Страница 155: ...rn off the power to this unit If the power cannot be turned off press the RESET button or remove the battery or AC adaptor and then reattach it After that turn on the power again If normal operation i...

Страница 156: ...n click OK If an error message appears even after a compatible disc is inserted packet writing software may be installed in your computer Uninstall the packet writing software An image that should hav...

Страница 157: ...he icon in the task tray and follow the instructions on the screen Problem Check points Even if connected by the USB cable this unit is not recognized by the computer Have you set this unit to the cor...

Страница 158: ...Click the upper right save icon and save the settings 2 Exit from ImageMixer VCD DVD2 and remove the disc 3 Start ImageMixer VCD DVD2 again click the Load Project button to read the file with the sav...

Страница 159: ...a long time When you use the unit in a sandy or dusty place such as a beach do not let sand or fine dust get into the body and terminals of the unit Also keep the unit away from sea water Sand or dust...

Страница 160: ...y 40 to 60 Extremely high temperatures or low temperatures will shorten the life of the battery If the battery is kept in high temperature high humidity or oily smoky places the terminals may rust and...

Страница 161: ...sc or if it is warped the following phenomena may occur Block noise in playback image Momentary stop of playback image Sound interrupted during playback or abnormal sound Thumbnail display with shades...

Страница 162: ...air conditioned car to outside When a cold room has been warmed up quickly When cool wind from an air conditioner is directly blown onto this unit After summer afternoon showers of rain When this unit...

Страница 163: ...et 10 Candlelight Outside of the effective range of automatic white balance adjustment the image will become reddish or bluish Even within the effective range of automatic white balance adjustment the...

Страница 164: ...the dirty window Similarly when recording something on the opposite side of a road with heavy traffic a vehicle that happens to pass by may be brought into focus Recording a subject that is surrounde...

Страница 165: ...F1 8 to F2 8 Focal length VDR D300 3 0 mm to 30 0 mm VDR D250 2 45 mm to 24 5 mm Macro Full range AF Filter diameter 37 mm Zoom 10k optical zoom 25 700k digital zoom Monitor 2 7z wide LCD monitor appr...

Страница 166: ...PEED 2X 1X 8 cm 3z DVD R for General Ver 2 0 Compression MPEG2 Recording mode and transfer rate XP 9 Mbps VBR Approx 18 min recordable time on a single sided DVD RAM SP 5 Mbps VBR Approx 37 min record...

Страница 167: ...155 256 MB 160 250 210 330 512 MB 320 490 410 650 1 GB 630 990 820 1290 2 GB 1290 2010 1680 2630 Picture size 1760k1320 1760k992 Picture quality 8 MB 4 7 7 11 16 MB 10 18 18 28 32 MB 24 40 40 61 64 MB...

Страница 168: ...argeable Lithium Ion Battery Pack CGA DU21A 1B 2040 mAh Rechargeable Lithium Ion Battery Pack RP SDK02GU1A RP SDK01GU1A RP SDK512U1A RP SDH256U1A RP SDQ02GU1A RP SDQ01GU1A RP SD512BU1A RP SD256BU1A RP...

Страница 169: ...ORDER OFFICE 20421 84th Avenue South Kent WA 98032 Ship To Mr Mrs Ms First Last Street Address City State Zip Phone Day Night 4 Shipping information UPS delivery requires complete street address Plea...

Страница 170: ...ly event this product needs service Please include your proof of purchase Failure to do so will delay your repair To further speed your repair please provide an explanation of what is wrong with the u...

Страница 171: ...andard 4 3 screen TV s or non expanded standard 4 3 pictures on wide screen TV s or onscreen data in a stationary and fixed location The warranty ALSO DOES NOT COVER damages which occurred in shipment...

Страница 172: ...m 9 5 San Gabriel Industrial Park Carolina Puerto Rico 00985 Phone 787 750 4300 Fax 787 768 2910 For hearing or speech impaired TTY users TTY 1 866 605 1277 Purchase Parts Accessories and Instruction...

Страница 173: ...is performed THIS EXPRESS LIMITED WARRANTY IS IN LIEU OF ALL OTHER WARRANTIES EXPRESS OR IMPLIED INCLUDING ANY IMPLIED WARRANTIES OF MERCHANTABILITY AND FITNESS FOR A PARTICULAR PURPOSE IN NO EVENT W...

Страница 174: ...5 L Language 41 LCD monitor 19 47 162 Locking files 96 M MagicPix function 63 Manual focus 72 Menu 42 Menu list 142 Motion picture playback 76 Motion picture recording 50 N Number of recordable pictur...

Страница 175: ...T1011 Index Others U Un finalize 101 V Video format 24 Viewfinder 19 47 162 Volume adjustment 77 VR format 24 W White balance 73 163 Wide mode 66 Wind noise reduction function 65 Z Zoom 56 Zoom microp...

Страница 176: ...je la bater a contra el porta bater a y h gala deslizar hasta que dispare C mo quitar la bater a Mientras hace deslizar la palanca BATTERY RELEASE haga deslizar la bater a para quitarla C mo encender...

Страница 177: ...tarjeta Grabaci n de im genes din micas Gire el selector de modo para seleccionar 1 Pulse el bot n de inicio parada de la grabaci n para empezar a grabar 2 Pulse de nuevo el bot n de inicio parada de...

Страница 178: ...ido 2 Pulse el joystick 3 Mueva el joystick para obrar 1 Reproducci n Pausa Mueva Salto de reproducci n hacia atr s Mueva y mantenga Reproducci n regresiva 9 Mueva Salto de reproducci n en adelante 9...

Страница 179: ...179 LSQT1011 Others...

Страница 180: ...tronics Company Division of Panasonic Corporation of North America One Panasonic Way Secaucus NJ 07094 Panasonic Puerto Rico Inc Ave 65 de Infanter a Km 9 5 San Gabriel Industrial Park Carolina Puerto...

Отзывы: