


29
10 Measurements and Adjustments
10.1. Adjustment
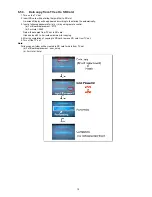
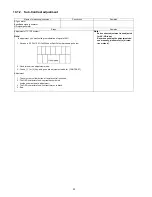
10.1.1.
Vsus selection
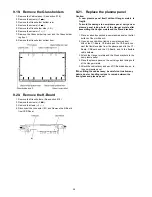
Caution:
When Plasma panel or A-board is replaced, Vsus should be set to LOW or HIGH.
Procedure
1. Go into main item [VSUS] in Service Mode. LOW or HIGH will be displayed.
2. Press [OK] button to go to TEST stage.
White pattern without On-Screen Display will be displayed during TEST and CONF stage. Press [5] button to display the
On-Screen Display.
3. Press [VOL (-)] button to set to LOW.
4. In LOW setting
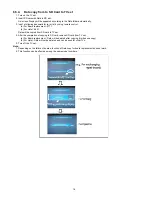
a. If no several dead pixel is visible remarkably in white pattern, press [3] button to go to CONF stage.
b. If the several dead pixels are visible remarkably in white pattern, Set to HIGH by press [VOL (+)] button. Press [3] button
to go to CONF stage if the symptom is improved.
5. Press [OK] button in CONF stage to store LOW or HIGH.
6. Exit Service Mode by pressing [Power] button.
Содержание TX-P50S20B
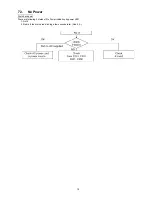
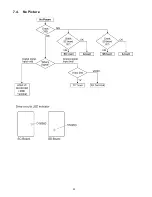
Страница 20: ...20 7 4 No Picture ...
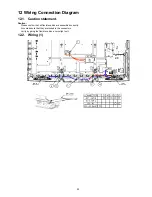
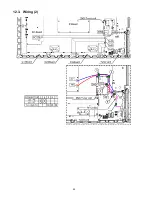
Страница 40: ...40 12 3 Wiring 2 ...
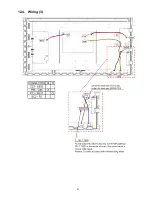
Страница 41: ...41 12 4 Wiring 3 ...
Страница 42: ...42 ...
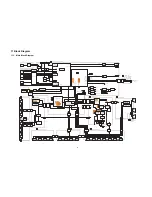
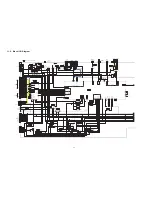
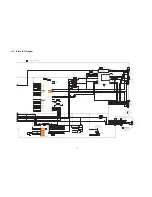
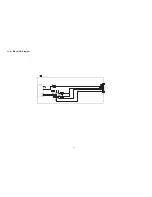
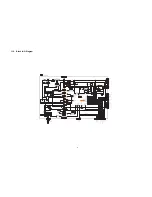
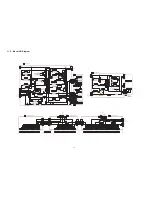
Страница 43: ...43 13 Schematic Diagram 13 1 Schematic Diagram Note ...
Страница 81: ...81 14 Printed Circuit Board 14 1 P Board A B C D E F G H I 1 2 3 4 5 6 P BOARD FOIL SIDE ETX2MM806MEH ...
Страница 83: ...83 A B C D E F G H I 1 2 3 4 5 6 P BOARD COMPONENT SIDE ETX2MM806MEH ...
Страница 96: ...96 15 1 2 Exploded View 2 ...
Страница 97: ...97 15 1 3 Packing 1 ...
Страница 98: ...98 15 1 4 Packing 2 ...
Страница 99: ...99 15 1 5 Mechanical Replacement Parts List ...
Страница 102: ...102 15 2 Electrical Replacement Parts List 15 2 1 Replacement Parts List Notes ...