background image

16

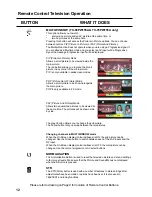
Setup menu

Geomagnetic

Q-Link

On

AV1 select

YUV

Flicker reduction

Off

Off timer

Off

Volume cor rection

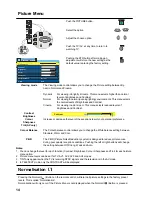
Setup menu

Geomagn etic

Q-Link

On

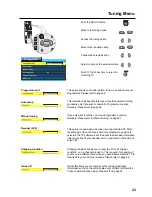
Tuning menu

Flicker redu ction

Off

Off timer

Off

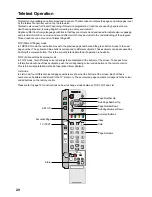
Teletext

TOP

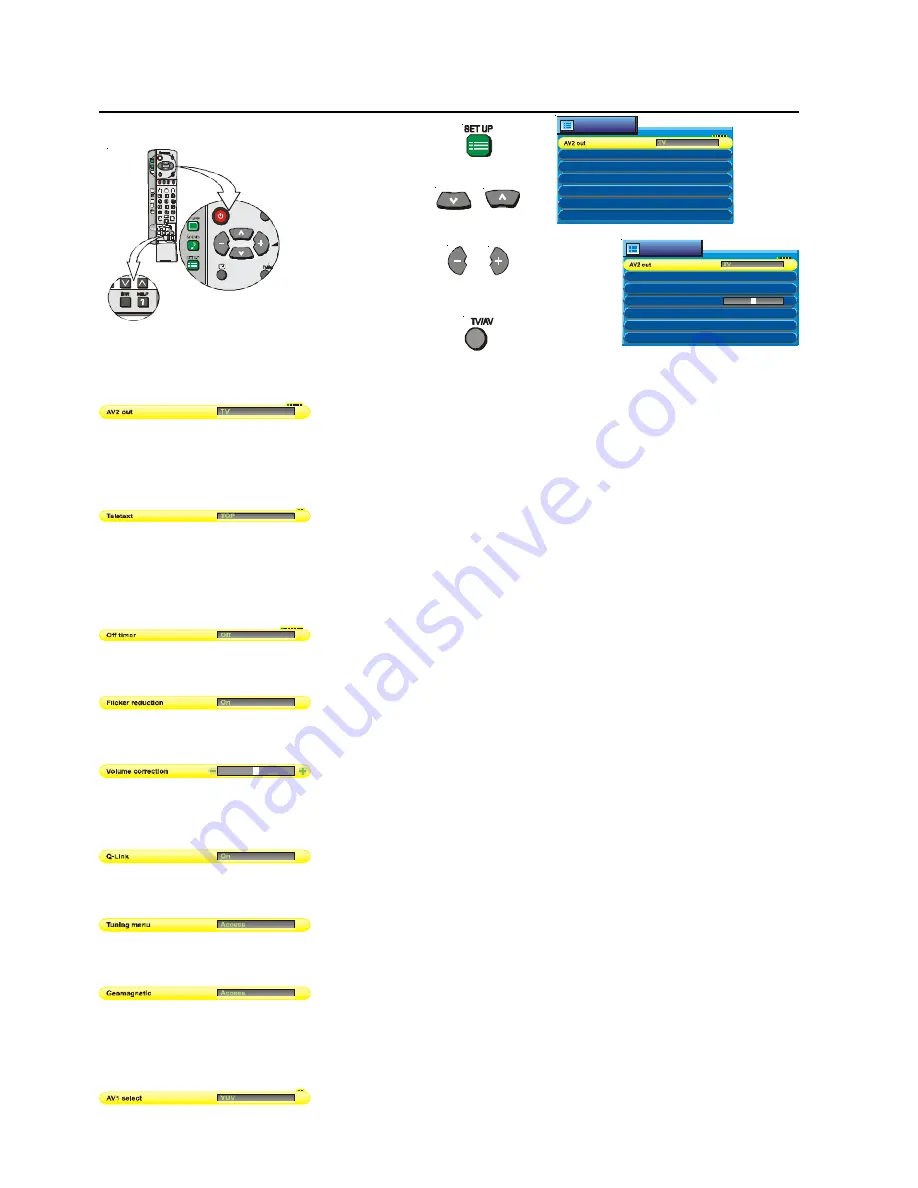
Set Up Menu

Allows you to select which audio / video source will be sent to the AV2
Scart output. You can choose between TV (current selected programme),
AV1, AV3, AV4 or Monitor (whatever programme is being shown on the
screen). YUV pictures are not available on AV2 out.

This control allows you to change between TOP (or FLOF) and List modes.
TOP mode is the current preferred method in Australia.
FLOF mode is the current preferred method in New Zealand. FLOF is also
known as FASTEXT.

The Off-Timer turns the television off after a period of time chosen by you.
The timer settings (in minutes) are OFF, 15, 30, 45, 60, 75, 90.

This activates motion compensation to smooth the image and get rid of
unwanted picture movement.

This feature allows you to adjust the input level from your DVD player etc.
to match the sound level of normal TV reception. You can set the input
level for each AV input.

Allows you to turn the Q-Link system On or Off. Please refer to page 17.

This provides access to many other features including tuning options and
Owner ID. Please refer to page 23.

If you notice a slight tilt in the picture or if there are coloured patches at
the corners of the screen, use this feature to eliminate them.
Refer to page 18 for instructions on using the geomagnetic correction
adjustment.

Allows you to select which video source to apply to the AV1 input. You can
switch between Component Video (YUV) and RGB.

Push the SETUP button

Move to the option

Adjust the chosen
option

Push TV/AV at any time
to return to watching TV.

AV2 out

Teletext 

(RF Mode only)

Off timer

Flicker reduction

Volume correction 

(AV Mode only)

Q-Link

Tuning menu 

(RF Mode only)

Geomagnetic

AV1 select 

(AV Mode only)

RF Mode

AV Mode

Содержание TX-66PW60A

Страница 1: ... range of televisions Your television may not have all the functions described herein Please read these operating instructions completely before operating this set and retain the booklet for future reference tau FLA DIGI AL TQB4A0165 TX 86PW155A TX 76PW155A TX 76PW60A TX 66PW60A Widescreen Stereo Colour Television With Teletext ...

Страница 2: ...ecycling If you or someone else has no further use for the carton it can be flattened or cut up and placed into the recycle bin or service provided by your local council applicable for most parts of Australia By recycling the cardboard you are benefiting the environment by reducing waste to landfill and reducing the dependence on virgin forest timbers for paper fibre Plastics Panasonic is reducing...

Страница 3: ...o Input The TX 76PW60A and TX 66PW60A are designed for Interlaced signals only Make sure that your Settop box DVD player etc is not switched to Progressive The TX 86PW155A and TX 76PW155A are designed to accept Interlaced and Progressive signals Programme Location Numbers Throughout this booklet Programme Location Numbers are referred to These are memory locations into which you can tune televisio...

Страница 4: ...E NUMBER UPAND DOWN 13 VOLUME DOWN AND UP 13 TV AV 13 COLOUREDBUTTONS 13 STILL 13 0 9 DIRECT PROGRAMME NUMBER SELECTION 13 TWO DIGIT PROGRAMME NUMBER SELECTION 13 Picture Menu Operation 14 Viewing mode 14 Contrast Brightness Colour Sharpness Tint 14 Colour Balance 14 P NR Picture Noise Reduction 14 Sound Menu Operation 15 Volume Bass Treble Balance Headphone Volume MPX Mode Ambience 15 Set Up Menu...

Страница 5: ...R DVD Operation 30 Remote Control VCR DVD Buttons 30 REWIND REVIEW 30 STOP 30 RECORD 30 POWER BUTTON 30 PAUSE 30 PLAY 30 FAST FORWARD CUE 30 VCR DVD 30 PROGRAMME NUMBER DOWN SKIP BACK 30 PROGRAMME NUMBER UP SKIP FORWARD 30 Connecting Equipment to the TV Front Panel 31 Headphones 31 AV Equipment 31 Connectors 32 Connecting Equipment to the TV RearPanel 32 34 Connectng a VCR 33 Connecting a Standard...

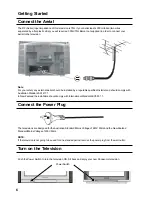
Страница 6: ... installer and should comply with Australian Standard AS1417 1 In New Zealand the installation should comply with International Standard IEC597 1 1 Connect the Power Plug The televisions are designed for theAustralian Standard Mains Voltage of 240V 50Hz and the New Zealand Standard Mains Voltage of 230V 50Hz NOTE If the television is not going to be used for an extended period remove the power plu...

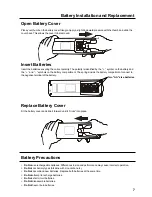
Страница 7: ...ent The springs inside the battery compartment connect to the negative terminal of the battery Two AA size batteries Replace Battery Cover Fit the battery cover and slide it forward until it clicks into place Battery Precautions Do Not use rechargeable batteries Differences in size and performance may cause incorrect operation Do Not mix battery types Alkaline with zinc carbon etc Do Not mix old a...

Страница 8: ... box Press the HELP button External connection Select the External connection option View connection information Menu demonstration Select the Menu demo option View the demonstration Help menu HOW TO USE THE MENUS Press the MENU keys to open or close the menus Use the keys on the remote to move between menu options Use the keys to adjust the chosen option or to access the chosen menu Press the TV ...

Страница 9: ...ion please refer to page 20 For details of VCR and DVD player remote control operation please refer to page 30 Remote Control Buttons Recall Direct TV Rec Channel Aspect Ambience Set Up Sound Picture Stand By Normalisation Mute Programme Number Up Volume Up Volume Down Programme Number Down TV AV Two Digit Programme Numbers Help Direct Programme Numbers Coloured Buttons Used for Aspect Functions A...

Страница 10: ...me Geomagnetic Contrast Tuning mode Brightness Balance Colour Treble Sharpness Bass Tint Notes Tint Only in AV Mode when receiving NTSC signals Tuning mode Not displayed when in AV mode This button is used to select the next lower programme number It is also used with the F button to adjust volume and other function settings This button is used to select the next higher programme number It is also...

Страница 11: ...it automatically switches to display the Programme Number or theAV Number and the Off Timer setting Pressing the button again cancels the recall function and removes the text being displayed on the screen The recall button also allows you to change channel The coloured buttons are used to select the channel range Use the UP and DOWN buttons to highlight the channel you want and press the Blue butt...

Страница 12: ...is only available in 4 3 mode PAP Picture And Picture Mode Allows two equal sized pictures to be viewed at the same time The pictures will be shown side by side The green button allows you to change the sub picture The Yellow button lets you swap between the two pictures Changing channels in MULTI WINDOW mode When the On Screen display coloured boxes is ON the sub picture can be changed Use the Gr...

Страница 13: ...screen the different AV inputs can be selected using the coloured buttons COLOURED BUTTONS These buttons are used for selecting different aspect ratios selecting different AV inputs teletext functions STILL Press this button to freeze the picture on the screen Press it again to return to normal viewing If Multi Pip has been selected pressing the Still button once will freeze the main picture while...

Страница 14: ...ue replacing the factory setting Viewing mode Contrast Brightness Colour Sharpness Tint AV only Colour Balance P NR The Viewing mode control allows you to change the Picture setting between Dy namic Normal and Cinema Dynamic For viewing in brightly lit rooms This menu selects higher than normal levels of Brightness and Contrast Normal For viewing in normal evening lighting environments This menu s...

Страница 15: ...t value replacing the factory setting Adjusts the output volume Used to boost or cut low frequency sounds Used to boost or cut high frequency sounds Adjusts the sound balance between the left and right speakers Adjust for output volume for the headphones This volume is independant of the television speakers so that everyone can enjoy listening at a level comfortable for them When in PiP the sound ...

Страница 16: ...on to smooth the image and get rid of unwanted picture movement This feature allows you to adjust the input level from your DVD player etc to match the sound level of normal TV reception You can set the input level for each AV input Allows you to turn the Q Link system On or Off Please refer to page 17 This provides access to many other features including tuning options and Owner ID Please refer t...

Страница 17: ...be downloaded to the VCR If at any time you wish to turn off the Q Link feature follow the above procedure to get to the Q Link menu option then set the option to Off A message sent from the VCR will appear on screen showing what is being recorded or if it is not possible to record Notes With Panasonic Q Link VCRs these additional features are available If you insert a tape in your VCR and press t...

Страница 18: ...hes will not be completely eliminated even after adjustment particularly in ferroconcrete buildings and other structures susceptible to geomagnetic effects In these cases the TV location will have to be changed Using the Front Panel Push the F button repeatedly to access the Geomagnetic Correction Menu Push or to adjust the picture tilt or coloured patches as necessary The adjustment range is from...

Страница 19: ...aspect distortion Zoom 1 This option will display 16 9 letterbox or 4 3 pictures with no aspect distortion Zoom 2 This option will display 16 9 anamorphic letterbox pictures as a full screen display with no aspect distortion Zoom 3 This option will display 21 9 letterbox pictures as a full screen display with no aspect distortion Notes If in Auto mode you experience problems with the screen displa...

Страница 20: ...he yellow and blue buttons correspond to different subjects These subjects can be accessed by Pushing the coloured button This is the current preferred method of operation in Australia FLOF Full Level One Features mode In FLOF mode four differently coloured subjects are displayed at the bottom of the screen To access more information about one of these subjects push the corresponding colour coded ...

Страница 21: ...wing When TEXT is on the sound from the broadcast channel is still audible To adjust the volume press the Sound button or the button to display the volume indicator The volume can then be adjusted normally STR This button is used to store page numbers into the coloured buttons or the Favourite Page button The STR button is located behind the remote control door PAGE NUMBERS UP AND DOWN These butto...

Страница 22: ...r Other Updates When a news flash page or another page which provides regular updates has been selected Push the Set Up button followed by the Yellow button to view the TV picture When a news flash is received the page number will be displayed on the screen Push the Yellow button to display the news flash TIME TEXT When a Page has more than one screen sub page of information you may have to wait f...

Страница 23: ...ecoded information this is important if your decoder unit is connected to AV2 via a Q LinkVCR Shipping condition allows you to reset the TV to its original condition i e no channels tuned in This is useful for example if you move to a different area when you will probably want the TV to tune itself to your new local stations Please refer to page 28 Owner ID allows you to enter a security code and ...

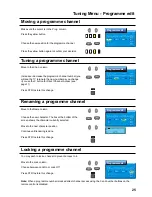
Страница 24: ...the STR button after making an adjustment stores any changes made Adding deleting a programme channel Make sure the cursor is in the Prog column Press the green button to add a programme channel to the programme position or the red button to delete one Press the same button again to confirm your decision Programme edit Delete Add Move Download Prog Chan Name Lock 1 Off 3 Off 4 Off 5 Off 2 CH02 ABC...

Страница 25: ...box at the bottom of the screen shows the character currently selected Move to the next character position Continue until renaming is done Press STR to store this change Locking a programme channel You may wish to lock a channel to prevent access to it Move to the Lock column Choose between Lock On or Lock Off Press STR to store this change Note When a programme number is locked direct channel acc...

Страница 26: ... will have to restart and complete the Auto setup so that the TV can be retuned Start the Auto setup or exit the Auto Setup Menu The television will search for locate store and sort into order your local stations If a compatible VCR is connected via theAV2 socket programme data will be sent to the VCR via the Q Link Please refer to page 17 Once this operation is completed the TV will display the p...

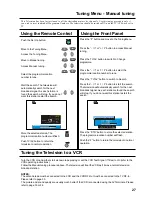
Страница 27: ...elect the programme location number to tune Press the TV AV button to switch to Search Press the or button to start the search The television will automatically search for the next broadcast signal As each station is found the search will stop If you do not want this station restart the search Press the STR button to store the selected station The programme location number will flash Push the F bu...

Страница 28: ...ion will be stored You will have to restart and complete the Auto setup so that the TV can be retuned You can exit the Shipping condition setting at any time by pressing TV AV to exit or SETUP to return to the tuning menu Press STR to start You will be given a warning message followed by two chances to change your mind Each time that you are asked Are you sure press STR to confirm or exit the Ship...

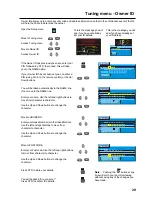
Страница 29: ... to change the character MovetoPOSTCODE Enter your Postcode Use the left and right buttons to move from character to character Use the Up and Down buttons to change the character Press STR to store your details You will be asked Are you sure Press STR to confirm the details Note Pushing the button at any time will return you to normal viewing without saving any of the changes you havemade Owner ID...

Страница 30: ...P Used to stop the VCR DVD RECORD Push this button to start recording POWER BUTTON Used to switch the VCR DVD ON or OFF Standby PAUSE Pauses the tape or disc during play PLAY Used to start the VCR DVD playing FAST FORWARD CUE Used to wind the tape forward quickly or to watch the tape disc at fast speed VCR DVD Switch Setting Selects VCR or DVD PROGRAMME NUMBER SKIP UP Used to select the next highe...

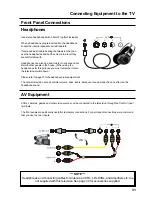
Страница 31: ...rpose you must remember to turn thetelevisionvolumedown Please refer to page 15 for headphone volume adjustment The normal television sound controls volume bass treble balance or sound mode have no effect on the headphonesound AV Equipment VCRs cameras games and other video sources can be connected to the television through the front AV input terminals The front panels are particularly useful for ...

Страница 32: ... No Yes No No Camcorder S Video No Yes Yes Yes Camcorder Composite video Yes Yes Yes Yes Games Console RGB Yes No No Yes Computer RGB Yes No No Yes Notes 1 The AV2 Scart socket can output selectable Audio Video signals to other equipment Refer to AV2 Out set up on page 15 2 AV1 and AV4 can supply Monitor out signals using a Scart cable or a Scart adaptor switched to OUT 3 You can connect YPB PR vi...

Страница 33: ...ase refer to the VCR instruction book for details Use the supplied Scart adaptor Make sure that the Scart adaptor is switched to IN Use RCA cables not supplied to connect the VCR to the Scart adaptor Connecting S Video Equipment S Video equipment uses a 4Pin Mini Din Male plug for the video and RCA plugs for the audio Use the supplied Scart adaptor Make sure that the Scart adaptor is switched to I...

Страница 34: ...connect the external equipment to the Scart adaptor If a video recorder is connected to the Monitor Out and video sources VCR video disc camera etc are connected to one of the other AV Inputs the television becomes a visual display for editing or copying The audio output can be connected to a stereo amplifier or recorder The audio output corresponds to the programme being shown on screen NOTE Neve...

Страница 35: ...ocket when the Television is not going to be used for an extended period of time In the event of unusual operation e g odd sounds smoke or aromas turn the television Off and remove the power cord from the wall socket Then call the Television Service Centre this may reduce the possibility of expensive repair costs Safety First Danger Always pull the plug out of the wall outlet by holding the plug i...

Страница 36: ...wiping with a soft cloth Even if the television is heavily soiled do not apply cleaner directly to the unit Soak a cloth in a solution of neutral cleanser thinned with water Wring out the cloth wipe the television clean and finish by wiping with a dry cloth Cleaning the Remote Control The lens of the Remote Control should be kept clean and free of dirt and grease Use a soft cloth moistened with wa...

Страница 37: ...ge 27 for tuning individual stations Question I have done an Auto setup because the book told me to If I should only do manual tuning why is automatic tuning first in the book Answer The Automatic setup and the manual tuning each have specific uses The reason for each is clearly described in the book The reason that Auto setup is described first is because this is the first option on the screen Qu...

Страница 38: ...rast levels Various internal safety devices may have been triggered Switch the TV off for a few minutes and try again Colour Control If the picture is from a tape playback try adjusting the tracking Retune the Television Refer to page 26 Magnetic Interference from unshielded equipment or the television may have been moved while it was switched ON Switch the television OFF or into Standby and leave...

Страница 39: ...A TX 76PW155A 1 Tuner plus AV Picture in Picture Picture and Picture Picture out of Picture Teletext TOP FASTEXT1500 Pages Component Video TX 86PW155A TX 76PW155A 576P 480P 625i and 525i TX 76PW60A TX 66PW60A 625i and 525i Audio Video Terminals AV1 Rear Video or Y PB PR Audio L R Scart connector AV2 Rear S Video Video Audio L R IN OUT Scart connector AV3 Front S Video Video Audio L R RCA connector...

Страница 40: ...Certified to International Quality Standard AS NZS ISO9001 CertifiedtoInternationalEnvironmentalStandardAS NZSISO14001 Distributed in New Zealand by Panasonic New Zealand Limited 350 Te Irirangi Drive East Tamaki Auckland CustomerCareCenter Ph 0800 726 276 Email Customerservice panasonicnz co nz www panasonic co nz AUSTRALIA NEW ZEALAND www panasonic com au ...

Отзывы: