background image

Welcome

We hope you have many years of enjoyment from your new Panasonic Digital
converter box.
The simple, easy to follow instructions will enable you to quickly set up and install
the equipment and begin your enjoyment of the available services.
The availability of Digital services in your area is dependent on the transmissions
received by your aerial and the configuration of your existing equipment.

Warnings and precautions

  This Digital converter box (DCB) is intended for the reception of Digital TV

picture and sound signals.

  If the Digital converter box (DCB) is exposed to drastic temperature changes,

e.g. taking it from a cold room to a warm room, connect it to the mains supply
and let it stand for at least two hours.

  Do not expose the Digital converter box (DCB) to any moisture. The Digital

converter box (DCB) is designed for use indoors and should be protected
against moisture (splashes of water etc.).

  Do not expose the Digital converter box (DCB) to dripping or splashing water

and objects filled with liquid, such as vases, must not be placed on top of or
above the unit.

  Adequate ventilation is essential to prevent failure of electrical components, we

recommend that a gap of at least 5cm is left all around this Digital converter
box (DCB) even when it is placed inside a cabinet or between shelves.

  Ensure that the ventilation holes beneath the unit are not blocked.

  Do not place the receiver in the immediate vicinity of a heat source or in direct

sunlight as this would prevent appropriate cooling.

  To prevent fire, never place any type of candle or naked flame on top of or near

the Digital converter box (DCB).

  Caring for your


Digital converter box (DCB)

Remove the mains plug from the wall socket. The cabinet can be cleaned with
a dry clean cloth. Do not use solutions containing benzol or petroleum.

  Make sure that all the electrical connections are properly made. Do not connect

any of your equipment (TV, video recorder, etc.) to the mains supply until you
have properly connected all the other leads. Disconnect your Digital converter
box (DCB) from the mains supply before you disconnect any other equipment
from its rear panel.

2

Содержание TU-CT20

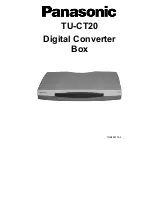
Страница 1: ...TU CT20 Digital Converter Box TQB8E3730 2 ...

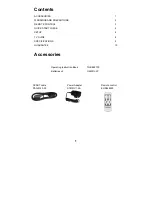
Страница 2: ...UTIONS 2 REMOTE CONTROL 3 QUICK START GUIDE 4 SETUP 6 TV GUIDE 8 SPECIFICATIONS 9 GUARANTEE 10 Accessories 1 SCART cable PAN 5143 02 Power Adapter STM51V1 5A Remote control EUR648500 Operating Instruction Book TQB8E3730 Batteries x 2 UM 3DJ 2P ...

Страница 3: ...or splashing water and objects filled with liquid such as vases must not be placed on top of or above the unit Adequate ventilation is essential to prevent failure of electrical components we recommend that a gap of at least 5cm is left all around this Digital converter box DCB even when it is placed inside a cabinet or between shelves Ensure that the ventilation holes beneath the unit are not blo...

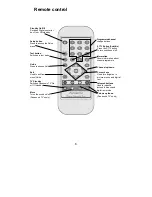
Страница 4: ...hows information about current programme Programme channel change buttons Mute Turns the sound on off Panasonic TV s only TV Standby Switches Panasonic TV On or Off standby Volume up down Panasonic TV s only Channel up down Coloured buttons Used for specific actions in menus and digital text mode Cursor keys Used for navigation in picture menus and digital text 3 STTL Button Subtitle Press the STT...

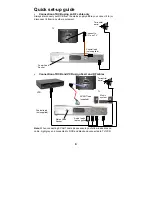
Страница 5: ...nd VCR using Scart and RF cables Terrestrial aerial TV Coaxial lead not supplied Terrestrial aerial 4 TV VCR Coaxial lead not supplied Note When connecting SCART cable please ensure you follow indications on cable Light grey end connected to DCB and black end connected to TV VCR Mains Lead Socket Power Lead Socket Music system Audio leads not supplied Connect to RF In on TV SCART lead supplied ...

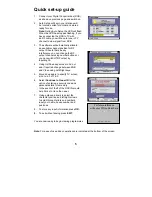
Страница 6: ... output by inputting 00 4 Using Up Down keys move to AV out and if required change between RGB and Video using Left Right keys 5 Move down again to specify TV screen size i e 4 3 or 16 9 6 Select Continue to Owner ID for the option of entering a security code and personal details into memory In the event of theft of the DCB this could help Police to trace the owner 7 Using up down arrows to select...

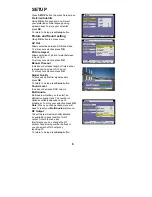
Страница 7: ...displayed on screen 0 10 secs To store your selection press OK Signal Quality To access and confirm signal quality press OK To return to Setup press Setup button Sound Level Increase or decrease DCB volume Multi Audio Multi audio will allow you to select an alternative sound track The number of options available depends on each broadcast To store your selection press OK Note When you change channe...

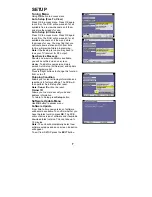
Страница 8: ...d this new service simply access Auto Setup All Services and update your programme list Press left right buttons to change this function from on to off Shipping Condition Allows you to clear all tuning information and reset back to factory settings The DCB will then perform Auto Setup after reset Note Owner ID will not be reset Owner ID Allows you to enter a security code and address information T...

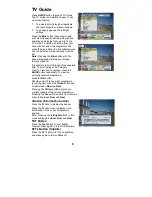
Страница 9: ...te lists To scroll between All Category Free To View and Favourites press the GUIDE button repeatedly To view the currently selected programme press the OK button Should you wish to see what programme is coming next press the Green button and scroll between Now and Next Pressing the Yellow button will give you a brief synopsis of the current programme Pressing the Green button whilst in this mode ...

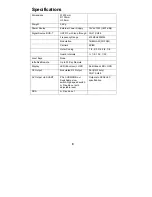
Страница 10: ...n 16 64QAM COFDM Carriers 2K 8K Outer Coding 1 2 2 3 3 4 5 6 7 8 Guard Intervals 1 8 1 16 1 32 Local Keys None Infra Red Remote Up to 33 Key Remote Display LED Bi colour OSD Red Green LED OSD RF Output Modulated RF Output Pal UHF only CH21 CH68 AV Output via SCART PAL CVBS RGB out Switchable slow switch high speed switch L R audio out with adjustable level Outputs to CENELEC specification RCA L R ...

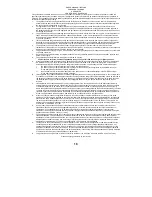
Страница 11: ... by the purchaser then the appliance together with the guarantee and proof of date of purchase should be returned at the purchaser s risk and expense to such sales company or distributor which will handle the repair service In some countries the affiliated sales company or national distributor will designate dealers or certain service centres to execute the repairs involved C If the appliance is a...

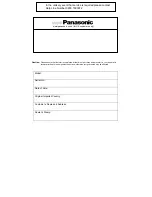
Страница 12: ...iginal Importer Country Customer s Name and Address Dealer s Stamp Go on line through our Internet Accessory ordering application Most major credit and debit cards accepted All enquiries transactions and distribution facilities are provided directly by Panasonic UK Ltd It couldn t be simpler In the unlikely event that service is required please contact Help Line Number 0800 1693012 www panasonic c...

Отзывы: