


POWER
INPUT
MENU
ENTER/
Ŷ
– /
ź
+/
Ÿ
VOL
14
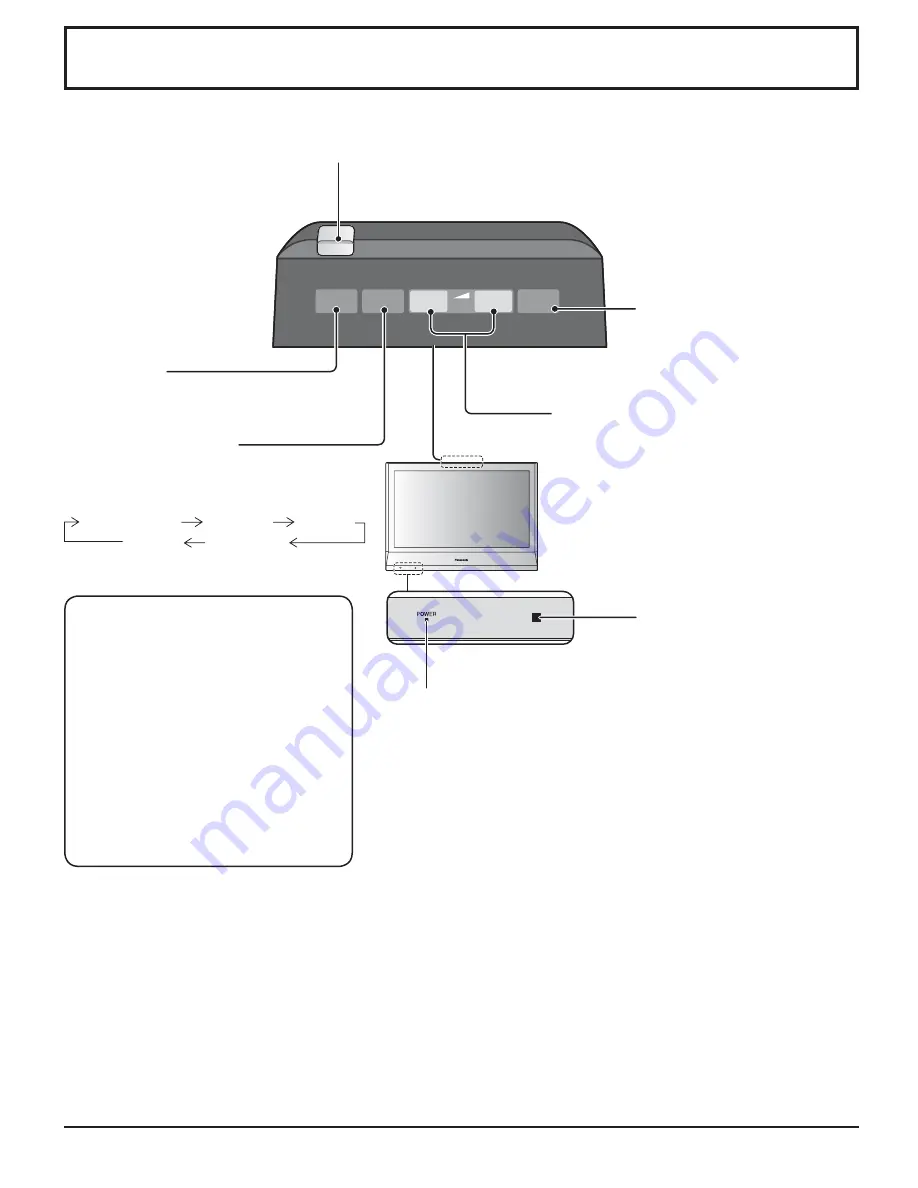
Basic Controls
How to release button lock
MENU and ENTER/
Ŷ
buttons are locked
before shipping.
You can unlock them with unit buttons.
1.
Press +/
Ÿ
4 times.
2.
Press INPUT 4 times.
3.
Press –/
ź
4 times.
4.
Press ENTER/
Ŷ
.
Note:
After unlocking the buttons, Button lock
in OPTIONS menu is set to “Off”.
(see page 35)
MENU Screen ON / OFF
This button is locked by initial setting.
Each time the MENU button is pressed, the
menu screen will switch. (see page 20)
Power Indicator
The Power Indicator will light.
• Power-OFF .... Indicator not illuminated (The unit will still consume
some power as long as the power cord is still inserted
into the wall outlet.)
• Standby ......... Red
• Power-ON ...... Green
• DPMS ............. Orange (With PC input signal and during operation of
PC’s screensaver.)
Normal Viewing
PICTURE
SET UP
SOUND
POS. /SIZE
Remote control sensor
INPUT button
(INPUT1, INPUT2, INPUT3 and PC selection)
(see page 13)
Main Power On / Off Switch
Volume Adjustment
Volume Up “+” Down “–”
When the menu screen is displayed:
“+” : press to move the cursor up
“–” : press to move the cursor down
(see page 20)
Enter / Aspect button
This button is locked by initial
setting. (see page 16, 20)


