


English
64
Periodic time
Deactivated.
Operating time
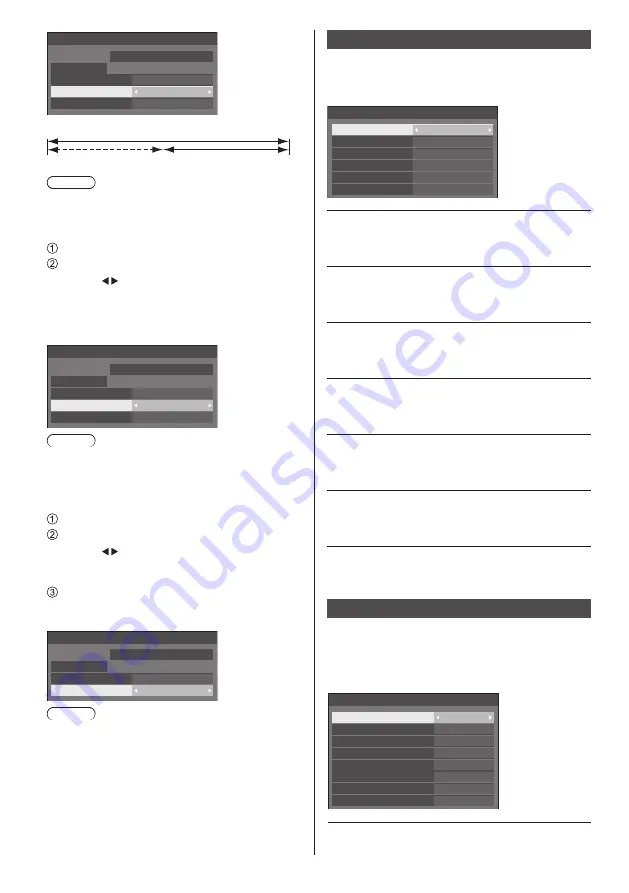
Screensaver
Start
Mode
Interval
Periodic time
Operating time
0:00
0:00
TUESDAY
2019/01/01
10:00
Note
●
It is not possible to set the duration of [Operating
time] longer than that of [Periodic time].
To set start and finish time of Screensaver
Select [Time designation] in [Mode].
Set [Start time] and [Finish time].
●
Press once to change the time by 1 minute.
Keep pressing down to change the time by 15
minutes.
●
In [ENGLISH(US)] OSD language, [Time
designation] is displayed as [TIME OF DAY].
Screensaver
Start
10:00
Mode
Time designation
Start time
Finish time
0:00
0:00
TUESDAY
2019/01/01
Note
●
When the current time is displayed as [- -], set [Date
and time] before setting [Start time] and [Finish
time]. (see page 67)
To turn the power off after Screensaver
Select [Standby after SCR saver] in [Mode].
Set [Screensaver duration].
●
Press once to change the time by 1 minute.
Keep pressing down to change the time by 15
minutes.
Select [Start] and press <ENTER>.
●
Screensaver will be activated and the power will
be turned off (Standby) at the time set.
Screensaver
Start
10:00
Mode
Standby after SCR saver
Screensaver duration
0:00
TUESDAY
2019/01/01
Note
●
[Screensaver duration] can be set from 0:00 to
23:59.
When this is set to [0:00], [Standby after SCR
saver] will not be activated.
Input label
This function can change the label of the Input signal to
be displayed.
[Input label] - submenu screen
HDMI
DisplayPort
DIGITAL LINK
PC
PC
DIGITAL LINK
DisplayPort
DVI-D1
DVI-D1
DVI-D2
DVI-D2
HDMI
Input label
[HDMI]
[HDMI] / [DVD1] / [DVD2] /
[DVD3] / [Blu-ray1] / [Blu-ray2] /
[Blu-ray3] / [CATV] / [VCR] /
[STB] / (Skip)
[DisplayPort]
[DisplayPort] / [DVD1] / [DVD2] /
[DVD3] / [Blu-ray1] / [Blu-ray2] /
[Blu-ray3] / [CATV] / [VCR] /
[STB] / (Skip)
[DIGITAL LINK]
[DIGITAL LINK] / [DVD1] /
[DVD2] / [DVD3] / [Blu-ray1] /
[Blu-ray2] / [Blu-ray3] / [CATV] /
[VCR] / [STB] / (Skip)
[DVI-D1]
[DVI-D1] / [DVD1] / [DVD2] /
[DVD3] / [Blu-ray1] / [Blu-ray2] /
[Blu-ray3] / [CATV] / [VCR] /
[STB] / (Skip)
[DVI-D2]
[DVI-D2] / [DVD1] / [DVD2] /
[DVD3] / [Blu-ray1] / [Blu-ray2] /
[Blu-ray3] / [CATV] / [VCR] /
[STB] / (Skip)
[PC]
[PC] / [DVD1] / [DVD2] /
[DVD3] / [Blu-ray1] / [Blu-ray2] /
[Blu-ray3] / [CATV] / [VCR] /
[STB] / (Skip)
(Skip): When <INPUT> is pressed, the input will be
skipped.
Power management settings
Set each item to reduce power consumption.
This function works only for the input terminal that is
currently selected.
[Power management settings] - submenu screen
Power management settings
Power management mode
No signal power off
HDMI power management
DVI-D1 power management
PC power management
DVI-D2 power management
Extended standby mode
Custom
Off
Off
Disable
Off
Off
Off
DIGITAL LINK power management
Off


