22
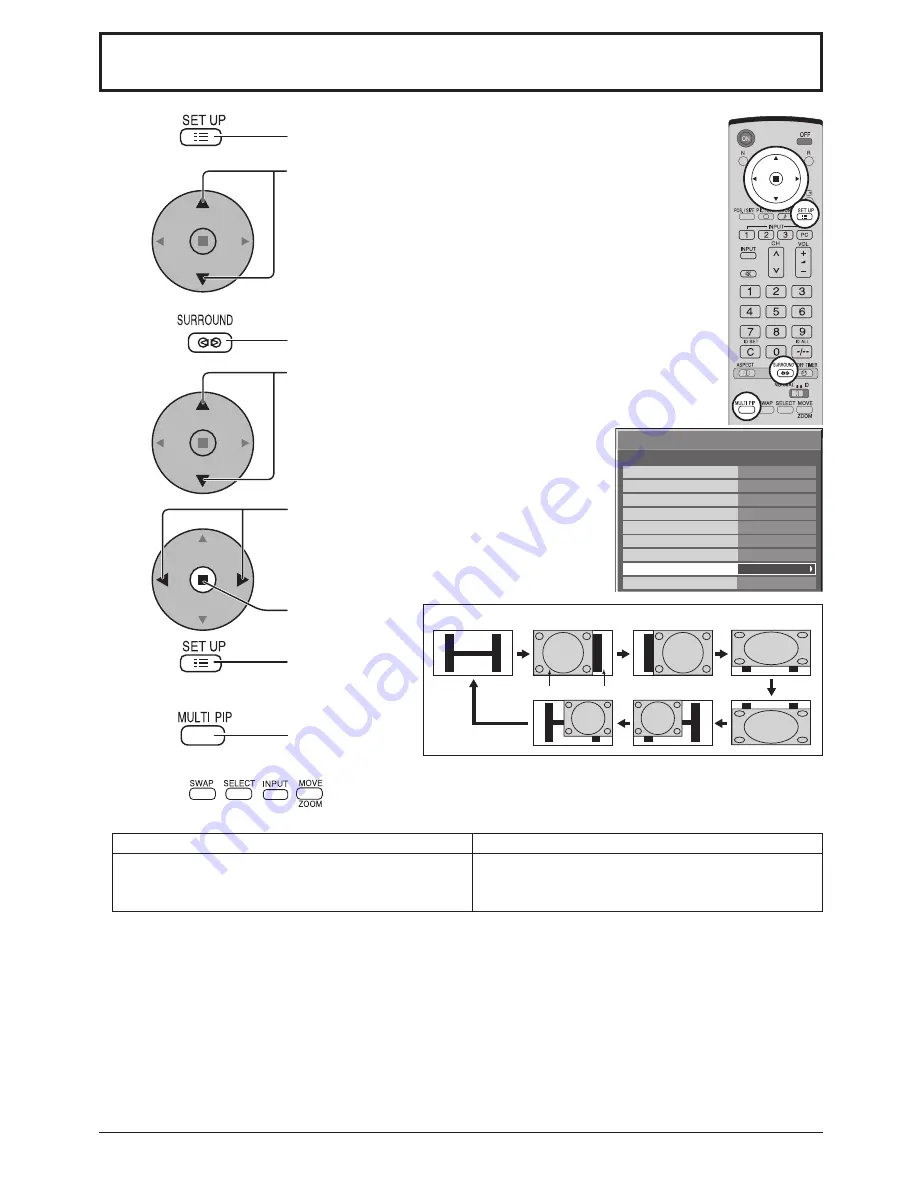
Advanced PIP
1
2
3
5
Press to display the Setup menu.
Press to select “OSD Language”.
Press and hold until the Options menu is displayed.
Press to select Advanced PIP.
Press to adjust the menu.
Off : Sets normal two screen display mode
(see page 21).
On : Sets Advanced PIP mode.
Press to con
fi
rm.
Press to exit from
Options menu.
4
6
One screen
Advanced PIP
Main screen
Sub screen
Notes:
• Advanced PIP corresponding signal
• Sound output is from the picture which is selected in Audio OUT (PIP) (See page 25).
• In 2 screen display, the same input mode cannot be selected for the main picture and sub picture.
• The main picture and sub picture are processed by different circuits, resulting in a slight difference in the clarity of
the pictures. There may also be a difference in the picture quality of the sub picture depending on the type of signals
displayed on the main picture and depending on the 2-picture display mode.
• Due to the small dimensions of the sub pictures, these sub pictures cannot be shown in detail.
• Computer screen picture is displayed in a simpli
fi
ed format, and it may not be possible to discern details on them satisfactorily.
• Following combinations of two analog signals cannot be displayed simultaneously;
Component - Component, Component - PC (RGB), PC (RGB) - Component, PC (RGB) - PC (RGB)
• Following signals are not applicable to this menu.
1125 / 50p • 60p, 1152 × 864 @60 Hz, 1400 × 1050 @60 Hz, 1600 × 1200 @60Hz, 1920 × 1200 @60 Hz
• Refer to each board's operating instruction for DVI, SDI, HDMI's corresponding signals.
1/3
Options
Off-timer function
INPUT lock
Studio W/B
Advanced PIP
Display size
Initial VOL level
Maximum VOL level
Initial INPUT
Onscreen display
Off
Off
Off
Off
Enable
On
Off
0
Off
Off
0
Sub screen
Main screen
NTSC, PAL, SECAM (tuner, video)
525i, 525p, 625i, 625p, 750/60p, 750/50p, 1125/60i, 1125/50i,
1250/50i (Component Video, RGB, DVI, SDI, HDMI)
640x480@60Hz, 852x480@60Hz, 1024x768@60Hz,
1366x768@60Hz (RGB, DVI, HDMI)
1280x768@60Hz (DVI)
Press repeatedly.
Each time pressing
this button main picture and sub picture will be displayed as above.
Note:
To use
,
,
,
buttons for the screen operations, follow the procedures in the previous page.
7
(When Advanced PIP is On)
Содержание TH-50PF9EK
Страница 46: ...46 Memo ...
Страница 47: ...47 Memo ...


