12
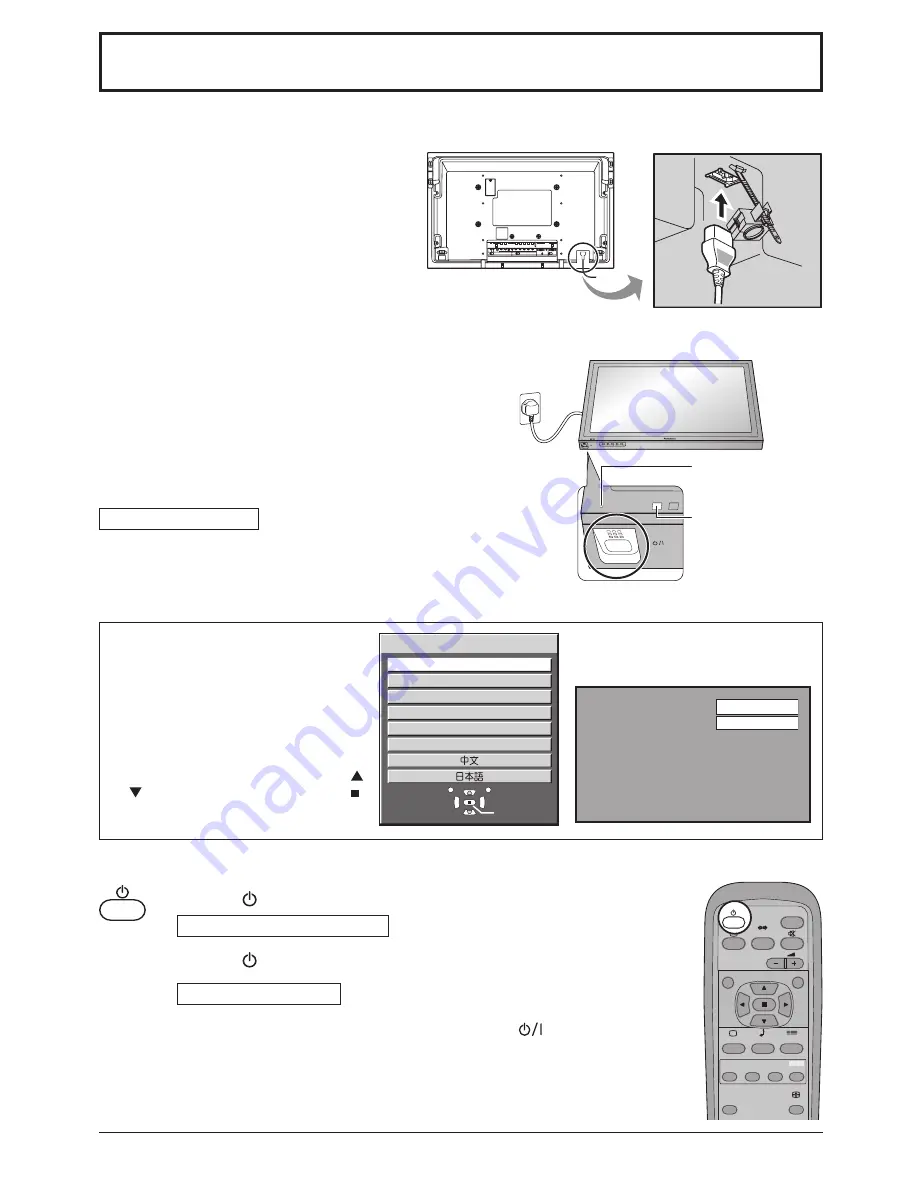
Power On / Off
TH-32LHD7
INPUT
MENU
ENTER/
+
/
VOL
-/
TH-32LHD7
INPUT
SURROUND
VOL
N
R
PICTURE
SOUND
SET UP
ASPECT
PICTURE
POS. /SIZE
MULTI
PIP
SWAP
SELECT
MOVE
ZOOM
VIDEO IN
AUDIO
IN
L
R
S VIDEO IN
SLOT 2
AV
VD
HD
PR/CR/R
PB/CB/B
Y/G
R AUDIO L
COMPONENT/RGB IN
SLOT 1
AUDIO
PC IN
SERIAL
VIDEO OUT
English (UK)
Deutsch
Français
Italiano
Español
ENGLISH (US)
OSD Language
Select
Set
P C
1 6 : 9
Power Indicator
Remote Control
Sensor
Connecting the plug to the Wall Outlet
Note:
Main plug types vary between countries. The power plug shown
at right may, therefore, not be the type
fi
tted to your set.
Press the Power switch on the LCD Display to turn the set on:
Power-On.
Power Indicator: Green
Example: The screen below is displayed for a while after the
LCD Display is turned on. (setting condition is an
example.)
When the Power is turned on for the
fi
rst
time, the Language selection screen is
displayed.
From the second time on, language
selection can be done from the setup
menu. (see page 13)
Select the desired language using the
or
button and press the ACTION ( )
button.
From the second time on, the below
screen is displayed for a while (setting
condition is an example).
Press the button on the remote control to turn the LCD Display off.
Power Indicator: Red (standby)
Press the button on the remote control to turn the LCD Display on.
Power Indicator: Green
Turn the power to the LCD Display off by pressing the
switch on the unit,
when the LCD Display is on or in standby mode.
Note:
During operation of the power management function, the power indicator turns
orange in the power off state.
Connecting the AC cord plug to the LCD Display.
Fix the AC cord plug securely to the LCD Display
with the clamper. (see page 8)
Содержание TH-32LHD7B
Страница 35: ......


