47
PC Mode
1
Install JPEG Addin Software (p. 46), then start PowerPoint on the PC.
2
Select [Open] from [File] menu to open a PowerPoint file for JPEG
conversion.
3
Connect PC using supplied USB cable.
(p. 42)
4
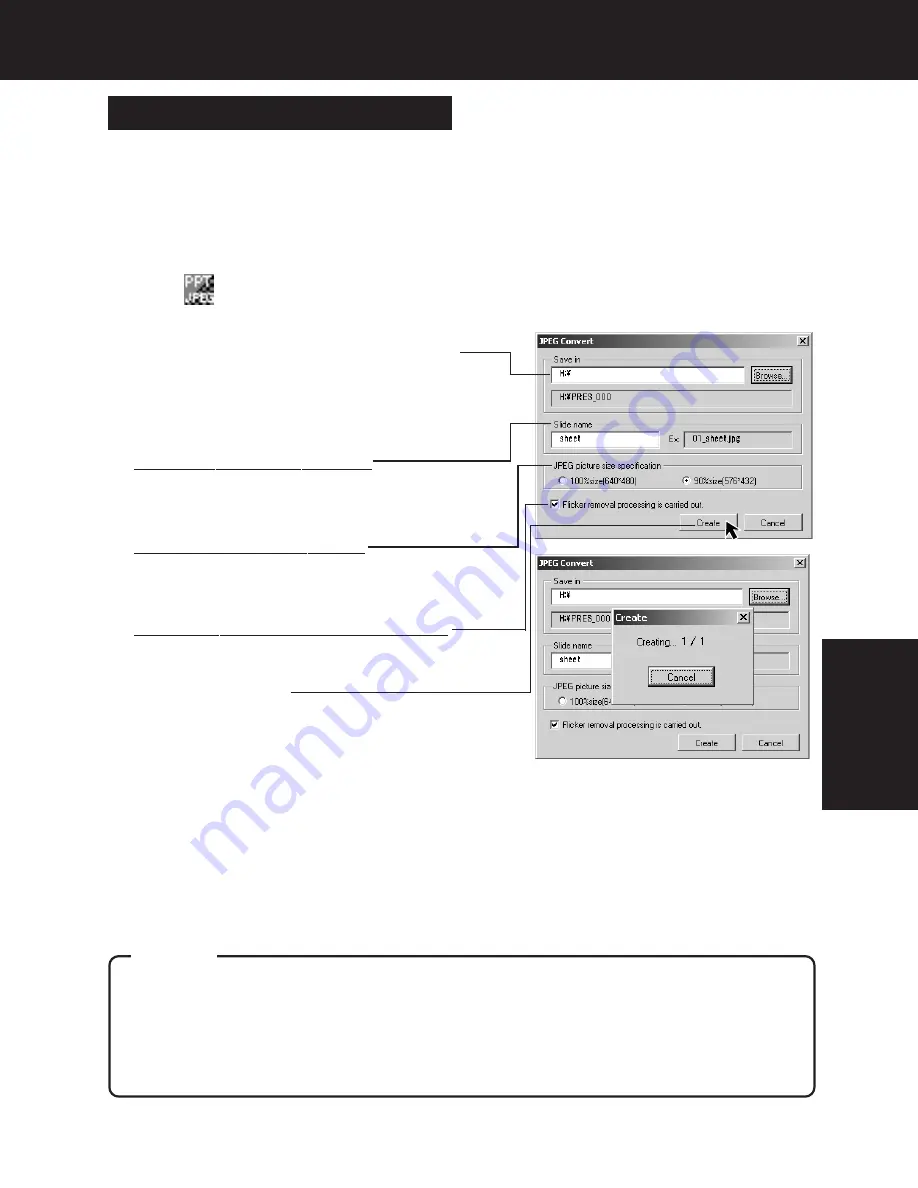
Click in the upper, left corner.
(p. 46)
• If “Drive not found.” appears, click [OK].
5
Select “Removable Disk” as the save
destination.
•
Select “SD” or “HDD (PC Card)” as the save
destination, then specify the drive to be recognized
as the removable disk drive corresponding to the
connected unit. (p. 44)
To change an image name:
• Type in a five-character alphanumeric name.
Do not use spaces or special symbols.
• Default name is “sheet”.
To change the image size:
• Certain TV types may cut off image edges when
displayed on the screen. Thus, the default image
size value is set at 90 %. To enlarge, select 100 %.
About flicker reduction processing:
• Images are processed to reduce TV screen flicker.
It is advisable to leave this option checked.
6
Click on [Create].
• Conversion of PowerPoint files to JPEG files is
started. Afterward, “It was created.” is displayed.
7
Click on [OK].
8
Check the created folder.
a
Confirm that a save destination folder was created on the PC.
b
Disconnect the USB cable correctly.
(p. 45)
c
Switch to TV mode and confirm the folder color is pink.
(pp. 24~26)
Presentation File Creation
PC Mode (Using the Applications)
• Only folders entitled “PRES_***” (last 3 digits “*” are variable) are recognized as presentation
folders. If you change the folder name on a PC, only change the last 3 digits. Otherwise it will
not be recognized.
• For Windows 98SE/Me, a limited number of JPEG files can be created. If an error occurs
during conversion, restart the PC, then repeat this operation. The number of files that can be
converted will vary depending on PC environment, such as the number of open applications
and the number of resident programs.
Caution
PT1.p46-49.p65
2003/01/14, 12:37
47


