background image

33

VQT0X39

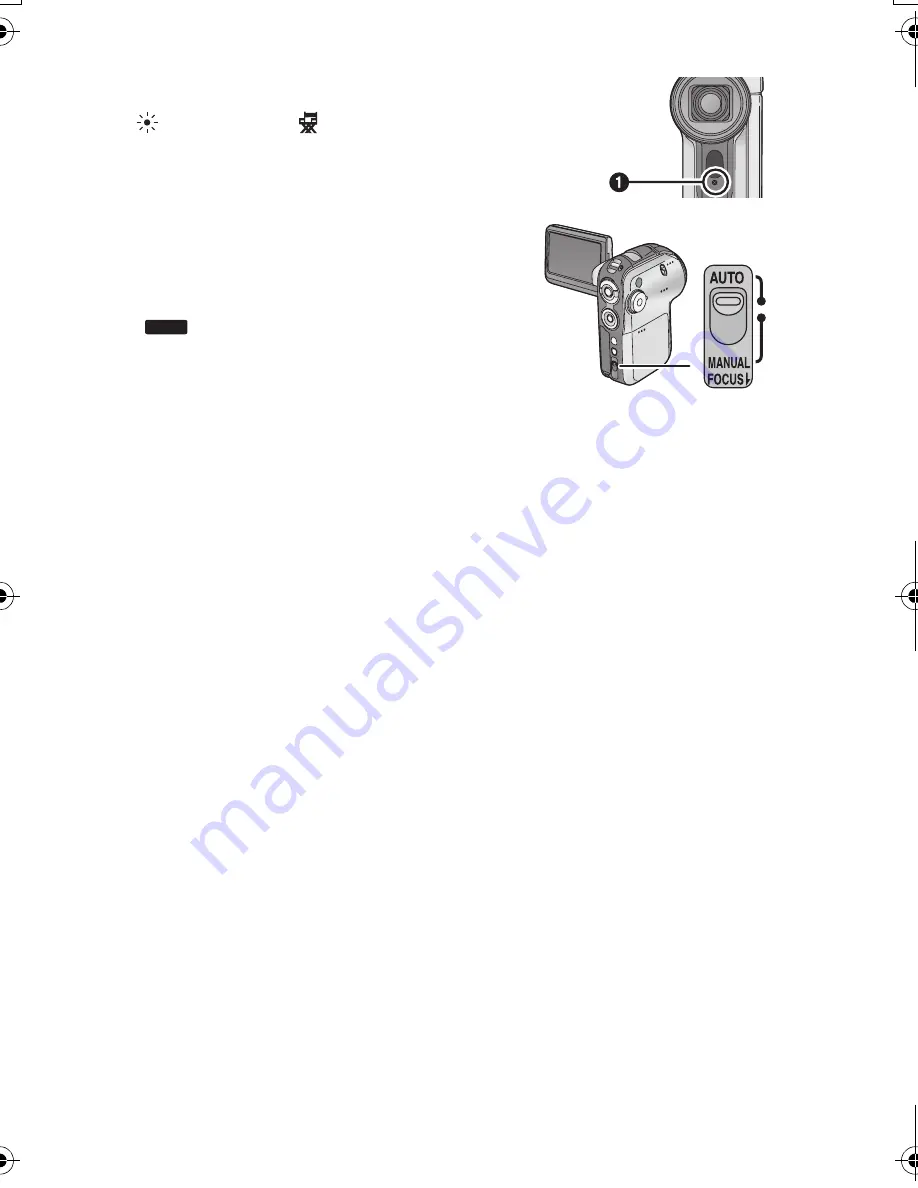
About the indication lamp 

1

The indication lamp flashes when signals from the remote control 
are sensed and during self-timer operation.
When [

REC LAMP] in [

ADVANCE] is set to [ON], the 

lamp lights during recording. You can therefore confirm recording 
when this unit is attached to a tripod or when using the remote 
control.

About the auto mode

Set the [AUTO/MANUAL/FOCUS] switch to [AUTO], 
and color balance (white balance) and focusing will 
be adjusted automatically. 
(The [

] indication appears on the screen.)

– Automatic white balance: P107
– Auto focus: P108

Depending on the brightness of the subject etc., the aperture and shutter speed are 
automatically adjusted for an optimum brightness.
(When set to the motion picture recording mode: The shutter speed is adjusted to a 
maximum of 1/250.)

Color balance and focus may not be adjusted depending on light sources or scenes. 
If so, manually adjust the white balance and focus.
– Scene mode setting: P46
– White balance setting: P49
– Shutter speed setting: P51
– Iris/gain value setting: P51
– Focus setting: P48

AUTO

VQT0X39ENG.book  33 ページ  2006年6月14日 水曜日 午前10時51分

Содержание SDRS150 - SD MOVIE CAMERA

Страница 1: ...Camera Model No SDR S150 VQT0X39 For USA assistance please call 1 800 272 7033 or contact us via the web at http www panasonic com contactinfo Before connecting operating or adjusting this product please read the instructions completely ...

Страница 2: ... one computer Article 5 Reverse Engineering Decompiling or Disassembly Licensee may not reverse engineer decompile or disassemble the Software except to the extent either of them is permitted under law or regulation of the country where Licensee resides Matsushita or its distributors will not be responsible for any defects in the Software or damage to Licensee caused by Licensee s reverse engineer...

Страница 3: ...o take close ups Soft skin mode 40 This makes skin colors appear softer for a more attractive appearance Backlight compensation function 41 This is for protecting a backlit subject from being darkened Wind noise reduction function 42 This is for reducing the wind noise coming into the microphone when recording Wide mode 43 This is for selecting the screen s aspect ratio when recording motion pictu...

Страница 4: ...D card slot onto its hard disk PC With a PC 76 Installing MotionSD STUDIO 80 Installing the Web Camera Driver 81 Connection and recognition procedures 83 Using MotionSD STUDIO 85 Reading the MotionSD STUDIO operating instructions 86 Using the unit as a Web Camera 86 If using a Macintosh 88 To disconnect USB cable safely 89 Software application uninstallation 89 Verifying the driver 90 Details Appr...

Страница 5: ... in no event be liable for the loss of recordings due to malfunction or defect of this SD Video Camera its accessories or Memory Card Note that the SD Video Camera may not play the data recorded or created on another product and another product may not play the data recorded on the SD Video Camera The nameplate of the SD Video Camera is fixed on the bottom of the battery compartment Information fo...

Страница 6: ... Consult the dealer or an experienced radio TV technician for help FCC Caution To assure continued compliance follow the attached installation instructions and use only shielded interface cables with ferrite core when connecting to computer or peripheral devices Any changes or modifications not expressly approved by the party responsible for compliance could void the user s authority to operate th...

Страница 7: ...eriod of time or before recording important data to check that the picture and sound are recorded correctly About the photographs and illustrations in these operating instructions Please note that the actual controls and components menu items etc of your SD Video Camera may look somewhat different from those shown in the illustrations in these Operating Instructions Pages for reference Pages that ...

Страница 8: ...u are not allowed to reproduce copy or transfer to a network any part of the software applications supplied with this product for commercial purposes without written authorization Panasonic will in no way be liable for any damages sustained directly or indirectly from the use of this product or from any trouble occurring therein Panasonic will also in no way be liable for any losses of data caused...

Страница 9: ...03 Accessories SD Memory Card 2 GB RP SDR02G Wireless remote control N2QACC000009 Button type battery CR2025 Battery pack CGA S303 Hand strap VFC4144 AC cable K2CA2CA00029 Attachable grip VYC0948 USB cable VFA0453 A AC adaptor VSK0681 Headphone cable K2KZ99Z00002 Multi cable K2KZ9CB00001 CD ROM ...

Страница 10: ... the center to enter the selection 11 Menu button MENU P27 12 Delete button P65 13 Mode select switch AUTO MANUAL FOCUS P33 46 to 51 14 Terminal cover P70 73 83 15 USB terminal P70 83 16 Multi connector MULTI P12 73 17 DC input terminal DC IN 9 3V P18 18 Status indicator P18 to 20 19 Power switch ON OFF P19 20 Microphone built in stereo 21 Flash lever OPENß P57 22 White balance sensor P50 23 Speak...

Страница 11: ...opping 1 Hand strap Tripod mount This hole is for attaching the attachable grip supplied to this unit or attaching this unit to a tripod optional It is easier to hold this unit if you attach the attachable grip to the tripod mount Attachable grip 1 Attach the hand strap to the strap fixture 2 Attach the attachable grip string to the hand strap string 3 Attach the attachable grip to the tripod moun...

Страница 12: ...When a tripod is used you can perform operations easily using the remote control When the tripod is used the card slot cover and battery cover cannot be opened Insert an SD card or the battery before attaching this unit to the tripod P15 17 1 Camera base Multi connector MULTI Only connect the supplied multi cable and supplied headphone cable to this connector as the sound may not be output correct...

Страница 13: ...battery When the button type battery runs down replace it with a new battery CR2025 The battery typically lasts about one year the actual life may be less with heavy use Keep the button type battery out of the reach of children 2 1 3 4 6 5 11 9 10 8 7 1 2 Warning Danger of explosion if battery is incorrectly replaced Replace only with the same or equivalent type recommended by the equipment manufa...

Страница 14: ...ng light this unit may not operate properly even within the usable ranges Operating with remote control The menu screen transition is the same as when the buttons on the main unit are used P27 1 Press the MENU button 2 Select a menu item The 3 4 2 1 buttons and the ENTER button can be used in the same way as pressing the cursor button on this unit up down left and right 3 Press the MENU button to ...

Страница 15: ...and then slide the card slot open lever 1 to open the card slot cover 2 Insert remove the SD card into from the card slot 2 A Label side When inserting an SD card face the label side towards you and press it straight in with one stroke as far as it goes When removing the SD card open the card slot cover and press the center of the SD card and then pull it straight out 3 Securely close the card slo...

Страница 16: ...amaged or this unit may malfunction Opening the card slot cover and inserting or removing the SD card Operating the ON OFF switch or the mode dial Removing the battery or AC adaptor About the write protection switch on the SD card The SD card has a write protection switch 1 on it If the switch is moved to LOCK you cannot write to the SD card delete the data on it or format it If it is moved back y...

Страница 17: ... the battery in the holes on the unit 3 Put the battery cover back in its original place A Label B Projecting parts Removing the battery Remove the battery cover then remove the battery Before removing the battery be sure to set the ON OFF switch to OFF and check that the status indicator is off After removing the battery put the battery cover back in its original place Inserting Removing the Batt...

Страница 18: ...the power supplied from the AC outlet to power the unit for use While it is in use the battery will not be charged Charging time and recordable time The times shown in the tables below are for when the temperature is 25 oC 77 oF and the humidity is 60 If the temperature is higher or lower than 25 oC 77 oF the charging time will become longer The intermittent recordable time refers to recordable ti...

Страница 19: ...seconds after the LCD monitor is next opened Use the quick start function when stopping recording for a few moments The quick start function can be set in the following cases In motion picture recording mode when the SD card is inside this unit In still picture recording mode when the SD card is inside this unit The recordable time will become shorter when you use this unit with the LCD monitor li...

Страница 20: ...wer and then turn it on again or open the LCD monitor again The unit cannot be quick started and it takes longer for it to start operating Quick start standby is canceled and the power turns off if the mode dial is switched to a mode other than motion picture recording mode or still picture recording mode Since about half the power of normal recording is used in quick start standby using quick sta...

Страница 21: ...mode P60 Use this to play back motion pictures recorded with this unit Still picture recording mode P53 Use this to record still pictures JPEG The unit can be used as a Web camera when it is connected to a PC Still picture playback mode P63 Use this to play back still pictures recorded with this unit PC Connection mode P76 Use MotionSD STUDIO etc to view an SD card s pictures on a PC or to import ...

Страница 22: ...mage to be recorded is the same as that recording Only some screen indications will appear on the LCD monitor When appears turn the LCD monitor in direction 2 and check the warning alarm indications P98 When using this unit for recording yourself you cannot operate the operation icons using the One touch navigation P23 Using the LCD monitor Rotating the LCD monitor beyond the angles given above ma...

Страница 23: ... Basic cursor button operations Press the cursor button up down left or right to select items or files 1 and then press the button in the center to enter the selection 2 Menu screen operations P27 File playback selection P60 63 In viewer style When the LCD monitor is put back into place with its back facing out the up down left and right positions of the cursor button change as shown in the illust...

Страница 24: ...nges 2 Press the cursor button up down left or right to make a selection Playback When the mode dial is at the or position 1 Press the cursor button up down left or right to select the scene and then press the button in the center All the scenes are displayed and an operation icon automatically appears 2 Press the cursor button up down left or right to proceed with the operation If the button in t...

Страница 25: ... recording mode AUTO MANUAL FOCUS switch is set to AUTO AUTO MANUAL FOCUS switch is set to MANUAL Motion picture playback mode The indication can also be changed during playback Still picture recording mode AUTO MANUAL FOCUS switch is set to AUTO AUTO MANUAL FOCUS switch is set to MANUAL Still picture playback mode The indication can also be changed during playback When PICTURE is selected When SL...

Страница 26: ...49 51 Motion picture playback mode 3 Playback pause P60 4 Stop playback and show thumbnails P60 2 Rewind skip during playback P60 Reverse slow frame playback during pause P61 9 1 Fast forward skip during playback P60 Forward slow frame playback during pause P61 Still picture recording mode 1 2 3 Tele macro P39 4 Soft skin mode P40 Ø 2 Self timer P59 1 Backlight compensation P41 2 2 Same as motion ...

Страница 27: ...enu screen is displayed 2 Press the cursor button up or down in order to select the desired top menu 1 3 Press the cursor button right or press the button in the center 4 Press the cursor button up or down in order to select the submenu item 1 Submenu 2 Current settings on menus Using the menu screen BASIC ADVANCE SETUP MENU EXIT SETUP ENTER BASIC ADVANCE SETUP MENU EXIT SETUP ENTER 1 MENU SETUP E...

Страница 28: ...reen To exit the menu screen Press the MENU button To get back to the previous screen Press the cursor button left If you change the settings for WIDE P43 PICTURE SIZE P55 or TV ASPECT P74 the screen size changes If you change PICTURE SIZE to or from HDTV the size changes Using the menu screen continued XP SP LP MENU SETUP ENTER EXIT SCENE MODE WIDE WIND CUT CLOCK SET BASIC REC MODE MENU SETUP ENT...

Страница 29: ... set the 12 hour system is used 3 Press the button in the center to enter the selection After pressing the menu button to finish the setting check the date and time display The clock function starts at 00 seconds Changing the display style Press the menu button select SETUP DATE FORMAT then use the cursor button to select the desired display style P27 Setting date and time ワイド MENU SETUP ENTER EXI...

Страница 30: ...ry will be recharged Leave this unit as is for approx 24 hours and the battery will save the date and time for approx 6 months Even if the ON OFF switch is set to OFF the battery is still being recharged Adjusting the brightness and color level of the LCD monitor 1 Press the menu button then use the cursor button to set SETUP LCD SET YES P27 2 Press the cursor button up or down to select the item ...

Страница 31: ...ENTER EXIT POWER SAVE LCD SET BEEP SOUND INITIAL SET SETUP NORMAL DYNAMIC 2 3 LCD AI When DYNAMIC is set the LCD monitor is set to the color level and brightness optimally suited for the particular scenes to be recorded Crisp and bright images will be displayed The effect will vary depending on the scene recorded This function is automatically set to DYNAMIC when the brightness of the LCD monitor ...

Страница 32: ...rt when the LCD monitor is closed However even if the LCD monitor is closed during recording the power does not turn off until recording is ended The angle of the LCD monitor can be adjusted to suit what you want to record We recommend attaching the hand strap 4 supplied to prevent the camera from dropping It is easier to hold this unit if you attach the attachable grip 5 supplied to the tripod mo...

Страница 33: ...ance and focusing will be adjusted automatically The indication appears on the screen Automatic white balance P107 Auto focus P108 Depending on the brightness of the subject etc the aperture and shutter speed are automatically adjusted for an optimum brightness When set to the motion picture recording mode The shutter speed is adjusted to a maximum of 1 250 Color balance and focus may not be adjus...

Страница 34: ...unit until is green When the LCD monitor is closed recording ends and the unit automatically turns off If the quick start function is set the unit goes into quick start standby mode P19 About the screen indications in the motion picture recording mode 1 Recording time elapsed 2 Quality of motion picture 3 Remaining time left for recording When the remaining time on the SD card is less than 1 minut...

Страница 35: ...ure recording Please confirm the latest information about SD cards that can be used for motion picture recording on the following website http panasonic co jp pavc global cs e_cam This website is in English only Approximate recording times of motion pictures per SD card made by Panasonic 1 h 40 min indicates 1 hour 40 minutes XP SP LP MENU SETUP ENTER EXIT SCENE MODE WIDE WIND CUT CLOCK SET BASIC ...

Страница 36: ... P35 Motion picture recording MPEG2 motion pictures continued Recordable time using the battery P18 8 MB and 16 MB SD cards cannot be used for motion picture recording If the write protection switch on the SD card is set to LOCK it cannot be used for recording P16 Even if there is available memory for recording on the SD card it may not be possible to record In this case after saving the data on P...

Страница 37: ...fication T W 10 10t 10t W T W T 5t 5t W T W T 1t W T 1t W T When zooming in and taking a picture while holding this unit by hand we recommend using the image stabilizer function P44 When distant subjects are brought closer they are focused at about 1 m 3 3 feet or more When the zoom speed is high the subject may not be focused easily When the zoom magnification is 1k this unit can focus on a subje...

Страница 38: ...o use the zoom microphone function Interlocked with the zooming operation the microphone will collect sounds clearly far away with the tele shot or those in the vicinity with the wide angle shot Rotate the mode dial to select Press the menu button then use the cursor button to select ADVANCE ZOOM MIC ON P27 Zoom in out function continued MENU SETUP ENTER EXIT D ZOOM ZOOM MIC ADVANCE OFF 25x 700x M...

Страница 39: ...flashes orange then lights white If the magnification is 10k or less then it is automatically set to 10k To cancel the tele macro function Select the icon again Tele macro function This is for bringing only what you want to record into focus to take close ups If a sharper focus cannot be achieved adjust the focus manually P48 In the following cases the tele macro function is canceled automatically...

Страница 40: ... Press the cursor button down then select the soft skin icon The icon flashes orange then lights white To cancel the soft skin mode Select the icon again Soft skin mode This makes skin colors appear softer for a more attractive appearance If the background or anything else in the scene has colors similar to the skin color they will also be smoothed If the brightness is insufficient the effect may ...

Страница 41: ...select the ª backlight compensation icon The ª icon flashes orange then lights white The image on the screen will become brighter To return to normal recording Select the ª icon again Backlight compensation function This is for protecting a backlit subject from being darkened In the following case the backlight compensation is canceled automatically The power is turned off or the mode dial is set ...

Страница 42: ... WIND CUT OFF P27 Wind noise reduction function This is for reducing the wind noise coming into the microphone when recording MENU SETUP ENTER EXIT SCENE MODE WIDE WIND CUT CLOCK SET BASIC OFF ON REC MODE This function s default setting is ON Reduces the wind noise depending on the wind strength If this function is activated in strong winds the stereo effect may be reduced When the wind weakens th...

Страница 43: ...E ON P27 Recording images with a 4 3 aspect ratio Rotate the mode dial to select Press the menu button then use the cursor button to select BASIC WIDE OFF P27 Wide mode This is for selecting the screen s aspect ratio when recording motion pictures MENU SETUP ENTER EXIT SCENE MODE WIDE WIND CUT CLOCK SET BASIC OFF ON REC MODE MENU SETUP ENTER EXIT SCENE MODE WIDE WIND CUT CLOCK SET BASIC OFF ON REC...

Страница 44: ...akes during recording MENU SETUP ENTER EXIT D ZOOM REC LAMP O I S ZOOM MIC ADVANCE OFF ON MAGICPIX In still picture recording mode pressing the record button halfway increases the effect of the image stabilizer function MEGA OIS When a tripod is used we recommend that you turn the image stabilizer off It may not be possible to compensate for image shake when the unit is shaken greatly or the perso...

Страница 45: ...focus indication and then focus the subject If MagicPix is set to ON when it has already been set to ON If the mode is changed when MagicPix is set to ON To cancel the MagicPix function Press the menu button then use the cursor button to select ADVANCE MAGICPIX OFF P27 MagicPix function This allows recording in dark locations MENU SETUP ENTER EXIT D ZOOM ZOOM MIC ADVANCE OFF ON MAGICPIX REC LAMP O...

Страница 46: ...SCENE MODE OFF P27 You can also cancel the scene mode function by setting the AUTO MANUAL FOCUS switch to AUTO Scene mode This is for recording in various situations MENU SETUP ENTER EXIT SCENE MODE WIDE WIND CUT CLOCK SET BASIC OFF REC MODE Indication Mode Recording conditions 5 Sports To record sports scenes or scenes where there are quick motions Portrait To make persons stand out against the b...

Страница 47: ...nes of light may appear If the brightness is insufficient the sports mode does not function The 5 indication flashes If this mode is used indoors the screen may flicker Portrait mode If this mode is used indoors the screen may flicker If this happens change the scene mode setting to OFF Low light mode Extremely dark scenes may not be able to be recorded finely Spotlight mode If the recording subje...

Страница 48: ...splayed 3 Press the cursor button left or right to bring the subject into focus When focused with a wide angle the subject may not be in focus when zoomed in First zoom in on the subject and then focus on it To restore to the automatic adjustment Move the AUTO MANUAL FOCUS switch down again to the FOCUS position You can also restore the auto focusing by setting the AUTO MANUAL FOCUS switch to AUTO...

Страница 49: ...ight to select the white balance mode To restore to the automatic adjustment Set the white balance mode to You can also restore the automatic adjustment by AUTO MANUAL FOCUS switch to AUTO White balance This is for recording in natural colors MNL MNL AWB MNL Indication Mode Recording conditions Auto white balance adjustment Indoor mode for recording under incandescent lamps Incandescent lights hal...

Страница 50: ...e indication flashes while settings are being performed in set mode Upon completion of the settings it stops flashing and lights instead About the white balance sensor Do not cover the white balance sensor 1 during recording or it may not function properly About the black balance adjustment This is one of the 3CCD system functions that automatically adjusts the black when the white balance is set ...

Страница 51: ...ion such as 1 60 or iris gain indication such as F2 0 0dB 3 Press the cursor button left or right to make the adjustment 1 Shutter speed 1 60 to 1 8000 1 30 to 1 2000 The shutter speed closer to 1 8000 1 2000 is faster 2 Iris value CLOSE F16 to F2 0 OPEN The closer to OPEN the value selected the brighter the iris value becomes 3 Gain value 0dB 18dB If the value does not become OPEN you cannot adju...

Страница 52: ...and accordingly the gain value increases automatically which may increase the noises on the screen You may see vertical lines of light in the playback image of a brightly shining subject or highly reflective subject but this is not a malfunction During normal playback image movement may not look smooth When recording in an extremely bright place the screen may change color or flicker If so adjust ...

Страница 53: ... When the record button is pressed halfway the shutter chance mark is indicated as follows The white lamp flashes Focusing The green lamp lights up When in focus Beeps twice No mark When focusing is unsuccessful 4 beeps If you set O I S to ON P44 then the image stabilizer function will be more effective will be indicated The shutter chance mark is indicated as follows when the record button is not...

Страница 54: ... of still pictures 2 Size of still pictures 3 Remaining number of still pictures Flashes red when R 0 appears Still picture recording JPEG still pictures continued The sound cannot be recorded When the access lamp is lit do not operate the mode dial When the access lamp is lit do not insert or remove an SD card If the write protection switch on the SD card is set to LOCK it cannot be used for reco...

Страница 55: ...quality P27 Still pictures with a high picture quality are recorded Priority is given to the number of still pictures recorded Still pictures are recorded in normal picture quality MENU SETUP ENTER EXIT SCENE MODE PICTURE SIZE CLOCK SET BASIC 2048 1280 640 HDTV PICT QUALITY MENU SETUP ENTER EXIT SCENE MODE PICTURE SIZE CLOCK SET BASIC PICT QUALITY When you purchase this unit PICTURE SIZE is set to...

Страница 56: ... to display in the following cases About the focus area When there is a contrasting object ahead or behind the subject in the focus area the subject may not be focused If so move the contrasting object out of the focus area If focusing is still difficult use manual focus to adjust the focus P48 Still picture recording JPEG still pictures continued MENU SETUP ENTER EXIT SHTR EFFECT ADVANCE OFF ON 2...

Страница 57: ...it flash When the flash is not used Store the flash by pressing it with your fingers until it clicks back into place Red eye reduction function Reduces the phenomena where human eyes become red from flashes Press the menu button then use the cursor button to select ADVANCE RED EYE ON P27 The indication appears The flash is activated 2 times Do not move until the second flash is finished Use this w...

Страница 58: ...ghtness If it determines that the flash is necessary the ß indication flashes yellow When the ß ßi ßj indication or the ßA ßAi ßAj indication is displayed the flash can be lit If the indication is flashing or not displayed the flash cannot be lit The available range of the flash is approx 1 m to 2 m 3 3 feet to 6 6 feet in a dark place Pictures will appear dark or reddish when they are recorded by...

Страница 59: ...as been set recording will start After recording the self timer is canceled 1 Indication lamp When the record button is pressed halfway and then all the way the subject will be brought into focus when the record button was pressed halfway When the record button is pressed all the way at once the subject will be focused just before the recording To stop the timer midway through Press the MENU butto...

Страница 60: ... at the page with the scene you want to playback 3 Press the button in the center of the cursor button The selected scene is played back on the full screen The operation icon is automatically displayed on the LCD monitor 1 The date time display reflects the recording start date and time so it will remain unchanged during playback 4 Press the cursor button up down left or right to operate Playback ...

Страница 61: ...ne frame at a time 1 Press the cursor button up during motion picture playback to pause the playback 2 Press the cursor button right The frames will be advanced one at a time in the reverse direction when you press the cursor button left Normal playback is restored when the cursor button up is pressed To adjust volume Adjusting the speaker volume or the headphone volume when using headphones optio...

Страница 62: ...the stopped scene If playback is stopped at any point during a motion picture while RESUME PLAY is set to OFF the next time the motion picture is played back it will be from the beginning RESUME PLAY is set to OFF if an SD card with the write protection switch at the LOCK position is inserted P16 About motion picture mode compatibility This unit can play back MPEG2 formatted files This unit is bas...

Страница 63: ...me The screen will not change at this time but the scene numbers and bar graph display will change so release the button when you have arrived at the page with the scene you want to display 3 Press the button in the center of the cursor button The selected scene is played back on the full screen The operation icon is automatically displayed on the LCD monitor 4 Press the cursor button up down left...

Страница 64: ...nother product may degrade or not play back data recorded on this unit Still picture playback JPEG still pictures continued MENU SETUP ENTER EXIT PLAY MODE LOCK PLAY SETUP PICTURE SLIDE SHOW DPOF SET Do not operate the mode dial during the slide show When the access lamp is lit do not insert or remove an SD card It takes time to display the still picture depending on the number of pixels of the st...

Страница 65: ...y a yellow frame When the button in the center is pressed again the selected scene will be canceled Up to 12 scenes displayed on a page can be set in succession 3 Only when SELECT is selected in step 1 Press the button If no file is selected in step 2 and the button is pressed the scene encircled by a red frame is deleted 4 When the confirmation message appears use the cursor button to select YES ...

Страница 66: ...d P105 Scenes that are locked cannot be deleted If the write protection switch on an SD card is set to LOCK the scenes on the card cannot be deleted P16 When CARD FULL is shown during recording delete unnecessary scenes If there are no scenes to be deleted it means that the memory is full so insert a new SD card In case of ALL the deletion may take time if there are many scenes on the SD card When...

Страница 67: ...n press the button in the center indication appears and the selected scene is locked Press the button in the center again to release the lock setting 2 or more scenes can be set in succession To complete the settings Press the MENU button Locking scenes This is for preventing scenes from being deleted by mistake MENU SETUP ENTER EXIT PLAY MODE LOCK PLAY SETUP YES NO DPOF SET MENU SETUP ENTER EXIT ...

Страница 68: ... initializing formatting cards MENU SETUP ENTER EXIT DISPLAY FORMAT CARD DATE TIME POWER SAVE SETUP YES NO 1 2 DATE FORMAT SETUP ENTER FORMAT CARD ALL DATA WILL BE DELETED FORMAT THE CARD NOW YES NO MENU EXIT Use this unit to format SD cards If an SD card is formatted on other equipment such as a PC the time spent for recording may become longer and you may not be able to use the SD card During fo...

Страница 69: ...r of pictures can be printed as you set the number of prints with the printer supporting DPOF The function can be canceled by setting the number of pictures to 0 2 or more scenes can be set in succession To complete the settings Press the MENU button To return the total number of pictures to 0 Press the menu button then use the cursor button to select PLAY SETUP DPOF SET CANCEL ALL P27 When the co...

Страница 70: ...D card is inserted in this unit the indication does not appear You cannot print any pictures When this unit and the printer are not connected properly the indication keeps blinking It will blink for over approx 1 minute Connect the cable or check the printer Do not use any other USB cables except the supplied one Operation is not guaranteed with any other USB cables DPOF setting continued The DPOF...

Страница 71: ... cursor button right to enter the date print setting If the printer is not capable of date printing this setting is unavailable 6 Use the cursor button to select PAPER SIZE then press the cursor button right to enter the paper size setting STANDARD Size specific to the printer 4k5 INCH L size 5k7 INCH 2L size 4k6 INCH Postcard size A4 A4 size You cannot set paper sizes not supported on the printer...

Страница 72: ...eturns to the thumbnails PictBridge continued SETUP DATE PRINT PAPER SIZE STANDARD PAGE LAYOUT PRINT PictBridge ENTER MENU RETURN YES NO SETUP DATE PRINT PAPER SIZE PAGE LAYOUT PRINT PictBridge ENTER MENU RETURN Avoid the following operations during printing These operations disable proper printing Disconnecting the USB cable Removing the SD card Switching the mode dial Turning off the power Check...

Страница 73: ...Turn on this unit then set the mode to or 3 Change the input channel on the TV TV setting Example Set the channel to VCR2 etc The channel set will differ depending on the terminal to which the cable is connected 4 Start playback on this unit P60 63 The image and audio are output on the TV If the image or audio from this unit is not output on the TV Check that the plugs are inserted as far as they ...

Страница 74: ...motion pictures on TV Depending on the TV connected the sides of the images the part outside the dotted line being played may not appear We recommend widening the recording range of the objects you want to record beforehand 1 16 9 screen 2 4 3 screen To display the on screen information on the TV The information displayed on the LCD monitor operation icon and mode indication etc can be displayed o...

Страница 75: ...es This is for copying recordings from a DVD recorder s SD card slot onto its hard disk If you cannot copy images recorded with this unit directly from an SD card connect this unit and the DVD recorder with the multi cable supplied You can then copy the images output on this unit For details on how to connect and record refer to the operating instructions of the device you are connecting to e g DV...

Страница 76: ... If Adobe Acrobat Reader is not installed in the PC used click the desired language in the setup screen or open a folder of which name is the name of the desired language in Adobe folder and then double click AR505XXX exe or AR500XXX exe file XXX the last 3 characters in the name of the file varies depending on the language folder you selected and follow the message on the screen to install Adobe ...

Страница 77: ... when devices are connected through USB hubs or by using extension cables proper operation is not guaranteed Use the supplied USB cable when connecting to the PC Operation is not guaranteed with any other USB cables IBM and PC AT are registered trademarks of International Business Machines Corporation of the U S Intel Pentium and Celeron are registered trademarks or trademarks of Intel Corporation...

Страница 78: ...r more 512 MB or more recommended Display High Color 16 bit or more 32 bit recommended Desktop resolution of 1024k768 pixels or more 1280k1024 pixels or more recommended Graphics card complying with DirectX 9 0b or 9 0c and DirectDraw overlay Free hard disk space Ultra DMA 33 or more 100 or more is recommended 640 MB or more When writing to DVD the same amount of free space as the disc is necessar...

Страница 79: ... 0 or 7 5 7 5 Windows XP only Sound Windows compatible sound device Drive CD ROM drive for installation Interface USB port Other requirements Mouse or equivalent pointing device To use this unit as a Web Camera the following conditions must be met For information about how to use Windows Messenger MSN Messenger read the help file The other parties also need to use the same software during the comm...

Страница 80: ...n properly if you cancel the installation at any point e g by pressing Cancel 3 Click Next Continue to follow the on screen messages to install it 4 Select the video system 5 Click Finish Depending on the operating environment you may be required to install DirectX 9 0b If so click Yes and install it If it is necessary to reboot the PC after the application has been installed click Yes and reboot ...

Страница 81: ...s XP installation may take some time depending on the environment 1 Insert the CD ROM into the PC The CD launcher starts Refer to page 82 if the CD launcher fails to start automatically after the CD ROM has been inserted into the PC 2 Click Web Camera Driver The software application may not run properly if you cancel the installation at any point e g by pressing Cancel 3 Click Next Installing the ...

Страница 82: ... application has been installed Do not remove the CD ROM After the PC has rebooted the installation of the Web camera driver starts from step 3 5 Click Finish Installing the Web Camera Driver continued The PC must be rebooted for the driver to work If the CD launcher fails to start automatically after the CD ROM has been inserted into the PC Select start My Computer or double click My Computer on ...

Страница 83: ...ect this unit s operation mode When this unit is in still picture playback mode connect it to a printer supporting PictBridge P70 2 Open this unit s terminal cover then firmly plug one end of the USB cable 1 supplied into the USB terminal and the other end into the terminal on the PC Insert the plugs as far as they will go The unit and PC will not operate properly if they are not inserted fully Do...

Страница 84: ...Folder structure of a removable disk The scenes recorded by this unit are stored in the following folders Do not use the PC to delete the SD card s folders Otherwise it may no longer be possible for this unit to read the SD card Always use this unit to format SD cards When data not supported by this unit has been recorded on a PC it will not be recognized by this unit Up to 999 scenes can be recor...

Страница 85: ...otionSD STUDIO 1 1E MotionSD STUDIO Let s Try MotionSD STUDIO is displayed on the screen Closing MotionSD STUDIO 1 Click at the very bottom of TOOL BOX MotionSD STUDIO can be closed by selecting File Exit on the MotionSD STUDIO menu If you use MotionSD STUDIO to edit images and then output them to an SD card use an SD card made by Panasonic or one that allows motion picture recording P16 If you us...

Страница 86: ... to the person you are communicating with Alternatively you can use the PC s speakers to configure a kind of Internet TV phone for communicating Outline view of equipment configuration when using the unit as a Web camera 1 Unit used as a Web Camera 2 Computers connected via the Internet You must use AC adaptors as the power supply for all the equipment You can use the PC s microphone instead of th...

Страница 87: ...81 1 Turn on the unit s power then set it to motion picture recording mode or still picture recording mode 2 Connect the unit to the PC via the USB cable P83 Do not use any other USB cables except the supplied one Operation is not guaranteed with any other USB cables 3 Select start All Programs Programs Windows Messenger or MSN Messenger 2 Windows XP Windows 2000 Windows Messenger MSN Messenger MS...

Страница 88: ...iver for operation Supplied CD ROM is available for Windows only Copying still pictures on PC 1 Connect this unit to the personal computer via the supplied USB connection cable 2 Double click NO_NAME or Untitled displayed on the desktop Files are stored in 100CDPFP folder in the DCIM folder 3 Using a drag and drop operation move the pictures you want to acquire or the folder storing those pictures...

Страница 89: ... that you no longer require 1 Click start Settings Add or Remove Programs Applications in Control Panel 2 Select the software application to be deleted then click Change Remove Change or Remove or Add Remove Proceed with the uninstallation by following the on screen instructions Select Panasonic SD Video Camera Web Driver to uninstall the Web camera driver To remove the Web camera driver from the ...

Страница 90: ... 1 Select start Settings Control Panel Performance and Maintenance System 2 Display Device Manager and check whether the driver has been installed properly Click the Hardware tab then click Device Manager If the driver has been recognized properly When the unit is in the motion picture recording or still picture recording mode Windows XP USB composite device is displayed at USB controller and USB ...

Страница 91: ...all the Web Camera Driver P81 and connect the USB cable again In the following cases the Web camera driver has not been installed properly When an exclamation mark appears at USB composite device under USB Universal Serial Bus controller or at USB video device under Imaging device When Web Camera is displayed at Other devices Remove the driver from Device Manager uninstall it P89 re install Web Ca...

Страница 92: ... on an SD Card Picture size 2048t1512 1280t960 Picture quality 8 MB 2 4 7 12 16 MB 7 12 20 32 32 MB 18 28 45 73 64 MB 38 61 96 155 128 MB 75 120 185 300 256 MB 155 250 390 620 512 MB 310 490 770 1230 1 GB 630 990 1550 2470 2 GB 1280 2010 3160 5030 4 GB 2520 3950 6200 9870 Picture size 640t480 1920t1080 Picture quality 8 MB 37 75 3 6 16 MB 92 185 10 16 32 MB 200 410 23 37 64 MB 430 850 50 80 128 MB...

Страница 93: ...enus BASIC SCENE MODE P46 PICTURE SIZE P55 PICT QUALITY P55 CLOCK SET P29 ADVANCE FLASH P57 RED EYE P57 FLASH LEVEL P58 O I S P44 REC LAMP P33 SHTR EFFECT P56 Menu list MENU SETUP ENTER EXIT SCENE MODE WIDE WIND CUT CLOCK SET BASIC OFF ON ON NO REC MODE SP MENU SETUP ENTER EXIT D ZOOM REC LAMP ZOOM MIC ADVANCE ON 25x OFF OFF OFF O I S MAGICPIX MENU SETUP ENTER EXIT DISPLAY FORMAT CARD DATE TIME SE...

Страница 94: ...icture playback menus For DELETE and SETUP items refer to the motion picture playback menus PLAY SETUP PLAY MODE P62 LOCK P67 DPOF SET P69 Menu list continued MENU SETUP ENTER EXIT SELECT ALL DELETE MENU SETUP ENTER EXIT PLAY MODE REPEAT PLAY PLAY SETUP RESUME PLAY LOCK VIEW ALL NO OFF OFF MENU SETUP ENTER EXIT DISPLAY FORMAT CARD DATE TIME POWER SAVE SETUP 1 2 DATE FORMAT ON D T NO 5 MINUTES M D ...

Страница 95: ...battery from running down When you use this unit turn it on again In the following cases the power may not turn off even when set POWER SAVE 5 MINUTES When connecting to the AC outlet When using the AC adaptor When connecting the unit to a PC or printer via the USB cable INITIAL SET YES NO When there is a menu that cannot be selected depending on a combination of functions set to YES for changing ...

Страница 96: ...D 1 60 Shutter speed OPEN F2 4 F number 6dB Gain value WEB CAMERA mode Soft skin mode Tele macro MagicPix function Zoom microphone Wind noise reduction Motion picture recording mode AUTO MNL O I S WEB ZOOM XP SP LP Sports mode Portrait mode Low light mode Spotlight mode Surf snow mode Auto white balance Indoor mode recording under incandescent lamp Outdoor mode Manual adjustment mode ß ßs ßr ßA ßA...

Страница 97: ... 1920k1080 PictBridge 2048 pixels or more 1600 or more less than 2048 pixels 1280 or more less than 1600 pixels 1024 or more less than 1280 pixels 800 or more less than 1024 pixels 640 or more less than 800 pixels The size is not displayed at under 640 pixels For pictures not recorded with this unit the size display is determined as follows according to the number of horizontal pixels If this numb...

Страница 98: ...is full No further data can be recorded Delete motion picture files or insert a new SD card P15 65 UNPLAYABLE CARD The data on the SD card cannot be played back FILE LOCKED You are attempting to erase protected files P67 NOW ACCESSING PLEASE DO NOT REMOVE CARD Data processing is now underway Close the card slot cover and wait a few moments NO DATA There are not any still pictures and motion pictur...

Страница 99: ...the connected printer NO PAPER IN PRINTER PRINTER ERROR PLEASE CONNECT AC ADAPTOR AND BATTERY The AC adaptor has not been connected or the battery has not been inserted while the unit is connected to the PC in PC Connection mode CHANGE MODE TO USE USB The USB cable is connected in the motion picture playback mode DISCONNECT USB CABLE Another mode has been selected from the PC Connection mode while...

Страница 100: ...to AC adaptor or the remaining capacity of the battery is enough FINISHED When the remaining capacity of the battery is low PLEASE CONNECT AC ADAPTOR OR CHANGE BATTERY NO CANNOT USE THIS CARD IN VIDEO MODE WITHOUT REPAIRING DATA ERROR When you recover files or delete play lists you can record or play motion pictures again Therefore be sure to follow the instruction When data recorded on another de...

Страница 101: ...Pix set and cancel Flash In motion picture recording mode During demo mode Scene mode When setting the AUTO MANUAL FOCUS switch to AUTO When the MagicPix function is used Zoom When the record button is pressed halfway in still picture recording Functions Conditions which disable the functions Change of white balance When digital zoom 10k or higher is used When the MagicPix function is used Adjusti...

Страница 102: ...n out The battery has a limited life If the operating time is still too short even after the battery is fully charged depending on the usage the battery has worn out and can no longer be used This unit cannot be operated though powered up This unit does not operate normally This unit cannot be operated unless you open the LCD monitor Press the RESET button P105 If normal conditions are not restore...

Страница 103: ...Use an SD card that can be used for motion picture recording P35 36 Auto focus function does not work Is manual focus mode selected If auto mode is selected focus is automatically adjusted P33 Are you trying to record a scene which is hard to bring into focus in auto focus mode There are some recording subjects and surroundings for which the auto focus does not operate correctly P108 If so use the...

Страница 104: ...ng to record small or finely detailed objects with PICT QUALITY set at If you try to record small or finely detailed objects with PICT QUALITY set at the images may break up into a mosaic like pattern Record with PICT QUALITY set at instead P55 A scene recorded on an SD card cannot be deleted Is the scene locked Locked scenes cannot be deleted P67 For the SD card if its write protect switch is set...

Страница 105: ...e reset Set the date and time again Even after you press the RESET button the indication may still appear repeatedly If so this unit needs repair Detach the power connected and consult the dealer who you purchased this unit from Do not attempt to repair the appliance by yourself If the SD card is inserted in another device it is not recognized Check that the device is compatible with the capacity ...

Страница 106: ...plastic bag remove as much of the air from inside the bag as possible then seal the bag Leave the unit for about an hour in the room so the temperature of the unit is close to the ambient temperature of the room then use it What to do with the lens is fogged up Remove the battery or disconnect the AC adaptor and leave the unit for about 1 hour When the unit becomes close to the ambient temperature...

Страница 107: ... effective range of automatic white balance adjustment the image will become reddish or bluish Even within the effective range of automatic white balance adjustment the automatic white balance adjustment may not function properly if there is more than one light source For light outside the functional auto white balance adjustment range use the manual white balance adjustment mode White balance The...

Страница 108: ...ject to be recorded The focus may become blurry when recording subjects at the seashore in night views or in scenes involving fireworks or special lights Recording a subject in dark surroundings The unit cannot focus correctly because the light information that comes through the lens decreases considerably Recording a fast moving subject As the focus lens inside moves mechanically it cannot keep u...

Страница 109: ...nd the surface finish may peel off Do not leave rubber or plastic products in contact with the unit for a long time When you use the unit in a sandy or dusty place such as a beach do not let sand or fine dust get into the body and terminals of the unit Also keep the unit away from sea water Sand or dust may damage the unit Care should be taken when inserting and removing an SD card If sea water sp...

Страница 110: ... capacity Dust and other matter attached to the battery terminals should be removed Prepare spare batteries when going out for recording In cold places such as a ski resort the period during which you can record pictures is shortened When you travel do not forget to bring an AC adaptor supplied so that you can recharge the batteries at your destination If you drop the battery accidentally check to...

Страница 111: ...ard rotate the mode dial turn off the power or cause any vibrations or impacts Do not leave the SD card in places where there is high temperature or direct sunlight or where electromagnetic waves or static electricity are easily generated Moreover do not fold or drop the SD card and do not strongly vibrate it The SD card may break or the contents of the card may be destroyed or erased After use be...

Страница 112: ... 46 7 mm to 467 mm 16 9 Still picture 43 4 mm to 434 mm 4 3 47 0 mm to 470 mm 16 9 Tele macro function provided full range AF Filter diameter 37 mm Zoom 10k optical zoom 25 700k digital zoom Monitor 2 8q wide LCD monitor approx 210 K pixels Microphone Stereo with a zoom function Speaker 1 dynamic type White balance adjustment Auto tracking white balance system Standard illumination 1 400 lx Minimu...

Страница 113: ...parts Mass Approx 250 g 8 82 oz Mass in operation Approx 290 g 10 23 oz with SD Card and supplied battery Operating temperature 0 oC to 40 oC 32 oF to 104 oF Operating humidity 10 to 80 Battery operation time See page 18 Compression MPEG2 SD Video standard compliant Picture size 704k480 Transfer rate Approx 10 Mbps VBR 30 fps Approx 5 Mbps VBR 30 fps Approx 2 5 Mbps VBR 30 fps Audio compression MP...

Страница 114: ... your safety Battery pack Information for your safety Specifications continued Power source AC 100 V to 240 V 50 60 Hz Input capacitance 0 25 A Output DC 9 3 V 1 0 A Maximum voltage DC 8 4 V Nominal voltage DC 7 4 V Rated capacitance 760 mAh ...

Страница 115: ... 1 800 272 7033 For assistance in Puerto Rico call Panasonic Puerto Rico Inc 787 750 4300 or fax 787 768 2910 Limited Warranty Limits And Exclusions This warranty ONLY COVERS failures due to defects in materials or workmanship and DOES NOT COVER normal wear and tear or cosmetic damage The warranty ALSO DOES NOT COVER damages which occurred in shipment or failures which are caused by products not s...

Страница 116: ...LIMITED TO THE PERIOD OF THE LIMITED WARRANTY Some states do not allow the exclusion or limitation of incidental or consequential damages or limitations on how long an implied warranty lasts so the exclusions may not apply to you This warranty gives you specific legal rights and you may also have other rights which vary from state to state If a problem with this product develops during or after th...

Страница 117: ... Company 410B Airport Road Elgin IL 60123 9333 Attention Digital Camcorder Repair Dept Please carefully pack and ship prepaid and insured to the Elgin Centralized Factory Servicenter Customer s in Puerto Rico please ship or carry in to location below Service in Puerto Rico Phone 787 750 4300 Fax 787 768 2910 Purchase Parts Accessories and Instruction Books online for all Panasonic Products by visi...

Страница 118: ...33 Attn Digital Camcorder Repair Dept RequestforServiceNotice Please photocopy this form when making a request for service notice in the unlikely event this product needs service Please include your proof of purchase Failure to do so will delay your repair To further speed your repair please provide an explanation of what is wrong with the unit and any symptom it is exhibiting ...

Страница 119: ...cture playback 60 Motion picture recording 34 MPEG2 34 60 108 N Number of recordable pictures 92 O One touch navigation 23 Operation icons 25 P PictBridge 70 Picture quality 55 Picture size 55 PLAY MODE 62 64 Playing back motion pictures by date 62 Power save 95 Q Quick start 19 R Record button 34 Recording mode of the motion pictures 35 Recording time elapsed 34 Recording yourself 22 Red eye redu...

Страница 120: ...eta tiene que estar hacia usted y tiene que introducirla completamente de un golpe Cuando quita una tarjeta SD abra la tapa de la ranura de la tarjeta y pulse el center de la tarjeta SD y luego tire de ella hacia fuera 3 Cierre firmemente la tapa de la ranura de la tarjeta Cómo insertar quitar la batería 1 Quite la tapa de la batería 1 Mientras aprieta la tapa de la batería 2 deslícela en la direc...

Страница 121: ...r que la carga ha empezado La carga está completa cuando la luz indicadora se apaga Encendido apagado de la unidad Cómo encender la unidad Ponga el interruptor de encendido en ON El indicador de estado 1 se ilumina de color rojo en el modo de grabación de imágenes dinámicas o en el modo de grabación de imágenes fijas la tapa del objetivo se abre Cómo apagar la unidad Ponga el interruptor de encend...

Страница 122: ...e el botón de grabación a medias no completamente para enfocar al sujeto Solo en el modo de enfoque automático 1 Señal de obturador posible 2 Área de enfoque 3 Velocidad del obturador 4 Iris ganancia La velocidad del obturador y el valor de iris ganancia son fijos y la unidad enfoca al sujeto automáticamente Cuando se pulsa a medias el botón de grabación la señal de obturador posible se indica de ...

Страница 123: ...ción rápida hacia delante Siga pulsando 9 Para detener la reproducción y mostrar las miniaturas Pulse Reproducción de imágenes fijas 1 Gire el selector de modo para seleccionar La tapa del objetivo se cierra automáticamente 2 Pulse los botones de las flechas hacia arriba hacia abajo hacia la izquierda o hacia la derecha para llevar a cabo las distintas operaciones La exposición de diapositivas rep...

Страница 124: ...ustrial Co Ltd C Panasonic Consumer Electronics Company Division of Panasonic Corporation of North America One Panasonic Way Secaucus NJ 07094 Panasonic Puerto Rico Inc Ave 65 de Infantería Km 9 5 San Gabriel Industrial Park Carolina Puerto Rico 00985 ...

Отзывы: