background image

37

RQT7502

Reference

Picture

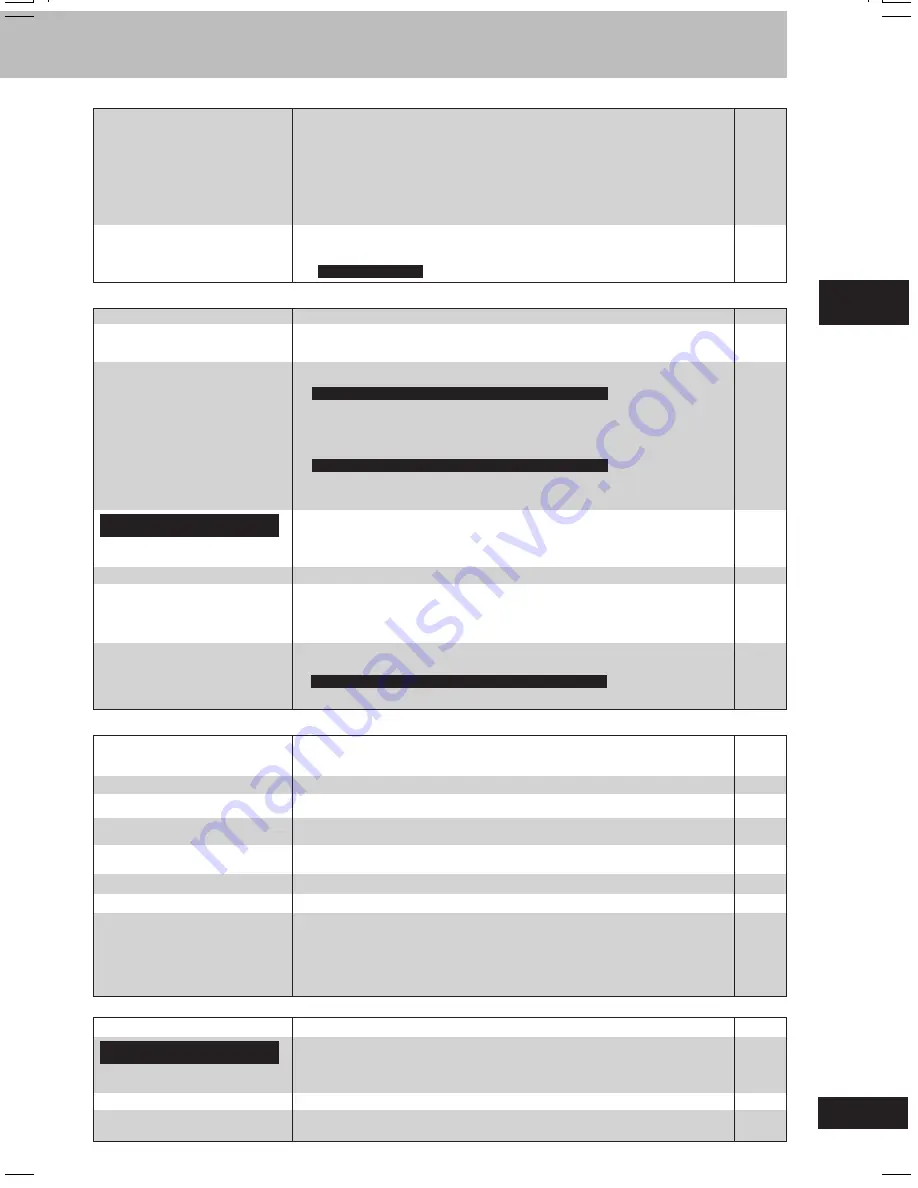
Picture distorted.
No picture.

The picture shown on the television
is not normal.
(The sides of the picture are
cut off, the picture is stretched
horizontally, or black bands appear
at the top and bottom
of the screen.)

For Saudi Arabia, Kuwait, the Middle East and
Southeast Asia

There is ghosting when
progressive output is on.

Picture quality is poor.

The picture on the television
disappears or stripes appear
on the screen.

Menus not displayed correctly.

Some distortion is normal during SEARCH.

Check the connection.

Make sure the television is on.

Ensure the television’s video input setting (e.g., VIDEO 1) is correct.

Go to “Video” tab in the SETUP menus, and change “TV Aspect” to suit your television.

Use the television to change the aspect to the correct one.

If your television cannot change the aspect when input is progressive,

 try

changing 4:3


Aspect in Display Menu.

Ensure that the unit is connected directly to the television, and is not connected
through a video cassette recorder.

Change the size with the zoom function.

Connect to the component video (480P) input terminals on a television compatible
with this unit’s copy guard system. You cannot view progressive video if your
television is not compatible.

Change “Video Output Mode” to “480I” so “PROGRESSIVE” on the display goes
out. This problem is caused by the editing method or material used on DVD-Video,
but should be corrected if you use interlace output.

Check the settings in Picture Menu.

Mobile telephone chargers can cause some disturbance.

The location and orientation of the antenna are incorrect. If you are using an
indoor antenna, change to an outdoor antenna.

The television antenna wire is too close to the unit. Separate the antenna wire of
the television from the unit.

Change the zoom ratio to “x1.00”.

Set “Subtitle Position” in Display Menu to “0”.

Set “4:3 Aspect” in Display Menu to “Normal”.

Sound

No sound.
Distorted sound.

Piercing noise comes from the
speakers.

Check the connections.

Turn the volume up.

Turn muting off.

Turn Advanced surround off if it causes distortion.

Switch off the unit, determine and correct the causes, then switch the unit on.
Causes include:
– Shorting (bare wires touching) of positive and negative speaker wires.
– Using speakers with an impedance lower than that rated for this unit.
– Straining of the speakers through excessive volume or power.
– Using the unit in a hot environment without proper ventilation.

If you have connected this unit to other equipment through the OPTICAL OUT
terminal, ensure you have selected the correct settings for “Dolby Digital”, “DTS
Digital Surround” and “MPEG

\

” in the SETUP menus’ “Audio” tab.

Unit displays

The display is dark.

“DVD NO PLAY”

“DVD NO DISC”

“F61”

“DVD U11”

“ERROR”

“DVD H

MM

MM


stands for a number.

Press [SHIFT]+[DIMMER] until the display returns to the original brightness.

You inserted a disc which the unit cannot play; insert one that can.

You inserted a blank DVD-RAM disc.

You haven’t inserted a disc; insert one.

You haven’t inserted the disc correctly; insert it correctly.

Check and correct the speaker cord connections.
If this does not fix the problem, there is a power supply problem. Consult the dealer.

Disc is dirty. Wipe it clean.

Incorrect operation performed. Read the instructions and try again.

Trouble may have occurred. The number following “H” depends on the status of the unit.

Reset procedure:

Press [

f

] to switch the unit to the standby mode and then back to ON. Alternatively, press

[

f

] to switch the unit to the standby mode, disconnect the AC mains lead, and then

reconnect it.

If the service numbers fail to clear, note the service number and contact a qualified
service person.

For Australia, N.Z., Saudi Arabia, Kuwait, the Middle East and Southeast Asia

Although the unit is on standby
mode, the display lights up and
changes continuously.

Turn off the demo function.

If you set the clock, demo function will be turned off automatically.

For Australia, N.Z., Saudi Arabia, Kuwait, the Middle East and Southeast Asia

Television displays

You are trying to display incompatible contents.

Go to “Video” tab in the SETUP menus, and select “Enable” in “Progressive Out
(Component)”.

Go to “Display” tab in the SETUP menus, and select “On” for “On-Screen Messages”.

Go to “Disc” tab in the SETUP menus, and select the preferred language for “Menus”.

6

29
28

32

9
9

29

5

12, 39

6

5

32

33

31


7

32

21

21

7

20

20

35

21

21

21

\

  Except for Southeast Asia

For Australia, N.Z., Saudi Arabia, Kuwait, the Middle East and Southeast Asia

“Cannot display group xx, content xx.”

For Saudi Arabia, Kuwait, the Middle East and

Southeast Asia

“The progressive out is set to
“Disable”.

No on-screen display.

The disc’s menu is displayed
in a different language.

RQT7502_36_37_new

3/16/04, 3:14 PM

37

Содержание SCPM39D - MINI HES W/CD PLAYER

Страница 1: ...sold For the United Kingdom Continental Europe Saudi Arabia Kuwait and the Middle East The region number of this player is 2 The player will play DVD Video marked with labels containing 2 or ALL Example For Southeast Asia The region number of this player is 3 The player will play DVD Video marked with labels containing 3 or ALL Example For Australia and N Z The region number of this player is 4 Th...

Страница 2: ...s 1 Remote control For Saudi Arabia Kuwait the Middle East and Southeast Asia N2QAJB000100 For others N2QAJB000099 1 AC mains lead For the United Kingdom Saudi Arabia Kuwait and the Middle East only RJA0053 3X For Australia and N Z K2CJ2DA00008 1 AM loop antenna N1DAAAA00001 1 Video cable RJL1P016B15A Note The included AC mains lead is for use with this unit only Do not use it with other equipment...

Страница 3: ...nd 28 Multi Re master Enjoying more natural sound 28 Changing sound field and quality 28 To enjoy even higher quality sound AUDIO ONLY 28 Other functions Convenient functions 29 Auto off function 29 Dimming the display 29 Enjoying more powerful bass 29 Muting the volume 29 Using headphones 29 The play record timer 30 The sleep timer 31 Operating a television 31 Discs Changing the player s setting ...

Страница 4: ...correspond with the coloured markings identifying the terminals in your plug proceed as follows The wire which is coloured Blue must be connected to the terminal which is marked with the letter N or coloured Black or Blue The wire which is coloured Brown must be connected to the terminal which is marked with the letter L or coloured Brown or Red WARNING DO NOT CONNECT EITHER WIRE TO THE EARTH TERM...

Страница 5: ...can play PAL and NTSC but your television must match the system used on the disc PAL discs cannot be correctly viewed on an NTSC television This unit can convert NTSC signals to PAL 60 for viewing on a PAL television A page 32 Video tab NTSC Disc Output Discs information Recorded using Version 1 1 of the Video Recording Format a unified video recording standard Recorded using the DCF Design rule f...

Страница 6: ...speakers further away from the television Caution Use the speakers only with the recommended system Failure to do so may lead to damage to the amplifier and or the speakers and may result in the risk of fire Consult a qualified service person if damage has occurred or if you experience a sudden change in performance Do not attach these speakers to walls or ceilings Simple setup Locating STEP1 Conn...

Страница 7: ...n the VIDEO OUT terminal by separating the chrominance C and luminance Y signals Actual results depend on the television For Australia N Z Saudi Arabia Kuwait the Middle East and Southeast Asia only 7 7 7 7 7 Connecting a television with COMPONENT VIDEO IN terminals FM ANT OPTICAL OUT S VIDEO OUT VIDEO OUT AC IN SUBWOOFER OUT R L AUX AM ANT HAUT PARLEURS HIGH 6Ω SPEAKERS SB PM39 LOW 6Ω R L COMPONE...

Страница 8: ...he same time heat or expose to flame take apart or short circuit attempt to recharge alkaline or manganese batteries use batteries if the covering has been peeled off Mishandling of batteries can cause electrolyte leakage which can damage items the fluid contacts and may cause a fire Remove if the remote control is not going to be used for a long period of time Store in a cool dark place 7 7 7 7 7...

Страница 9: ...ning on the demo The display changes each time the button is held down Demonstration demo on A NO DEMO off You can reduce the power consumed in standby mode by turning the demonstration off Note You cannot turn the demo function on and off when the unit is on DEMO function 1 Select CLOCK 3 Press to finish setting the time 2 Select DVD CD 3 Shows QUICK SETUP screen 4 Select the option from the scre...

Страница 10: ... VOL UP DOWN volume control knob 12 28 STOP stop demonstation button 9 12 DEMO 1 5 disc direct play buttons 13 Disc trays 12 TUNER AUX button 22 34 Remote control sensor DVD CD button 12 AC IN AC supply indicator This indicator lights when the unit is connected to the AC mains supply standby on switch Press to switch the unit from on to standby mode or vice versa In standby mode the unit is still ...

Страница 11: ...While pressing SHIFT press the corresponding button áMuting TV AV button MUTING TV AV 29 31 àPlay timer record timer Auto off button rPLAY REC AUTO OFF 29 30 âFL display Dimmer button FL DISPLAY DIMMER 9 22 29 äSurround Multi re master button SURROUND M RE MASTER 28 ãSound Audio only button SOUND A ONLY 28 åNumbered buttons 0 9 X X X X X10 13 çPosition memory button P MEMORY 14 éQuick replay butto...

Страница 12: ...ring pause SLOW SEARCH VOLUME Select Confirm 1 Open the disc tray The unit turns on automatically and a tray opens 3 Close the disc tray 2 Place disc Load double sided discs so the label for the side you want to play is facing up A page 39 Tray disc handling procedure Remove TYPE 2 and 4 discs from their cartridges before use Read the instructions for the disc carefully 4 Start play The stopped pl...

Страница 13: ... 123 1 A 2 A 3 A ENTER Press SHIFT CANCEL to cancel the number s DVD A DVD V Shows a disc top menu DVD V Shows a disc menu VCD Shows a disc menu ALL DISC ON ALL DISC OFF DVD discs and JPEG tracks are skipped HighMAT menus and video CD playback control are disabled The mode cannot be changed during program or random play You can also remove a disc while another is playing except in all disc random ...

Страница 14: ...ll disc repeat Soundtracks RAM DVD A DVD V VCD Discs with multiple soundtracks During play For Saudi Arabia Kuwait the Middle East and Southeast Asia Press SHIFT AUDIO to select the soundtrack For others Press DISPLAY then 9 8 to select Audio soundtrack RAM VCD You can also use this button to select L R or L R A page 19 Audio Subtitle DVD A Motion picture parts only DVD V Discs with multiple subti...

Страница 15: ...Press PGM PGM appears 3 Press the numbered buttons to select the items WMA MP3 JPEG then press ENTER Repeat this step to program other items VCD CD Step 1 is unnecessary when programming tracks on the same disc DVD A DVD V WMA MP3 JPEG To select an item using the cursor buttons Press ENTER and 8 8 8 8 8 9 9 9 9 9 to select an item then press ENTER again to confirm the number All the items on the d...

Страница 16: ...and press ENTER The search results screen appears 4 Press 8 8 8 8 8 9 9 9 9 9 to select the content or group and press ENTER To return to the menu Press RETURN Example WMA MP3 Navigation menu Example JPEG Thumbnails Navigation Menu 1 5 MP3 1 54 Lirkin Park Meteora Lirkin Park Hybrid Theory 09 A Pla Sep 15 2003 Lirkin Park Meteora The Ultimate DISPLAY to display the sub menu RETURN to exit Group 00...

Страница 17: ...x folder and file names with 3 digit numbers in the order you want to play them this may not work at times Files must have the extension WMA or wma MP3 or mp3 JPG jpg JPEG or jpeg WMA Noise may occur when playing WMA files You cannot play WMA files that are copy protected MP3 This unit is not compatible with ID3 tags If you play an MP3 track that includes still picture data it will take some time ...

Страница 18: ... a group of scenes and a play list created on other equipment such as a DVD video recorder The play list can be selected only if the disc contains a play list Press ANGLE PAGE to skip 10 lines at a time Indication on the main unit PL Play list number Playing the programs on DVD RAM 1 11 1 WED 12 05 Friends of a feather 2 1 1 MON 1 05 Sunny day 3 2 2 TUE 2 21 Penguins habitat 4 3 3 WED 3 37 Irresis...

Страница 19: ... are accompanied by still pictures Audio attributes See A A page 21 Audio attributes 1 2 3 Subtitle DVD A Motion picture parts only DVD V Discs with multiple subtitle languages VCD SVCD only To clear or display the subtitles Press 8 9 to select On or Off Subtitle on or off RAM Marker VR RAM To recall a marker recorded on DVD Video recorders Still Picture DVD A To view the still pictures Angle DVD ...

Страница 20: ...ng film material Auto2 For viewing film material the same as Auto 1 but able to convert 30 frame per second progressive video Video For video material Ä Å Audio Menu Advanced Surround RAM DVD A DVD V VCD CD WMA MP3 2 channels or more Enjoy a surround like effect when using front speakers or headphones The effect broadens when playing discs with surround effects and sound seems to come from speaker...

Страница 21: ... 4 3 Aspect RAM DVD A DVD V VCD JPEG For Australia N Z Saudi Arabia Kuwait the Middle East and Southeast Asia To select how to show images made for 4 3 aspect screens on a 16 9 aspect television Normal Laterally stretches images Auto Expands 4 3 letterbox images to fill more of the screen Other images appear in full in the center of the screen Shrink Images appear in the center of the screen Zoom ...

Страница 22: ...g or FM AM AUX TUNER AUX VOLUME Press and hold or until the frequency starts scrolling to start automatic tuning Tuning stops when a station is found ST is displayed when a stereo FM broadcast is being received If noise is excessive in FM 1 Press PLAY MODE to display MONO 2 Press PLAY MODE again to cancel the mode The mode is also cancelled when you changed the frequency Program type displays NEWS...

Страница 23: ...elect the reverse mode B 3 Start play Every press will change the direction F 3 Forward side front side will play 4 R Reverse side will play 4 Adjust the volume B Reverse mode selection Every time you press PLAY MODE One side is played Both sides are played forward reverse Both sides are played repeatedly until L STOP is pressed To fast forward or rewind the tape FF CANCEL or REW SETUP To fast for...

Страница 24: ...e Every time you press the button One side only records Both sides record forward reverse is automatically changed to when SHIFT aREC main unit REC is pressed Recording from disc s Do the preparatory steps A see above Insert the disc s you want to record A page 12 Discs Basic play STOP DISC ALL DISC TAPE REC SHIFT To stop recording disc play stops automatically Press L STOP Front side The interrup...

Страница 25: ...lume surround effects sound field and quality Recording level is set automatically The volume sound field and quality has no effect on recording They can be adjusted for playback Multi channel sources are automatically down mixed to 2 channels during recording Erasure prevention Use a screwdriver or similar object to break out the tab To record on the tape again cover the hole with an adhesive tap...

Страница 26: ...nd no vocal may be reversed Vocal mute function Use this function when enjoying sources not formatted for karaoke The voice portion of the track is blocked out but not the background music Press SHIFT V MUTE to switch the function on or off You need software recorded in stereo sound if you want to use the vocal mute function Voice and or static may be reproduced with the following types of softwar...

Страница 27: ... 6 to 6 Adding an echo effect SHIFT ECHO ECHO OFF ECHO 1 ECHO 2 ECHO 3 ECHO 4 off The effect increases with the level To record your karaoke performance Do preparatory steps A page 24 Recording When singing along with discs Insert the disc s you want A page 12 Discs Basic play Press DVD CD and then L STOP When singing along with radio Select your desired station A page 22 The radio When singing al...

Страница 28: ...und field and sound quality SHIFT M RE MASTER SURROUND Advanced Surround Changing sound field and quality To enjoy even higher quality sound Multi Re master During play See below for details SHIFT M RE MASTER SURROUND A ONLY SOUND A ONLY SOUND SHIFT Changing sound field and quality Preset EQ 1 Press and hold SOUND to select PRESET EQ Every time you press and hold the button MANUAL EQ PRESET EQ 2 P...

Страница 29: ...eturn to the original brightness press SHIFT DIMMER again Enjoying more powerful bass Connect an active subwoofer not included See below for connection Place the subwoofer as close as possible to the front center AM ANT EXT LOOP 75Ω FM ANT OPTICAL OUT AC IN SUBWOOFER OUT R L AUX HIGH 6Ω LOW 6Ω R L Audio cable not included To the subwoofer s input terminal Muting the volume Press MUTING Volume is r...

Страница 30: ...erate Play timer Play will start in the set condition at the set time with volume increasing gradually to the set level Record timer The unit comes on 30 seconds before the set time with the volume muted To cancel the timer Press rPLAY REC to clear the timer indicator from the display The timer comes on at the set time everyday if the timer is on To change the settings when the unit is on To chang...

Страница 31: ...Go right Select Confirm The settings remain intact even if you switch the unit to standby Underlined items are the factory preset 7 7 7 7 7 Disc tab To choose the language and set a rating level 1 Shows SETUP menu 2 Select the menu tab 3 Select the item 4 Make the settings 5 Press to exit Audio English Language options Language options Choose the audio language Original 1 Other 2 4 5 French German...

Страница 32: ... is out of sync with the video AV Output 4 A page 7 Television Video Choose the video signal format to be output from the SCART AV S Video terminal RGB Still Mode Automatic Field Specify the type of picture shown when paused Frame NTSC Disc Output PAL60 When connected to a PAL television Choose PAL 60 or NTSC output when playing NTSC discs A page 5 NTSC When connected to an NTSC television Video s...

Страница 33: ...respective of the setting Some equipment cannot handle sampling frequencies of 88 2 kHz even if they can handle 96 kHz Read your equipment s operating instructions for details Dolby Digital DTS Digital Surround and MPEG Bitstream Factory preset for Dolby Digital Select if the equipment you connected can decode the signal PCM Factory preset for DTS Digital Surround and MPEG Select if the equipment ...

Страница 34: ...perating instructions The equipment connections described are examples only Peripheral equipment and optional cables are sold separately unless otherwise indicated Using an external unit You can playback the sound from a video cassette recorder tape deck laser disc player etc through this unit s speaker AUDIO OUT R L Audio cable not included Video cassette recorder not included FM ANT OPTICAL OUT ...

Страница 35: ... The antenna should be installed by a competent technician AM outdoor antenna AM loop antenna included 5 12m 1 2 EXT AM ANT LOOP Run a piece of vinyl wire horizontally across a window or other convenient location Leave the loop antenna connected Note Disconnect the outdoor antenna when the unit is not in use Do not use the outdoor antenna during a lightning storm AM outdoor antenna not included Sa...

Страница 36: ...ber is the same or includes the Cover same region number as the unit or if DVD Video is marked ALL Confirm the region number for the unit on the rear panel The disc may be dirty and may require cleaning 5 Ensure that the disc is loaded with the label of the side to be played facing upwards 12 Check that the DVD RAM has something recorded on it This function is dependent on software availability Tr...

Страница 37: ...r wires Using speakers with an impedance lower than that rated for this unit Straining of the speakers through excessive volume or power Using the unit in a hot environment without proper ventilation If you have connected this unit to other equipment through the OPTICAL OUT terminal ensure you have selected the correct settings for Dolby Digital DTS Digital Surround and MPEG in the SETUP menus Aud...

Страница 38: ...0 dB at 999 kHz 560µV m Preset stations 15 CASSETTE DECK SECTION Track system 4 track 2 channel Heads Record playback Solid permalloy head Erasure Double gap ferrite head Motor DC servo motor Recording system AC bias 100 kHz AC erase 100 kHz Tape speed 4 8 cm s Overall frequency response 3 6 dB at DECK OUT Normal TYPE I 35 Hz 14 kHz S N ratio 50 dB A weighted Wow and flutter 0 18 WRMS Fast forward...

Страница 39: ... quality is high A field still is not blurred but it has only half the information of a frame still so picture quality is lower Interlace and progressive output NTSC the video signal standard has 480 interlaced I scan lines whereas progressive scanning uses twice the number of scan lines This is called 480P The video signals output from this unit s COMPONENT VIDEO OUT terminals Y PB PR allow you t...

Страница 40: ...SIMILAR ITEMS DO NOT PLACE SOURCES OF NAKED FLAMES SUCH AS LIGHTED CANDLES ON THE UNIT DISPOSE OF BATTERIES IN AN ENVIRONMENTALLY FRIENDLY MANNER VAROITUS ÄLÄ ASENNA TAI LAITA TÄTÄ LAITETTA KABINETTITYYPPISEEN KIRJAKAAPPIIN TAI MUU HUN SULJETTUUN TILAAN JOTTA TUULETUS ONNISTUISI VARMISTA ETTÄ VERHO TAI MIKÄÄN MUU MATERIAALI EI HUONONNA TUULE TUSTA JOTTA VÄLTETTÄISIIN YLIKUUMENEMIS ESTA JOHTUVA SÄH...

Отзывы: