RQ
T
8
9
2
6
71
You can set if this unit will use Music Shuffle information
included in the track when generating Music Shuffle lists.
From the Main Screen (
➜
page 30)
1
Press [SUB MENU].
2
Press [
3 4
] to select “Track Manager” and press
[ENTER].
3
Press [
3 4
] to select “Setting of Music Shuffle Info”
and press [ENTER].
4
Press [
2 1
] to select an item and press [ENTER].
Yes: This track can appear in Music Shuffle lists.
No: This track will not appear in Music Shuffle lists.
5
Press [ENTER].
To return to the previous screen
Press [RETURN].
You can clear the history and create new “Most Often Played”
or “Recently Ripped” playlists.
1
While stopped, press [SUB MENU].
2
Press [
3 4
] to select “Edit Playlist” and press
[ENTER].
3
Press [
3 4
] to select “Clear History of Most Often
Played playlist” or “Clear History of Recently Ripped
playlist” and press [ENTER].
e.g., When “Clear History of Recently Ripped playlist” is
selected.
4
Press [
2 1
] to select “Yes” and press [ENTER].
To return to the previous screen
Press [RETURN].
Setting of Music Shuffle information
Clearing the history for “Most Often
Played” and/or “Recently Ripped”
playlists
Note regarding editing playlists
If you try to edit playlists that cannot be edited, the
message “You cannot change the name of this playlist.”
etc. will be displayed. Switch to a playlist that can be
edited and then make changes.
No
Yes
Settin
g
of Music Shuffle Info
Do you want to use Music Shuffle information of
this track?
ENTER
RETURN
No
Yes
Clear History of Recently Ripped playlist
The record of the Recently Ripped playlist will be
erased.
Do you want to continue?
ENTER
RETURN
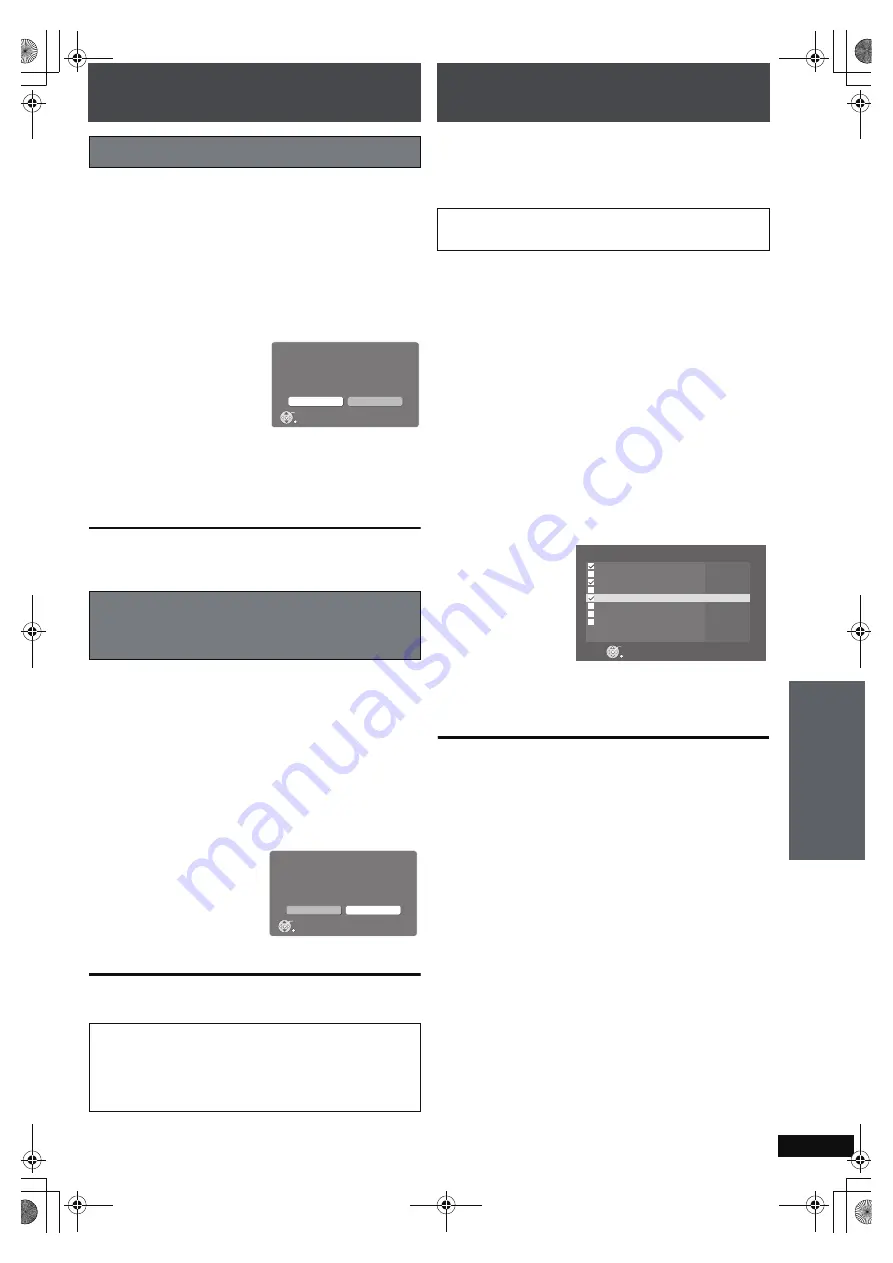
Deleting tracks
[HDD]
Unnecessary tracks can be deleted from the HDD. You can
select and delete a single track, or several tracks at once from
a playlist.
Preparation
1 To display the picture turn on the television and select the
appropriate video input to suit the connections to this unit.
2 Press [
Í
].
3 Press [MUSIC COLLECTION] to switch the selector to
“Music Collection”.
While the playlist containing the track that you want to delete is
stopped,
1
Press [SUB MENU].
2
Press [
3 4
] to select “Track Manager” and press
[ENTER].
3
Press [
3 4
] to select “Erase Selected Tracks” and
press [ENTER].
4
Press [
3 4
] to select the track and press [
2 1
] to
add a check mark.
Repeat step 4 to select all the tracks you want to delete.
5
Press [ENTER].
6
Press [
2 1
] to select “Yes” and press [ENTER].
To return to the previous screen
Press [RETURN].
[Note]
≥
When a track is deleted, it will also be deleted from any
playlists containing the track.
[Tips]
≥
You can also perform the operations above from the Track
List. Press [
3 4
] to select “Erase Selected Tracks” and
press [ENTER]. Then operate from step 4.
≥
To add or remove check marks to a group of tracks
1 Press [SUB MENU].
2 Press [
3 4
] to select “Mark All” or “Unmark All”.
Tracks that are deleted cannot be recovered, therefore
carefully check the tracks before deleting them.
Eine Kleine Nacht Musik
Music Collection
Erase Selected Tracks
[LEFT/RIGHT] to check/uncheck
ENTER
Cancel
Le nozze di Fi
g
aro, overture
Six German Dances
Symphony No.34
The Elopement from the Harem, overture
Symphony No.35 “Haffner”
Symphony No.40
Turkischer Marsch
Mozart
Mozart
Mozart
Mozart
Mozart
Mozart
Mozart
Mozart
Editin
g
A
d
v
a
n
ced
O
p
er
at
io
ns
PTX79P.book Page 71 Monday, April 9, 2007 9:24 AM


