35
RQT7436
T
rou
b
le
s
hoo
ting guide
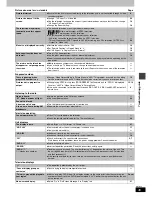
Picture abnormal or un-viewable
Page
Progressive video
Listening to the radio
Television operation
Unit displays
Television displays
Picture distorted.
≥
Ensure that the unit is connected directly to the television, and is not connected through a video
cassette recorder.
8
Picture size doesn’t fit the
screen.
≥
Change “TV Aspect” in “Video” tab.
≥
Use the television to change the aspect. If your television does not have that function, change
“4:3 Aspect” in Display Menu.
≥
Change the Zoom setting.
20
19
14
The television may display
incorrectly or colors appear
faded.
≥
The unit and television are using different video systems.
[Southeast\Asia]
Use a multi-system or NTSC television.
[Others]
Use a multi-system or PAL television.
≥
The system used on the disc does not match your television.
– PAL discs cannot be correctly viewed on an NTSC television.
– This unit can convert NTSC signals to PAL 60 for viewing on a PAL television (“NTSC Disc
Output” in “Video” tab).
—
—
20
Menu is not displayed correctly.
≥
Restore the zoom ratio to
a
1.00.
≥
Set “Subtitle Position” in Display Menu to “0”.
≥
Set “4:3 Aspect” in Display Menu to “Normal”.
14
19
19
Auto zoom function does not
work well.
≥
Turn off TV’s zoom function.
≥
Use the other preset aspect ratios or manual adjustment.
≥
Zoom function may not work well, especially in dark scenes and may not work depending on the
type of disc.
—
14
—
The picture on the television
disappears or stripes appear on
the screen.
≥
Mobile telephone chargers can cause some disturbance.
≥
If you are using a TV indoor antenna, change to an outdoor antenna.
≥
The television antenna wire is too close to the unit. Separate the antenna wire of the television
from the unit.
—
—
—
There is ghosting when
progressive output is on.
≥
Change “Video Output Mode” in Picture Menu to “480I”. This problem is caused by the editing
method or material used on DVD-Video, but should be corrected if you use interlace output.
19
Pictures not in progressive
output.
≥
When playing NTSC discs, press [PROGRESSIVE] on the main unit so “PROG.” is displayed.
Or select “480P” in “Video Output Mode” in Picture Menu.
≥
If the unit is connected to the television through VIDEO OUT, S-VIDEO and SCART, output will
be interlace.
12, 19
8
Noise is heard.
“ST” flickers or doesn’t light.
Sound is distorted.
≥
Adjust the position of the FM or AM antenna.
≥
Use an outdoor antenna.
—
23
A beat sound is heard.
≥
Turn the television off or separate it from the unit.
—
A low hum is heard during AM
broadcasts.
≥
Separate the antenna from other cables.
—
Cannot operate the TV.
≥
Press [TV] first to operate the television.
≥
Check the remote control code for the TV manufacturer.
—
29
The display is dark.
≥
Select “Bright” in “FL Dimmer” in “Others” tab.
21
“NO PLAY”
≥
You inserted a disc the unit cannot play; insert one it can.
≥
You inserted a blank disc.
11
—
“NO DISC”
≥
You haven’t inserted a disc; insert one.
≥
You haven’t inserted the disc correctly; insert it correctly.
—
12
“F61”
≥
Check and correct the speaker cord connections.
If this does not fix the problem, there is a power supply problem. Consult the dealer.
5, 7
“DVD U11”
≥
Disc is dirty. Wipe it clean.
11
“ERROR”
≥
Incorrect operation performed. Read the instructions and try again.
—
“DVD H
∑∑
”
∑∑
stands for a number.
≥
Trouble may have occurred. The number following “H” depends on the status of the unit. Turn
the unit off and then back to ON. Alternatively, turn the unit off, disconnect the AC mains lead,
and then reconnect it.
≥
If the service numbers fail to clear, note the service number and contact a qualified service
person.
—
—
“
/
”
≥
The operation is prohibited by the unit or disc.
—
“Cannot display group xx,
content xx”
≥
You are trying to display incompatible contents.
—
“This disc may not be played in
your region”
≥
You can only play DVD-Video if their region number is the same or includes the same region
number as the unit or if the DVD-Video is marked “ALL”. Confirm the region number for the unit
on the rear panel.
Cover
No on-screen display.
≥
Select “On” in “On-Screen Messages” in “Display” tab.
21


