Panasonic SC-HC412 Скачать руководство пользователя страница 15

15

TQBJ2174

Recalling the sound settings you have 
saved

1

Press [SOUND] to select “MY SOUND”.

2

Press [

2

,

1

] to select the desired sound setting 

number and then press [OK].

Press [D.BASS] to select “ON D.BASS” or
“OFF D.BASS”.

Alternatively, press [D.BASS] on the unit.

Press [PRESET EQ] repeatedly to select “HEAVY” 
(heavy), “SOFT” (soft), “CLEAR” (clear), “VOCAL” 
(vocal) or “FLAT” (flat/off).

When “PRESET EQ” is selected, Bass and Treble settings 
will be changed to the settings in preset EQ setting.
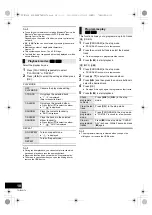
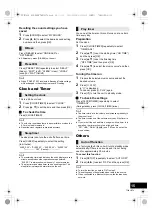
Clock and Timer

This is a 24-hour clock.

1

Press [CLOCK/TIMER] to select “CLOCK”.

2

Press [

3

,

4

] to set the time and then press [OK].

To check the time

Press [CLOCK/TIMER].

The clock is reset when there is a power failure or when the 
AC mains lead is removed.

Reset the clock regularly to maintain accuracy.

The sleep timer can turn the unit off after a set time.

Press [SLEEP] repeatedly to select the setting
(in minutes).

“SLEEP 30” 

-.

 “SLEEP 60” 

-.

 “SLEEP 90” 

-.

 “SLEEP 120”

^----------------

 “OFF” (Cancel) 

(""""""}

The remaining time is indicated on the unit’s display at every 
minute except when other operations are performed. 
“SLEEP 1” is always shown when only 1 minute remains.

The play timer and sleep timer can be used together. The 
sleep timer is always the main timer on the unit.

You can set the timer so this unit turns on at a certain 
time every day.

Preparation

Set the clock.

1

Press [CLOCK/TIMER] repeatedly to select 
“TIMER ADJ”.

2

Press [

3

,

4

] to set the starting time (“ON TIME”) 

and then press [OK].

3

Press [

3

,

4

] to set the finishing time 

(“OFF TIME”) and then press [OK].

4

Press [

3

,

4

] to select the music source*


and then 

press [OK].

Turning the timer on

1

Prepare the selected music source and set the 
desired volume.

2

Press [

F

,


PLAY].

F

” is displayed.

To cancel, press [

F

,


PLAY] again.

3

Press [

Í

] to turn the unit to standby mode.

To check the settings

Press [CLOCK/TIMER] repeatedly to select
“TIMER ADJ”.

(During standby, press [CLOCK/TIMER] twice.)

The timer starts at a low volume and increases gradually to 
the preset level.

The timer comes on at the set time every day if the timer is 
on.

If you turn off the unit and turn it on again while a timer is in 
operation, the timer will not stop at the end time.

* “CD”, “USB”, “DAB+” (

[HC412]

) and “FM” can be set as the 

music source.

Others

As a factory default, this unit will turn to standby mode 
automatically if there is no sound and it is not being 
used for approximately 20 minutes.

To cancel this function

1

Press [SETUP] repeatedly to select “AUTO OFF”.

2

Press [

2

,

1

] to select “OFF” and then press [OK].

To turn the function on, select “ON” in step 2.

This setting cannot be selected when radio is the source.

When connected to a Bluetooth

®

 device, the function does 

not work.

D.Bass

Preset EQ

Setting the clock

Sleep timer

Play timer

Auto off function

SC-HC410_412-EGEB~TQBJ2174.book  15 ページ  2018年11月9日 金曜日 午前9時41分

Содержание SC-HC412

Страница 1: ...ct and save this manual for future use Included Installation Instructions l 2 3 and 20 21 22 The installation work should be done by a qualified installation specialist Before commencing work carefull...

Страница 2: ...ot let metal objects fall inside this unit Do not place heavy items on this unit AC mains lead To reduce the risk of fire electric shock or product damage Ensure that the power supply voltage correspo...

Страница 3: ...sories before using this unit The symbols on this product including the accessories represent the following AC DC Class II equipment The construction of the product is double insulated I On Standby Ab...

Страница 4: ...o 50 max 7 FAVOURITE buttons for storing or selecting radio station 1 to 5 l 11 13 8 Set Space TuneTM sound mode according to this unit s placement location l 14 9 Select D BASS 10 Adjust Clear Surrou...

Страница 5: ...the volume is adjusted or the unit is turned off 24 Select preset EQ 25 Enter setup menu 26 Set the radio menu item 27 Selection OK 28 Dim the display panel and indicator Press again to cancel Using...

Страница 6: ...e recorded in the inner part of the disc This unit cannot play files recorded using packet write Disc must conform to ISO9660 level 1 or 2 except for extended formats Some CD R RW cannot be played bec...

Страница 7: ...unit To check if charging is complete look at the screen of the connected device etc Once fully charged remove the USB cable from the USB port After the device has started charging you can turn the u...

Страница 8: ...d as the source this unit will automatically try and connect to the last connected Bluetooth device LINKING is indicated on the display during this process If the connection attempt fails try to estab...

Страница 9: ...an equipment or in an environment that is sensitive to radio frequency interference example airports hospitals laboratories etc License Media playback controls The following marks indicate the availa...

Страница 10: ...racks 3 Press 1 to start playback CD MP3 USB 1 Press PROGRAM in the stop mode PROGRAM is shown for a few seconds 2 Press 3 4 to select the desired album 3 Press 9 and then press the numeric buttons to...

Страница 11: ...e is selected The station occupying a channel is erased if another station is preset in that channel You can change the stations stored under FAVOURITE 1 to 5 easily While listening to a DAB DAB broad...

Страница 12: ...the frequency block that is receivable in your region and then press OK If broadcasting stations are memorised proceed to To re scan DAB DAB stations to memorise stations on other frequency blocks l...

Страница 13: ...listening to the radio broadcast Press PROGRAM 2 Press the numeric buttons to select a preset number Do steps 1 through 2 again to preset more stations A station previously stored is overwritten when...

Страница 14: ...ons of the device Sound adjustment The following sound effects can be added to the audio output 1 Press SOUND repeatedly to select the effect 2 Press 2 1 to select the setting and then press OK You ma...

Страница 15: ...in time every day Preparation Set the clock 1 Press CLOCK TIMER repeatedly to select TIMER ADJ 2 Press 3 4 to set the starting time ON TIME and then press OK 3 Press 3 4 to set the finishing time OFF...

Страница 16: ...eard during playback If an AC mains lead or fluorescent lights are near the cords then keep other appliances and cords away from the cables The unit does not work One of the unit s safety devices may...

Страница 17: ...ng instructions for the device for details The sound is interrupted The device is out of the 10 m communication range Place the Bluetooth device closer to this unit Remove any interference between thi...

Страница 18: ...how the remaining play time for variable bit rate VBR tracks WAIT This is displayed for example when this unit is turning off Unit and media care Pull out the AC mains lead from the outlet before main...

Страница 19: ...Antenna terminals 75 unbalanced DAB SECTION HC412 DAB memories 20 channels Frequency Band Wavelength Band III 5A to 13F 174 928 MHz to 239 200 MHz Sensitivity BER 4x10 4 Min Requirement s98 dBm DAB Ex...

Страница 20: ...stand forward 3 Attach the fall prevention cord not supplied to this unit A Fall prevention cord not supplied Bend the cord twice from the tip each at 45o and 5 mm apart for it to go through the holes...

Страница 21: ...he wall l 6 1 Hook the unit securely onto the wall mount brackets with both hands 2 Slightly lift up the unit vertically until the slot reaches the hook of the safety holder 3 Push down until the unit...

Страница 22: ...ed electrical and electronic products and batteries must not be mixed with general household waste For proper treatment recovery and recycling of old products and used batteries please take them to ap...

Страница 23: ...akten Produkt Dette produktet anvender en laser Betjening av kontroller eller justering eller andre inngrep enn de beskrevet i denne bruksanvisning kan f re til farlig bestr ling Plasser ikke pen ild...

Страница 24: ...525 Hamburg Nem ija Slovensky Vyhl senie o zhode DoC Panasonic Corporation t mto vyhlasuje e tento v robok je v s lade so z kladn mi po iadavkami a al mi pr slu n mi ustanoveniami smernice 2014 53 E Z...

Страница 25: ...elja http www ptc panasonic eu Adresa ovla tenog predstavni tva Panasonic Marketing Europe GmbH Panasonic Testing Centre Winsbergring 15 22525 Hamburg Njema ka T rk e Uygunluk Beyan DoC Panasonic Corp...

Страница 26: ...26 TQBJ2174 SC HC410_412 EGEB TQBJ2174 book 26...

Страница 27: ...27 TQBJ2174 SC HC410_412 EGEB TQBJ2174 book 27...

Страница 28: ...c holidays Or go on line through our Internet Accessory ordering application at www pas europe com Most major credit and debit cards accepted All enquiries transactions and distribution facilities are...

Отзывы: