background image

20

R

Q

T

X

1101

G

e

tt

ing S

ta

rte

d

P

lay

in

g

 D

isc

s

Othe

r Op

e

ra

tions

Refer

ence


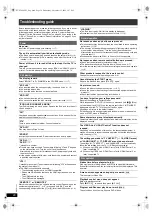
Before requesting service, make the following checks. If you are in doubt 
about some of the check points, or if the solutions indicated in the 
following guide do not solve the problem, refer to “Customer Services 
Directory (United States and Puerto Rico)” on page 24 if you reside in the 
U.S.A. or Puerto Rico, or refer to “Product information” on page 23 if you 
reside in Canada.

No power.

Insert the AC power supply cord securely. (

B

7)

The unit is automatically switched to standby mode.

The Sleep timer was working and had reached the set time limit. (

B

4)

This unit will automatically turn to standby mode after 30 minutes if it is 
inactive. (

B

4)

Power of this unit is turned off when the input for the TV is 
changed.

This is a normal phenomenon when using VIERA Link “HDAVI Control 4 
or later”. For details please read the operating instructions of the TV.

The display is dark.

Select “BRIGHT” in “FL DIMMER” in the OTHERS menu. (

B

17)

“NO PLAY”

You inserted a disc the unit cannot play; insert one it can. (

B

18)

You inserted a blank disc.

You inserted a disc that has not been finalized.

“NO DISC”

You have not inserted a disc; insert one.

You have not inserted the disc correctly; insert it correctly. (

B

11)

“IPOD OVER CURRENT ERROR”

The iPod is drawing too much power. Remove the iPod, and turn the unit 

off and on again.

“F61”

Check and correct the speaker cable connections. If this does not fix the 
problem, consult the dealer. (

B

6)

“F76”

There is a power supply problem. Consult the dealer.

“DVD U11”

Disc may be dirty. Wipe it clean.

“ERROR”

Incorrect operation performed. Read the instructions and try again.

“DVD H

∑∑

“DVD F

∑∑∑

 stands for a number.

Trouble may have occurred. The numbers following “H” and “F” depend 
on the status of the unit. Turn the unit off and then back on. 
Alternatively, turn the unit off, disconnect the AC power supply cord, and 
then reconnect it.

If the service numbers fail to clear, note the service number and contact 
a qualified service person.

“U70

 stands for a number. (The actual number following “U70” will depend on 

the state of the main unit.)

The HDMI connection acts unusually.
– The connected equipment is not HDMI-compatible.
– Please use HDMI cables that have the HDMI logo (as shown on the 

cover).

– The HDMI cable is too long.
– The HDMI cable is damaged.

“REMOTE 1” or “REMOTE 2”

Match the modes on the main unit and remote control. Depending on the 
number being displayed (“1” or “2”), press and hold [OK]

9

 and the 

corresponding numbered button ([1] or [2]) for at least 2 seconds. (

B

4)

“LOADING”

The iPod is not ready. Wait for this display to disappear.

Disconnect the iPod, and then reconnect it firmly. (

B

15)

No response when any buttons are pressed.

This unit cannot play discs other than the ones listed in these operating 
instructions. (

B

18)

The unit may not be operating properly due to lightning, static electricity 
or some other external factor. Turn the unit off and then back on. 
Alternatively, turn the unit off, disconnect the AC power supply cord, and 
then reconnect it.

Condensation has formed. Wait 1 to 2 hours for it to evaporate.

No response when remote control buttons are pressed.

Check that the batteries are installed correctly. (

B

7)

The batteries are depleted. Replace them with new ones. (

B

7)

Aim the remote control at the remote control signal sensor and operate. 
(

B

4)

Other products respond to the remote control.

Change the remote control operating mode. (

B

4)

Cannot display the START menu.

Remove the disc and then press [START]

C

 again.

No picture or sound.

Check the video or speaker connection. (

B

6, 7)

Check the power or input setting of the connected equipment and the 
main unit.

Check that the disc has something recorded on it.

You have forgotten your ratings password.

Reset all the settings to Factory Preset.
While stopped and “DVD/CD” is the source, press and hold [

]

8

(Stop) 

on the main unit and [

S

10]

3

 on the remote control until “INITIALIZED” 

disappears from the TV. Turn the unit off and on again.
All settings will return to the default values.
(This does not work during program and random modes, or when setup 
menu or START menu is displayed.)

Some characters are not displayed correctly.

Characters other than English alphabet and Arabic numerals may not be 
displayed correctly.

The VIERA Link “HDAVI Control” function does not 
respond.

Depending on the condition of this unit or the connected equipment, it 
may be necessary to repeat the same operation so that the function can 
work correctly. (

B

14)

The setting you made in “TV ASPECT” (

B

16, VIDEO menu) 

or “LANGUAGE” (

B

17, DISPLAY menu) does not work.

The settings for “TV ASPECT”

§

1

 and “LANGUAGE”

§

2

 will automatically 

follow the information from the TV. (

B

8, Easy setup settings)

§

1 When using VIERA Link “HDAVI Control” with “HDAVI Control 3 or 

later” compatible TV

§

2 When using VIERA Link “HDAVI Control” with “HDAVI Control 2 or 

later” compatible TV

It takes time before play starts. 

[MP3]

Play may take time to begin when an MP3 track has still picture data. 
Even after the track starts, the correct play time will not be displayed. This 
is normal. 

A menu screen appears during skip or search. 

[VCD]

This is normal for Video CDs.

Playback control menu does not appear.

[VCD]

 with playback control

Press [

STOP]

6

 twice and then press [

1

PLAY]

6

.

Program and Random play do not work. 

[DVD-V]

These functions do not work with some DVD-Videos.

Troubleshooting guide

Power

Unit displays

General operation

Disc operation

SC-PT480 PPC_Eng.book  Page 20  Wednesday, November 25, 2009  5:57 PM

Содержание SAPT480 - DVD HOME THEATER SOUND SYSTEM

Страница 1: ... used in place of the word Partner Region number The player plays DVD Video marked with labels containing the region number 1 or ALL Example 1 ALL 2 4 1 As an ENERGY STAR Partner Panasonic has determined that this product meets the ENERGY STAR guidelines for energy efficiency If you have any questions contact U S A and Puerto Rico 1 800 211 PANA 7262 Canada 1 800 561 5505 Only for U S A and Puerto...

Страница 2: ...ce of uninsulated dangerous voltage within the product s enclosure that may be of sufficient magnitude to constitute a risk of electric shock to persons CAUTION CAUTION TO REDUCE THE RISK OF ELECTRIC SHOCK DO NOT REMOVE SCREWS NO USER SERVICEABLE PARTS INSIDE REFER SERVICING TO QUALIFIED SERVICE PERSONNEL The exclamation point within an equilateral triangle is intended to alert the user to the pre...

Страница 3: ... 7 8 0 9 SLEEP VOL TV INPUT SEARCH SKIP SLOW SKIP PLAY PAUSE SEARCH OK DVD iPod EXT IN RADIO MUTE F U N C T I O N S START T O P M E N U 10 10 EXIT D I R E C T N A V I G A T O R REPEAT PLAYMODE CHSELECT SOUND SURROUND W SRD FLDISPLAY CANCEL PLAY LIST MENU SELECTOR OPEN CLOSE VOLUME POWER iPod Pull open SC PT480 PPC_Eng book Page 3 Wednesday November 25 2009 5 57 PM ...

Страница 4: ...d sound effects B 10 TV operations Aim the remote control at the Panasonic TV and press the button Í Turn the TV on off INPUT Change the TV s video input mode r VOL s Adjust the TV volume This may not work properly with some models Adjust the volume of the main unit Mute the sound MUTE flashes on the main unit s display while the function is on To cancel press the button again or adjust the volume...

Страница 5: ...4 Follow all instructions 5 Do not use this apparatus near water 6 Clean only with dry cloth 7 Do not block any ventilation openings Install in accordance with the manufacturer s instructions 8 Do not install near any heat sources such as radiators heat registers stoves or other apparatus including amplifiers that produce heat 9 Do not defeat the safety purpose of the polarized or grounding type p...

Страница 6: ...TV off for about 30 minutes The demagnetizing function of the TV should correct the problem If it persists move the speakers further away from the TV Caution Do not touch the front netted area of the speakers Hold by the sides Turn off all equipment before connection and read the appropriate operating instructions Do not connect the AC power supply cord until all other connections are completed Pa...

Страница 7: ...them to the available inputs on the TV and the TV output should then be connected to the AUX HDMI AV OUT 2 or DIGITAL AUDIO IN OPTICAL terminal of the main unit Conserving power The main unit consumes a small amount of power even when it is in standby mode approx 0 2 W To save power when the unit is not to be used for a long time unplug it from the household AC outlet You will need to reset some m...

Страница 8: ...ideo input mode refer to its operating instructions This remote control can perform some basic TV operations B 4 1 Press Í 1 to turn on the unit When the Easy setup screen appears automatically skip steps 2 to 7 2 Press DVD 5 to select DVD CD 3 Press START C to show the START menu 4 Press 3 4 9 to select Setup and press OK 9 5 Press 3 4 9 to select OTHERS and press OK 9 6 Press 3 4 9 to select EAS...

Страница 9: ...I ControlTM B 14 for other related functions Select to suit the type of audio from the DIGITAL AUDIO IN OPTICAL and HDMI AV OUT terminal on the main unit Setting must be made for the D IN and ARC selector Underlined items are the factory presets 3 Only when D IN is selected Be sure to select the device s STB etc input channel on the TV when making the setting The device must be connected to the Pa...

Страница 10: ...ing sound mode 1 Press SOUND to select a sound mode Each time you press the button EQ Equalizer SUBW LVL Subwoofer Level H BASS Harmonic Bass C FOCUS Center Focus 2 While the selected mode is displayed press 2 1 9 to make the settings Refer to the following for setting details of each sound effect EQ Equalizer You can select sound quality settings Each time you press 2 1 9 FLAT Cancel no effect is...

Страница 11: ...e screen Press 1 PLAY 6 to resume Press STOP 6 again to clear the position Pause PAUSE 6 Press 1 PLAY 6 to restart play Skip SKIP SKIP 9 6 Search SEARCH6 SEARCH5 6 during play Slow motion SEARCH6 SEARCH5 6 during pause Up to 5 steps Press 1 PLAY 6 to start normal play VCD Slow motion Forward direction only Frame by frame 2 1 9 during pause DVD VR DVD V VCD DVD VR VCD Forward direction only On scre...

Страница 12: ...0 0 1 0 11 11 CITY PENGUIN 0 0 0 1 2 0 0 1 2 0 1 2 0 1 FOOTBALL 0 1 2 0 Using on screen menus 1 Press FUNCTIONS D to show the on screen menu Each time you press the button Menu 1 Disc Play Menu 2 Video Menu 3 Audio Menu 4 HDMI Exit 2 Press 3 4 2 1 9 to select the item and press OK 9 3 Press 3 4 9 to make the settings and press OK 9 Items shown differ depending on the type of disc Menu 1 Disc Play ...

Страница 13: ...I STATUS To show HDMI information e g DVD V 1 Connection status 2 Shows the output signal type When OFF is selected in AUDIO OUT B 17 HDMI menu will be displayed 3 Shows the number of audio channels 4 B below VIDEO FORMAT 5 B below COLOR SPACE HD ENHANCER This works when the HDMI connection is being used with VIDEO PRIORITY B 17 HDMI menu set to ON To sharpen the 720p 1080i and 1080p picture quali...

Страница 14: ...ginning portion of playback press SKIP 6 or SEARCH6 6 to go back to where playback started When the following operations are performed the TV will automatically switch the input channel and display the corresponding action Additionally when the TV is off the TV will automatically turn on When play starts on the unit When an action that uses the display screen is performed e g START menu When you s...

Страница 15: ...it will be kept on the iPod after disconnecting it If the video menu is accessed the video shuffle playback mode on the iPod is set to off when the iPod is disconnected from the unit Easy control only with VIERA remote control for HDAVI Control 2 or later 1 Select this unit s operation menu by using the TV menu settings For details refer to the operating instructions for your TV The START menu wil...

Страница 16: ...INGS SETTING To change ratings When level 0 to 7 is selected CHANGE Follow the on screen instructions Enjoying photos 1 Press FUNCTIONS D to select the iPod menu 2 Play a slideshow on your iPod You can use the remote control to operate the iPod menu 3 4 9 To navigate menu items OK 9 To go to the next menu RETURN E To return to the previous menu The remote control operation may vary between iPod mo...

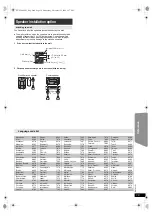
Страница 17: ... menu VIDEO PRIORITY ON When using the HDMI AV OUT terminal for video output The resolution of the video output from the HDMI AV OUT terminal is optimized according to the capability of the connected equipment e g TV OFF When not using the HDMI AV OUT terminal for video output L LS R SW C RS C RS LS Actual speaker position Ideal speaker position Primary listening distance Approximate room dimensio...

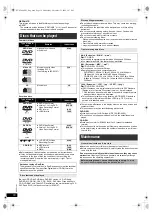
Страница 18: ...ame with the cloth Do not use commercially available lens cleaners as they may cause malfunction Cleaning of the lens is generally not necessary although this depends on the operating environment Discs that can be played Type of media Logo Remarks Indicated as DVD Video High quality movie and music discs DVD V Video CD Music discs with video Including SVCD Conforming to IEC62107 VCD CD Music discs...

Страница 19: ...ian 6984 Faroese 7079 Fiji 7074 Finnish 7073 French 7082 Frisian 7089 Galician 7176 Georgian 7565 German 6869 Greek 6976 Greenlandic 7576 Guarani 7178 Gujarati 7185 Hausa 7265 Hebrew 7387 Hindi 7273 Hungarian 7285 Icelandic 7383 Indonesian 7378 Interlingua 7365 Irish 7165 Italian 7384 Japanese 7465 Javanese 7487 Kannada 7578 Kashmiri 7583 Kazakh 7575 Kirghiz 7589 Korean 7579 Kurdish 7585 Laotian 7...

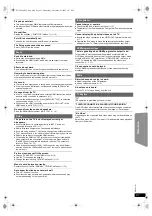
Страница 20: ...ct it firmly B 15 No response when any buttons are pressed This unit cannot play discs other than the ones listed in these operating instructions B 18 The unit may not be operating properly due to lightning static electricity or some other external factor Turn the unit off and then back on Alternatively turn the unit off disconnect the AC power supply cord and then reconnect it Condensation has fo...

Страница 21: ...ctly The output will return to 480p B 13 Video images converted to 1920k1080 resolution may look different from the true native 1080p full HD sources This is not a malfunction of the main unit Picture size does not fit the screen Change TV ASPECT in the VIDEO menu B 16 Use the TV to change the aspect Change the zoom setting ZOOM in Menu 2 B 13 Menu is not displayed correctly Restore the zoom ratio...

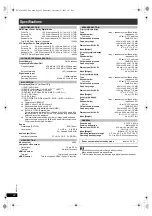
Страница 22: ...Excluding Root folder Pick up Wavelength DVD CD 655 790 nm Laser power For U S A For Canada CLASS II CLASS 1M Audio output Disc Number of channels 5 1 ch FL FR C SL SR SW VIDEO SECTION Video system NTSC Composite video output Output level Terminal 1 Vp p 75 Pin jack 1 system HDMI AV output Terminal 19 pin type A connector HDAVI Control This unit supports HDAVI Control 5 function SPEAKER SECTION Fr...

Страница 23: ...1 942 5 956 674 5 974 380 5 978 762 6 487 535 other U S and worldwide patents issued pending DTS and the Symbol are registered trademarks DTS Digital Surround and the DTS logos are trademarks of DTS Inc Product includes software C DTS Inc All Rights Reserved U S Patent Nos 6 836 549 6 381 747 7 050 698 6 516 132 and 5 583 936 This product incorporates copyright protection technology that is protec...

Страница 24: ...mercial use such as hotel office restaurant or other business or rental use of the product or service by anyone other than a Factory Service Center or other Authorized Servicer or damage that is attributable to acts of God THERE ARE NO EXPRESS WARRANTIES EXCEPT AS LISTED UNDER LIMITED WARRANTY COVERAGE THE WARRANTOR IS NOT LIABLE FOR INCIDENTAL OR CONSEQUENTIAL DAMAGES RESULTING FROM THE USE OF TH...

Страница 25: ...ANASONIC CANADA INC BE LIABLE FOR ANY SPECIAL INDIRECT OR CONSEQUENTIAL DAMAGES In certain instances some jurisdictions do not allow the exclusion or limitation of incidental or consequential damages or the exclusion of implied warranties so the above limitations and exclusions may not be applicable WARRANTY SERVICE IF YOU SHIP THE PRODUCT TO A SERVICENTRE Carefully pack and send prepaid adequatel...

Страница 26: ...r local authorities or dealer and ask for the correct method of disposal Inside of product DATE OF PURCHASE __________________________________________ DEALER NAME ________________________________________________ DEALER ADDRESS ____________________________________________ _________________________________________________________________ TELEPHONE NUMBER _________________________________________ The...

Отзывы: