background image

Reference

36

RQT7509

Recording

Selecting fine audio equipment such as the unit you’ve just purchased is only the start of your musical enjoyment.
Now it’s time to consider how you can maximize the fun and excitement your equipment offers. This manufacturer
and the Electronic Industries Association’s Consumer Electronics Group want you to get the most out of your
equipment by playing it at a safe level. One that lets the sound come through loud and clear without annoying blaring
or distortion—and, most importantly, without affecting your sensitive hearing.

We recommend that you avoid prolonged exposure to excessive noise.

Sound can be deceiving. Over time your hearing “comfort level” adapts to higher volumes of sound. So what sounds
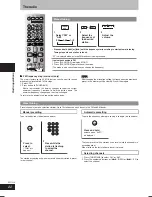
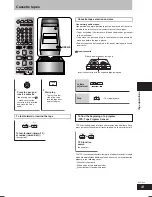
“normal” can actually be loud and harmful to your hearing.
Guard against this by setting your equipment at a safe level BEFORE your hearing adapts.
To establish a safe level:
• Start your volume control at a low setting.
• Slowly increase the sound until you can hear it comfortably and clearly, and without distortion.

Once you have established a comfortable sound level:
• Set the dial and leave it there.

Taking a minute to do this now will help to prevent hearing damage or loss in the future. After all, we want you
listening for a lifetime.

EST. 1924

Listening caution

Maintenance

For a cleaner, crisper sound (cassette deck)

Clean the heads regularly to assure good quality playback and re-
cording. Use a cleaning tape (not included).

To clean this unit, wipe with a soft, dry cloth.

Never use alcohol, paint thinner or benzine to clean this unit.

Before using chemically treated cloth, read the instructions that
came with the cloth carefully.

When moving the unit

1

Remove all discs.

2

Press [

/ I POWER] on the main unit to turn it off.

3

Disconnect the AC mains lead.

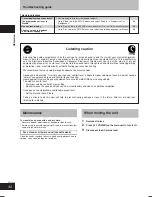
Troubleshooting guide

Television displays

You are trying to display incompatible contents.

Go to “Video” tab in the SETUP menus, and select “Enable” in “Progressive Out
(Component)”.

Go to “Display” tab in the SETUP menus, and select “On” for “On-Screen Messages”.

Go to “Disc” tab in the SETUP menus, and select the preferred language for “Menus”.

29

30

29

“Cannot display group xx, content xx.”

“The progressive out is set to
“Disable”.

No on-screen display.

The disc’s menu is displayed
in a different language.

Содержание SAPM39D - MINI HES W/CD PLAYER

Страница 1: ...er plays DVD Video marked with labels containing the region number or ALL Region Number 1 4 For U S A and Canada For Latin America Example For U S A and Canada P PL PC For U S A only The warranty can be found on page 39 For U S A and Canada only As an ENERGY STAR Partner Panasonic has determined that this product meets the ENERGY STAR guidelines for energy efficiency For Canada only The word Parti...

Страница 2: ...e exclamation point within an equilateral triangle is intended to alert the user to the presence of important operating and maintenance servicing instructions in the literature accompanying the appliance Inside of product CAUTION This equipment has been tested and found to comply with the limits for a Class B digital device pursuant to Part 15 of the FCC Rules These limits are designed to provide ...

Страница 3: ...r quality sound AUDIO ONLY 25 Other functions Convenient functions 26 Auto off function Dimming the display 26 Enjoying more powerful bass 26 Muting the volume Using headphones 26 The play record timer 27 The sleep timer Operating a television 28 Discs Changing the player s settings 29 Digital output 31 Using other equipment 32 Home Theater Enjoying more powerful sound 32 Using an external unit 32...

Страница 4: ...ry from tip over 13 Unplug this apparatus during lightning storms or when unused for long periods of time 14 Refer all servicing to qualified service personnel Servicing is required when the apparatus has been damaged in any way such as power supply cord or plug is damaged liquid has been spilled or objects have fallen into the apparatus the apparatus has been exposed to rain or moisture does not ...

Страница 5: ...cs such as heart shapes 7 7 7 7 7 Playing PAL system DVD Audio This unit converts PAL to NTSC for play The picture is compressed to show it in its entirety but this may cause it to be stretched vertically Disc information Recorded using Version 1 1 of the Video Recording Format a unified video recording standard Recorded using the DCF Design rule for Camera File system standard Some DVD Audio disc...

Страница 6: ...e to a television but the picture may be affected with some televisions and set up combinations If this occurs turn the television off for about 30 minutes The television s demagnetizing function should correct the problem If it persists move the speakers further away from the television Simple setup Positioning STEP1 Connecting the speakers STEP2 White Blue Red Black Confirm the colors of the tag...

Страница 7: ...AKERS SB PM39 LOW 6Ω R L COMPONENT VIDEO IN Y PB PR COMPONENTVIDEOOUT PR PB Y EXT LOOP 75Ω Video cables not included COMPONENT VIDEO OUT terminals These terminals can be used for either interlace or progressive output and provide a purer picture than the S VIDEO OUT terminal Connection using these terminals outputs the color difference signals PB PR and luminance signal Y separately in order to ac...

Страница 8: ... the covering has been peeled off Mishandling of batteries can cause electrolyte leakage which can damage items the fluid contacts and may cause a fire Remove if the remote control is not going to be used for a long period of time Store batteries in a cool dark place 7 7 7 7 7 Use Aim at the sensor avoiding obstacles at a maximum range of 7 m 23 feet directly in front of the unit Insert so the pol...

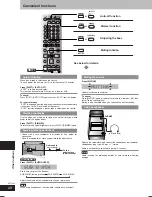
Страница 9: ...e display changes each time the button is held down Demonstration demo on A NO DEMO off You can reduce the power consumed in standby mode by turning the demonstration off Note You cannot turn the demo function on and off when the unit is on DEMO function 1 Select CLOCK 3 Press CLOCK TIMER to finish setting the time 2 Select DVD CD 3 Shows QUICK SETUP screen 4 Select the option from the screen 5 Pr...

Страница 10: ...monstation button 9 12 DEMO 1 5 disc direct play buttons 13 Disc trays 12 TUNER AUX button 22 32 Remote control sensor DVD CD button 12 AC IN AC supply indicator This indicator lights when the unit is connected to the AC power supply POWER standby on switch Press to switch the unit from on to standby mode or vice versa In standby mode the unit is still consuming a small amount of power MULTI RE MA...

Страница 11: ...3 3 3 FF SETUP CANCEL 9 12 13 15 22 23 ÜShift button SHIFT To use functions labeled in orange While pressing SHIFT press the corresponding button áMuting TV VIDEO button MUTING TV VIDEO 26 28 àPlay timer record timer Auto off button rPLAY REC AUTO OFF 26 27 âFL display Dimmer button FL DISPLAY DIMMER 9 26 äSurround Multi re master button SURROUND M RE MASTER 25 ãSound Audio only button SOUND A ONL...

Страница 12: ...es before use Read the instructions for the disc carefully 4 Start play The stopped play position is memorized when RESUME is displayed Press DVD CD to resume DVD V To review the previous chapters A page 14 Position memory Press L STOP to clear the position Press DVD CD to restart play Group skip WMA MP3 JPEG DVD A To select still pictures Up to 5 steps Press DVD CD to restart play DVD A Motion pi...

Страница 13: ... by frame during pause ENTER FF CANCEL SHIFT Select or DVD A Motion picture parts only VCD forward direction only Pressing J DISC PAUSE also activates forward direction RAM DVD A DVD V VCD CD Example To select 12 X10 A 1 A 2 VCD with playback control Press L STOP then press the numbered buttons WMA MP3 JPEG Example To select 123 1 A 2 A 3 A ENTER Press SHIFT CANCEL to cancel the number s DVD A DVD...

Страница 14: ...oup DVD A program and random play ALL REPEAT is displayed 4 All disc repeat Soundtracks RAM DVD A DVD V VCD Discs with multiple soundtracks During play Press DISPLAY then 9 8 to select Audio soundtrack A page 19 Audio Subtitle DVD A Motion picture parts only DVD V Discs with multiple subtitle languages VCD SVCD only During play Press DISPLAY to select the subtitle language A page 19 Subtitle RAM Y...

Страница 15: ...ress PGM PGM appears 3 Press the numbered buttons to select the items WMA MP3 JPEG then press ENTER Repeat this step to program other items VCD CD Step 1 is unnecessary when programming tracks on the same disc DVD A DVD V WMA MP3 JPEG To select an item using the cursor buttons Press ENTER and 8 8 8 8 8 9 9 9 9 9 to select an item then press ENTER again to confirm the number All the items on the di...

Страница 16: ...and press ENTER The search results screen appears 4 Press 8 8 8 8 8 9 9 9 9 9 to select the content or group and press ENTER To return to the menu Press RETURN Example WMA MP3 Navigation menu Example JPEG Thumbnails Navigation Menu 1 5 MP3 1 54 Lirkin Park Meteora Lirkin Park Hybrid Theory 09 A Pla Sep 15 2003 Lirkin Park Meteora The Ultimate DISPLAY to display the sub menu RETURN to exit Group 00...

Страница 17: ...x folder and file names with 3 digit numbers in the order you want to play them this may not work at times Files must have the extension WMA or wma MP3 or mp3 JPG jpg JPEG or jpeg WMA Noise may occur when playing WMA files You cannot play WMA files that are copy protected MP3 This unit is not compatible with ID3 tags If you play an MP3 track that includes still picture data it will take some time ...

Страница 18: ...s and a play list created on other equipment such as a DVD video recorder The play list can be selected only if the disc contains a play list Press ANGLE PAGE to skip 10 lines at a time Indication on the unit s display PL Play list number Playing programs on DVD RAM 1 11 1 WED 12 05 Friends of a feather 2 1 1 MON 1 05 Sunny day 3 2 2 TUE 2 21 Penguins habitat 4 3 3 WED 3 37 Irresistible 5 4 10 THU...

Страница 19: ...lo On Off Duet Off V1 V2 V1 V2 RAM VCD You can also use this button to select L R or L R Audio attributes See A A page 21 Audio attributes 1 2 3 Subtitle DVD A Motion picture parts only DVD V Discs with multiple subtitle languages VCD SVCD only To clear or display the subtitles Press 8 9 to select On or Off Subtitle on or off RAM Marker VR RAM To recall a marker recorded on DVD Video recorders Sti...

Страница 20: ...g film material the same as Auto1 but able to convert 30 frame per second progressive video Video For video material Ä Å Audio Menu Advanced Surround RAM DVD A DVD V VCD CD WMA MP3 2 channels or more Enjoy a surround like effect when using front speakers or headphones The effect broadens when playing discs with surround effects and sound seems to come from speakers on either side of you The level ...

Страница 21: ...M DVD A Motion picture parts only DVD V VCD Fine adjustments Press 8 8 8 8 8 9 9 9 9 9 from x1 00 to x1 60 in 0 01 units from x1 60 to x2 00 in 0 02 units Bitrate Display RAM DVD A Moving picture parts only DVD V VCD When you select On During play shows the bitrate approximate values of the video being played During pause shows the data volume of the frame and type of picture A page 37 Glossary I ...

Страница 22: ... noise is excessive in FM 1 Press PLAY MODE to display MONO 2 Press PLAY MODE again to cancel the mode The mode is also cancelled when you change the frequency 1 Select FM or AM 2 Select the frequency of the desired station 3 Adjust the volume Preset tuning Preset channels to make selection simpler Up to 15 stations can each be set in the FM and AM bands Manual presetting Tune to the desired stati...

Страница 23: ...ure that the cassette is fully inserted and close the lid by hand 2 Start play To play the other side of the tape turn the tape over and restart play To fast forward or rewind the tape FF CANCEL or REW SETUP To fast forward f 3 3 3 3 3 FF or rewind g 4 4 4 4 4 REW during stop To find the beginning of a program TPS Tape Program Sensor TPS finds the beginning of a track and resumes play from there E...

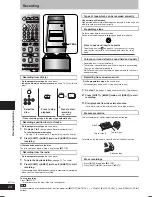
Страница 24: ... main unit aREC Press to open and insert a cassette Tape facing you see A A page 23 Insert cassette make sure that the cassette is fully inserted and close the lid by hand 1 Select the disc 2 Press to stop playback 3 Press to start recording play starts Side A Tab for side B Tab for side A Adhesive tape To stop recording Press L STOP To record or erase the other side turn the tape over Note During...

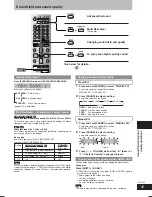
Страница 25: ...und field and sound quality SHIFT M RE MASTER SURROUND Advanced Surround Changing sound field and quality To enjoy even higher quality sound Multi Re master During play See below for details SHIFT M RE MASTER SURROUND A ONLY SOUND A ONLY SOUND SHIFT Changing sound field and quality Preset EQ 1 Press and hold SOUND to select PRESET EQ Every time you press and hold the button MANUAL EQ PRESET EQ 2 P...

Страница 26: ...turn to the original brightness press SHIFT DIMMER again Enjoying more powerful bass Connect an active subwoofer not included See below for connection Place the subwoofer as close as possible to the front center AM ANT EXT LOOP 75Ω FM ANT OPTICAL OUT AC IN SUBWOOFER OUT R L AUX HIGH 6Ω LOW 6Ω R L Audio cable not included To the subwoofer s input terminal Muting the volume Press MUTING Volume is re...

Страница 27: ... The unit must be off for the timers to operate Play timer Play will start in the set condition at the set time with volume increasing gradually to the set level Record timer The unit comes on 30 seconds before the set time with the volume muted To cancel the timer Press rPLAY REC to clear the timer indicator from the display The timer comes on at the set time everyday if the timer is on To change...

Страница 28: ...n with the play record timer Make sure the unit is off before the play record timer s start time Note The sleep timer will be turned off when you start recording from a disc Operating a television Face the remote control at the television for the following opera tions Turning the television on off Press SHIFT TVf f f f f Switching the television s video input mode Press SHIFT TV VIDEO Changing cha...

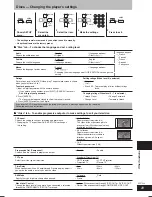
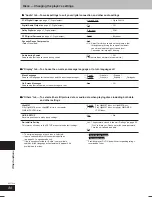
Страница 29: ...connected through VIDEO OUT or S VIDEO OUT Change the black level of the picture if you connected a television Darker When connected through COMPONENT VIDEO OUT through the COMPONENT VIDEO OUT terminals 1 Shows SETUP menu 2 Select the menu tab 3 Select the item 4 Make the settings 5 Press to exit 7 7 7 7 7 Disc tab To choose the language and set a rating level Audio English Language options Choose...

Страница 30: ...pañol Português On Screen Messages On Off Choose whether to show on screen messages or not 7 7 7 7 7 Others tab To select either still picture data or audio data when playing discs including both data and other settings HighMAT Enable Play HighMAT discs as HighMAT discs Play HighMAT discs as HighMAT discs or as regular Disable Play HighMAT discs as regular WMA MP3 WMA MP3 JPEG discs JPEG discs QUI...

Страница 31: ...pment cannot process will be output by this unit causing high levels of noise which can damage your hearing and the speakers Apparatus Claims of U S Patent Nos 4 631 603 4 577 216 and 4 819 098 licensed for limited viewing uses only This product incorporates copyright protection technology that is protected by method claims of certain U S patents and other intellectual property rights owned by Mac...

Страница 32: ...ructions The equipment connections described are examples only Peripheral equipment and optional cables sold separately unless otherwise indicated Using an external unit You can playback the sound from a video cassette recorder tape deck laser disc player etc through this unit s speakers AUDIO OUT R L Audio cable not included Video cassette recorder not included FM ANT OPTICAL OUT S VIDEO OUT VIDE...

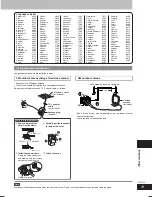
Страница 33: ...rbo Croatian 8372 Shona 8378 Sindhi 8368 Singhalese 8373 Slovak 8375 Slovenian 8376 Somali 8379 Spanish 6983 Sundanese 8385 Swahili 8387 Language code list Swedish 8386 Tagalog 8476 Tajik 8471 Tamil 8465 Tatar 8484 Telugu 8469 Thai 8472 Tibetan 6679 Tigrinya 8473 Tonga 8479 Turkish 8482 Turkmen 8475 Twi 8487 Ukrainian 8575 Urdu 8582 Uzbek 8590 Vietnamese 8673 Volapük 8679 Welsh 6789 Wolof 8779 Xho...

Страница 34: ...ensation has formed Wait 1 to 2 hours for it to evaporate This unit cannot play discs other than the ones listed in these operating instructions 5 17 You can only play DVD Video if their region number is the same or includes the Cover same region number as the unit or if DVD Video is marked ALL Confirm the region number for the unit on the rear panel The disc may be dirty and may require cleaning ...

Страница 35: ...se comes from the speakers Check the connections Turn the volume up Turn muting off Turn Advanced surround off if it causes distortion Switch off the unit determine and correct the causes then switch the unit on Causes include Shorting bare wires touching of positive and negative speaker wires Using speakers with an impedance lower than that rated for this unit Straining of the speakers through ex...

Страница 36: ...hout distortion Once you have established a comfortable sound level Set the dial and leave it there Taking a minute to do this now will help to prevent hearing damage or loss in the future After all we want you listening for a lifetime EST 1924 Listening caution Maintenance For a cleaner crisper sound cassette deck Clean the heads regularly to assure good quality playback and re cording Use a clea...

Страница 37: ... up of two fields A regular television shows these fields one after the other to create frames A still is shown when you pause a moving picture A frame still is made up of two alternating fields so the picture may appear blurred but overall quality is high A field still is not blurred but it has only half the information of a frame still so picture quality is lower Interlace and progressive output...

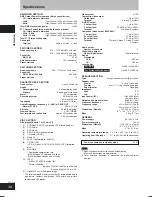
Страница 38: ...ps 10 JPEG Exif Ver 2 1 JPEG Baseline files Picture resolution between 320x240 and 6144x4096 pixels Sub sampling is 4 2 2 or 4 2 0 11 HighMAT Level 2 Audio and Image The total combined maximum number of recognizable audio and picture contents and groups 4000 audio and picture contents and 400 groups Video system NTSC Composite video output Output level 1Vp p 75Ω Terminal Pin jack 1 system S VIDEO ...

Страница 39: ...THE USE OF THIS PRODUCT OR ARISING OUT OF ANY BREACH OF THIS WAR RANTY As examples this excludes damages for lost time travel to and from the servicer loss of media or images data or other memory content The items listed are not exclusive but are for illustration only ALL EXPRESS AND IMPLIED WARRANTIES INCLUDING THE WARRANTY OF MERCHANTABILITY ARE LIMITED TO THE PERIOD OF THE LIMITED WARRANTY Some...

Страница 40: ...New Jersey 07094 http www panasonic com Panasonic Sales Company Division of Matsushita Electric of Puerto Rico Inc PSC Ave 65 de Infantería Km 9 5 San Gabriel Industrial Park Carolina Puerto Rico 00985 Panasonic Canada Inc 5770 Ambler Drive Mississauga Ontario L4W 2T3 www panasonic ca 2004 Matsushita Electric Industrial Co Ltd Printed in Malaysia ...

Отзывы: