

8
RQ
T
9
58
8
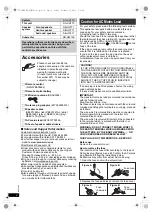
Conserving power
This unit consumes a small amount of power, even when
it is in standby mode (approx. 0.4 W). To save power
when the unit is not to be used for a long time, unplug it
from the household mains socket.
You will need to reset some memory items when plugging
back this unit.
The supplied AC mains lead is for use with this unit only.
Do not use it with other equipment. Also, do not use cords for
other equipment with this unit.
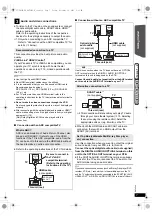
Aim at the remote control signal sensor (
B
4), avoiding
obstacles.
Distance: Within approx. 7 m
Angle: Within approx. 20° up and down, approx. 30° to
the left and right
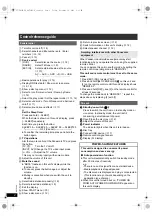
The Easy setup screen assists you in making
necessary settings.
≥
You can perform this setup anytime by selecting “Easy setup”
in the Setup menu. (
B
19)
≥
If this unit is connected to a “HDAVI Control 3 or later”
compatible TV via HDMI cable, the menu language and TV
aspect information will be retrieved via VIERA Link.
≥
If this unit is connected to a “HDAVI Control 2” compatible TV
via HDMI cable, the menu language information will be
retrieved via VIERA Link.
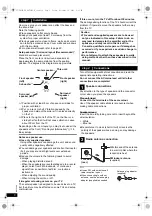
step 3
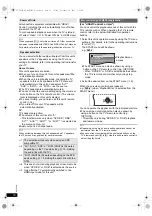
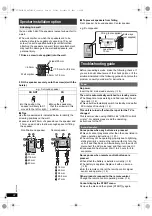
AC mains lead connection
BE SURE TO READ THE CAUTION FOR THE AC
MAINS LEAD ON PAGE 2 BEFORE CONNECTION.
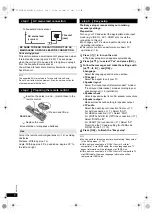
step 4
Preparing the remote control
≥
Use alkaline or manganese batteries.
Use
AC IN
This unit
(rear)
AC mains lead
(supplied)
To household mains socket
R6/LR6, AA
Press in and lift up.
Replace the cover.
Insert so the poles (
r
and
j
) match those in the
remote control.
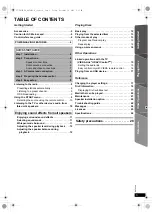
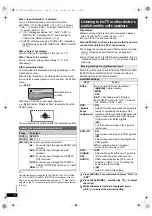
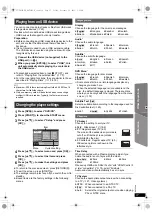
step 5
Easy setup
Preparation
Turn on your TV and select the appropriate video input
mode (e.g. VIDEO 1, AV 1, HDMI, etc.) to suit the
connection to this unit.
≥
To change your TV’s video input mode, refer to its
operating instructions.
≥
This remote control can perform some basic TV
operations (
B
4).
1
Press [
Í
]
1
to turn on the unit.
≥
The Easy setup screen appears automatically.
2
Press [
3
,
4
]
8
to select “Yes” and press [OK]
8
.
3
Follow the messages and make the settings with
[
3
,
4
,
2
,
1
]
8
and [OK]
8
.
≥
Language
Select the language used on menu screen.
≥
TV aspect
Select the aspect to suit your TV.
≥
Speaker layout
Select “Surround layout (Recommended)” mode or
“Front layout (Alternative)” mode according to your
speaker layout (
B
6, Installation).
≥
Speaker check
Listen to speaker output to confirm speaker connections.
≥
Speaker output
Make surround sound setting for speaker output.
≥
TV audio
Select the audio input connection from your TV.
For AUX connection (
B
7): Select “AUX”.
For HDMI connection (
B
7): Select “ARC”.
For DIGITAL AUDIO IN OPTICAL connection (
B
7):
Select “DIGITAL IN”.
For SCART (AV) connection (
B
7): Select “AV”.
This will be the TV audio setting for VIERA Link
“HDAVI Control”. (
B
15)
4
Press [OK]
8
to finish the “Easy setup”.
SC-XH170 EB_RQT9588-B_eng.book Page 8 Friday, December 16, 2011 3:11 PM