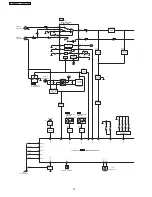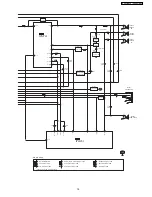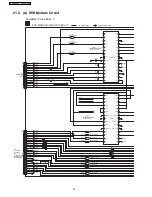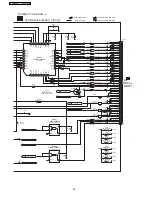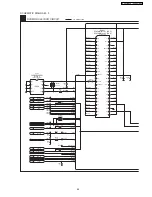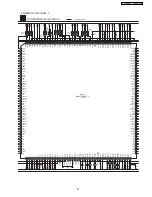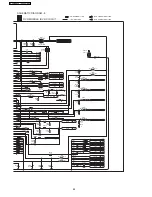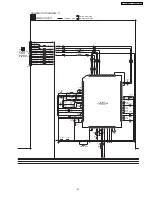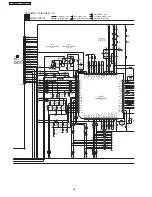
(All schematic diagrams may be modified at any time with the
development of the new technology)
Note:
S1
: Stock Switch
S2
: Play Switch
S3
: Bottom Switch
S4
: Open Switch
S5
: Change Switch
S501
: Voltage Selector Switch
S951
: Mode Switch
S952
: Half Switch
S971
: Mode Switch
S972
: Half Switch
S974
: Recinh_R Switch
S975
: Recinh_F Switch
S6800
: DVD/CD Switch
S6801
: Tape Switch
S6802
: Tuner/Band Switch
S6803
: Aux Switch
S6804
: Deck 1 Switch
S6805
: Display Switch
S6806
: Deck 2 Switch
S6807
: Rew Switch
S6808
: FF Switch
S6809
: Stop Switch
S6810
: Power Switch
S6811
: Disc Check Switch
S6812
: Multi Re-Master Switch
S6813
: Super Surround Switch
S6814
: Deck1/2 Switch
S6815
: Rec Switch
S6816
: CD Open/Close Switch
S6817
: Disc Change Switch
S6819
: Disc 5 Switch
S6820
: Disc 4 Switch
S6821
: Disc 3 Switch
S6822
: Disc 2 Switch
S6823
: Disc 1 Switch
S6824
: SSEQ Switch
S6825
: S.Woofer Switch
S6826
: Sound EQ Switch
VR6800
: VR Volume Jog
VR6801
: VR Mic
·
The voltage value and waveforms are the reference voltage
of this unit measured by DC electronic voltmeter (high
impedance) and oscilloscope on the basis of chassis.
Accordingly, there may arise some error in voltage values
and waveforms depending upon the internal impedance of
the tester or the measuring unit.
(( ))
: CD
< >
: FM
·
Importance safety notice :
Components
identified
by
mark
have
special
characteristics important for safety. Furthermore, special
parts which have purposes of fire-retardant (resistors), high-
quality sound (capacitors), low-noise (resistors), etc. are
used. When replacing any of components, be sure to use
only manufacturer´s specified parts shown in the parts list.
Caution !
IC, LSI and VLSI are sensitive to static electricity.
Secondary trouble can be prevented by taking care during
repair.
·
Cover the parts boxes made of plastics with aluminium foil.
·
Put a conductive mat on the work table.
·
Ground the soldering iron.
·
Do not touch the pins of IC, LSI or VLSI with fingers directly.
21 Schematic Diagram
80
SA-VK91DGCS / SA-VK91DGCP
Содержание SA-VK91DGCS
Страница 10: ...10 Operation Procedures 10 SA VK91DGCS SA VK91DGCP ...
Страница 11: ...11 SA VK91DGCS SA VK91DGCP ...
Страница 12: ...11 Disc information 12 SA VK91DGCS SA VK91DGCP ...
Страница 13: ...13 SA VK91DGCS SA VK91DGCP ...
Страница 17: ...13 Procedure for repairing the set 17 SA VK91DGCS SA VK91DGCP ...
Страница 42: ...42 SA VK91DGCS SA VK91DGCP ...
Страница 43: ...17 9 3 Replacement for the traverse deck Follow the Step 1 Step 10 of item 17 9 2 43 SA VK91DGCS SA VK91DGCP ...
Страница 45: ...45 SA VK91DGCS SA VK91DGCP ...
Страница 46: ...46 SA VK91DGCS SA VK91DGCP ...
Страница 48: ...48 SA VK91DGCS SA VK91DGCP ...
Страница 49: ...49 SA VK91DGCS SA VK91DGCP ...
Страница 50: ...50 SA VK91DGCS SA VK91DGCP ...
Страница 51: ...51 SA VK91DGCS SA VK91DGCP ...
Страница 52: ...52 SA VK91DGCS SA VK91DGCP ...
Страница 53: ...53 SA VK91DGCS SA VK91DGCP ...
Страница 54: ...54 SA VK91DGCS SA VK91DGCP ...
Страница 55: ...55 SA VK91DGCS SA VK91DGCP ...
Страница 56: ...56 SA VK91DGCS SA VK91DGCP ...
Страница 57: ...57 SA VK91DGCS SA VK91DGCP ...
Страница 59: ...59 SA VK91DGCS SA VK91DGCP ...
Страница 70: ...19 3 1 Cassette Deck Section 19 3 2 Adjustment Point 19 3 Alignment Points 70 SA VK91DGCS SA VK91DGCP ...
Страница 129: ...26 1 Deck Mechanism RAA3412 S 26 1 1 Deck Mechanism Parts Location 129 SA VK91DGCS SA VK91DGCP ...
Страница 130: ...130 SA VK91DGCS SA VK91DGCP ...
Страница 132: ...26 2 DVD Loading Mechanism 26 2 1 DVD Loading Mechanism Parts Location 132 SA VK91DGCS SA VK91DGCP ...
Страница 133: ...133 SA VK91DGCS SA VK91DGCP ...
Страница 134: ...134 SA VK91DGCS SA VK91DGCP ...
Страница 136: ...26 3 Cabinet 26 3 1 Cabinet Parts Location 136 SA VK91DGCS SA VK91DGCP ...
Страница 137: ...137 SA VK91DGCS SA VK91DGCP ...
Страница 138: ...138 SA VK91DGCS SA VK91DGCP ...
Страница 154: ...26 6 Packaging 154 SA VK91DGCS SA VK91DGCP ...
Страница 155: ...155 SA VK91DGCS SA VK91DGCP PRT0407 D K J N L ...


