39
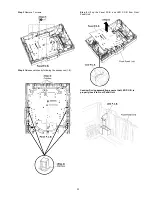
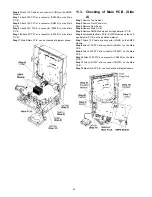
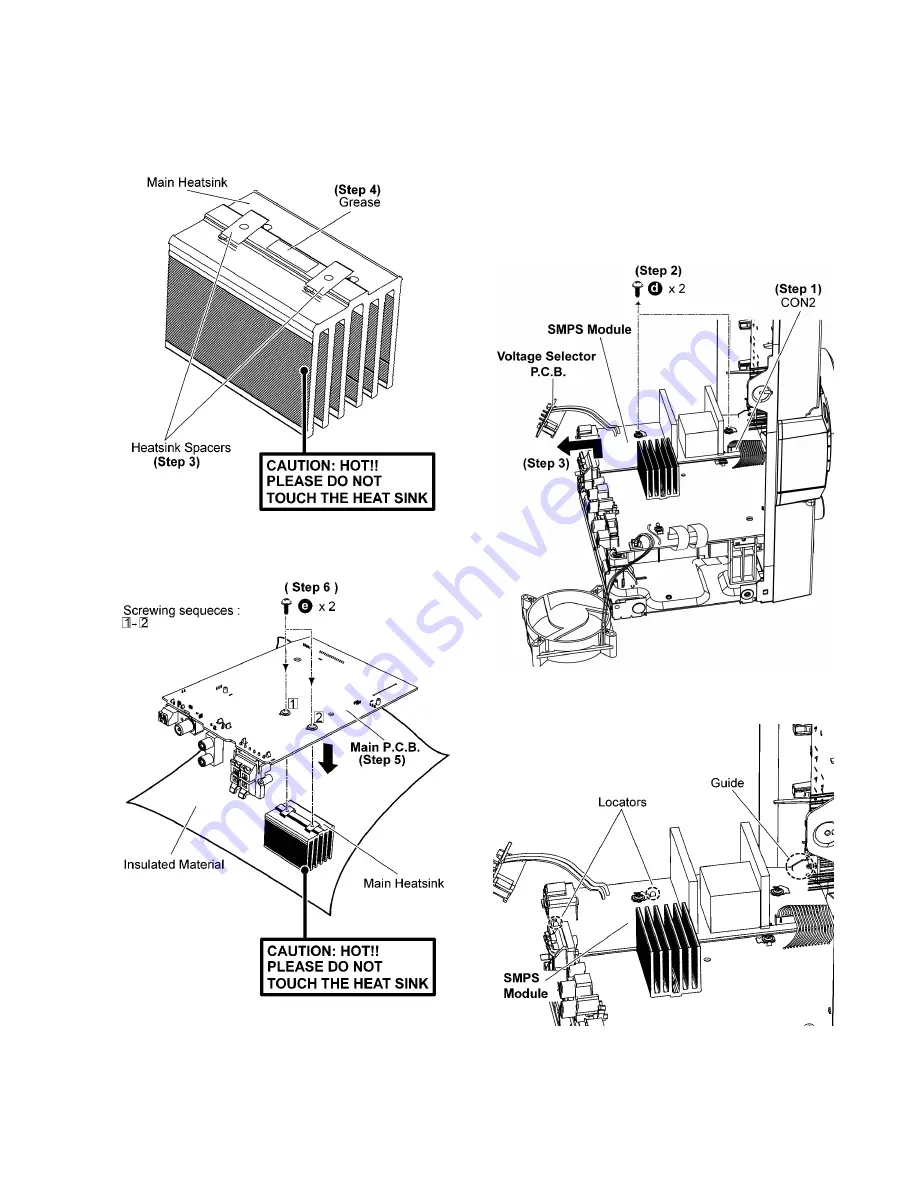
Step 3 Fix Heatsink spacers onto Main Heatsink..
Caotion: Ensure that the Heatsink Spacers are properly
located and seated flatly onto Main Heatsink.
Step 4 Apply grease to the Main Heatsink as indicate in the dia-
gram.
Caution: Ensure Grease thickness is about 0.2mm.
Step 5 Upset the Main P.C.B..
Step 6 Fix 2 screws.
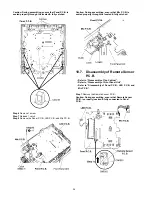
10.13. Disassembly of SMPS Module
and Voltage Selector P.C.B.
• Refer to “Disassembly of Top Cabinet.”.
• Refer to “Disassembly of Rear Panel”.
Step 1 Detach 13P Cable at a connector (CON2) on the SMPS
Module.
Step 2 Remove 2 screws.
Step 3 Remove the SMPS Module and the Voltage Selector
P.C.B..
Caution: During assembling, ensure that SMPS Module is
seated properly through the located & fully guided.
Содержание SA-AKX36PH
Страница 15: ...15 5 General Introduction 5 1 Media Information ...
Страница 16: ...16 6 Location of Controls and Components 6 1 Remote Control Key Button Operation ...
Страница 17: ...17 6 2 Main Unit Key Button Operation ...
Страница 18: ...18 7 Installation Instructions 7 1 Speaker and A C Connection ...
Страница 26: ...26 9 Troubleshooting Guide Contents for this section is not available at time of issue ...
Страница 29: ...29 10 3 Main Components and P C B Locations ...
Страница 52: ...52 ...
Страница 54: ...54 ...
Страница 70: ...70 ...
Страница 80: ...80 ...
Страница 90: ...90 MMH1302 ...


