LAN
ENGLISH -
53
Settings
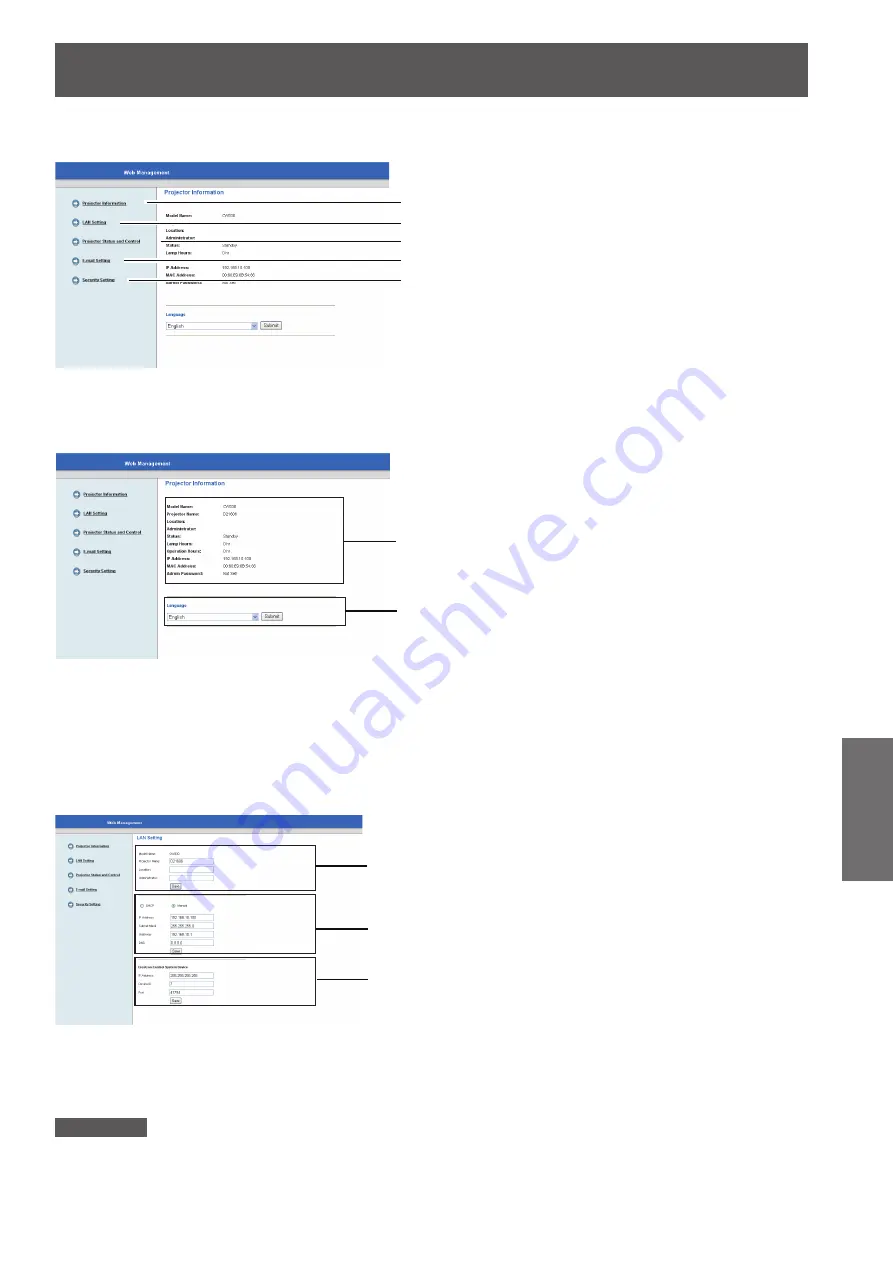
Main Menu description
J
Projector Information
J
Displays basic information of the projector.
LAN Settings
J
Sets the LAN Settings of the projector and press [Save] to store settings.
Attention
For the security reason, do not enter any information that third party can recognize your location or name, in [Location] and
z
[Administrator] columns.
(1)
(2)
(1) Projector Information
Confirm Projector Information.
Displays lamp use time [Lamp Hours]
(corresponding value) and projector running hour
[Operating Hours].
(2) Language
Select WEB Management display language (17
languages).
Switch languages among English / German /
z
French / Italian / Spanish /Dutch / Portuguese
/ Japanese / Traditional Chinese / Simplified
Chinese / Korean / Russian / Polish / Swedish /
Arabic / Turkish / Norwegian.
The On-screen Menu of Language of the
projector can not be changed by the Web
management menu.
(1)
(2)
(3)
(1)
(2)
(3)
(4)
(5)
(1) Projector Information
Click this item and the [Projector Information] displays.
(2) LAN Settings
Click this item and the [LAN Settings] displays.
(3) Projector Status and Control
Click this item and the [Projector Status and Control]
displays.
(4) E-mail Setting
Click this item and the [E-mail Setting] displays.
(5) Security Setting
Click this item and the [Security Setting] displays.
(1) [Model Name] [Projector Name] [Location]
[Administrator]
Enter projector basic information and press [Save].
(2) [DHCP] [Manual]
Select [DHCP] when the DHCP client function is
enable.
[IP Address] [Subnet Mask] [Gateway]
[DNS Server]
When DHCP server is unavailable, please select
[Manual] and enter [IP Address], [Subnet Mask],
[Gateway] and [DNS server].
(3) [Crestron Control System Device]
Enter [IP Address], [Device ID] and [Port] when
Crestron RoomView is in use and press [Save].


![NEC MT800[1].PART1 User Manual preview](http://thumbs.mh-extra.com/thumbs/nec/mt800-1-part1/mt800-1-part1_user-manual_250403-1.webp)


