background image

14

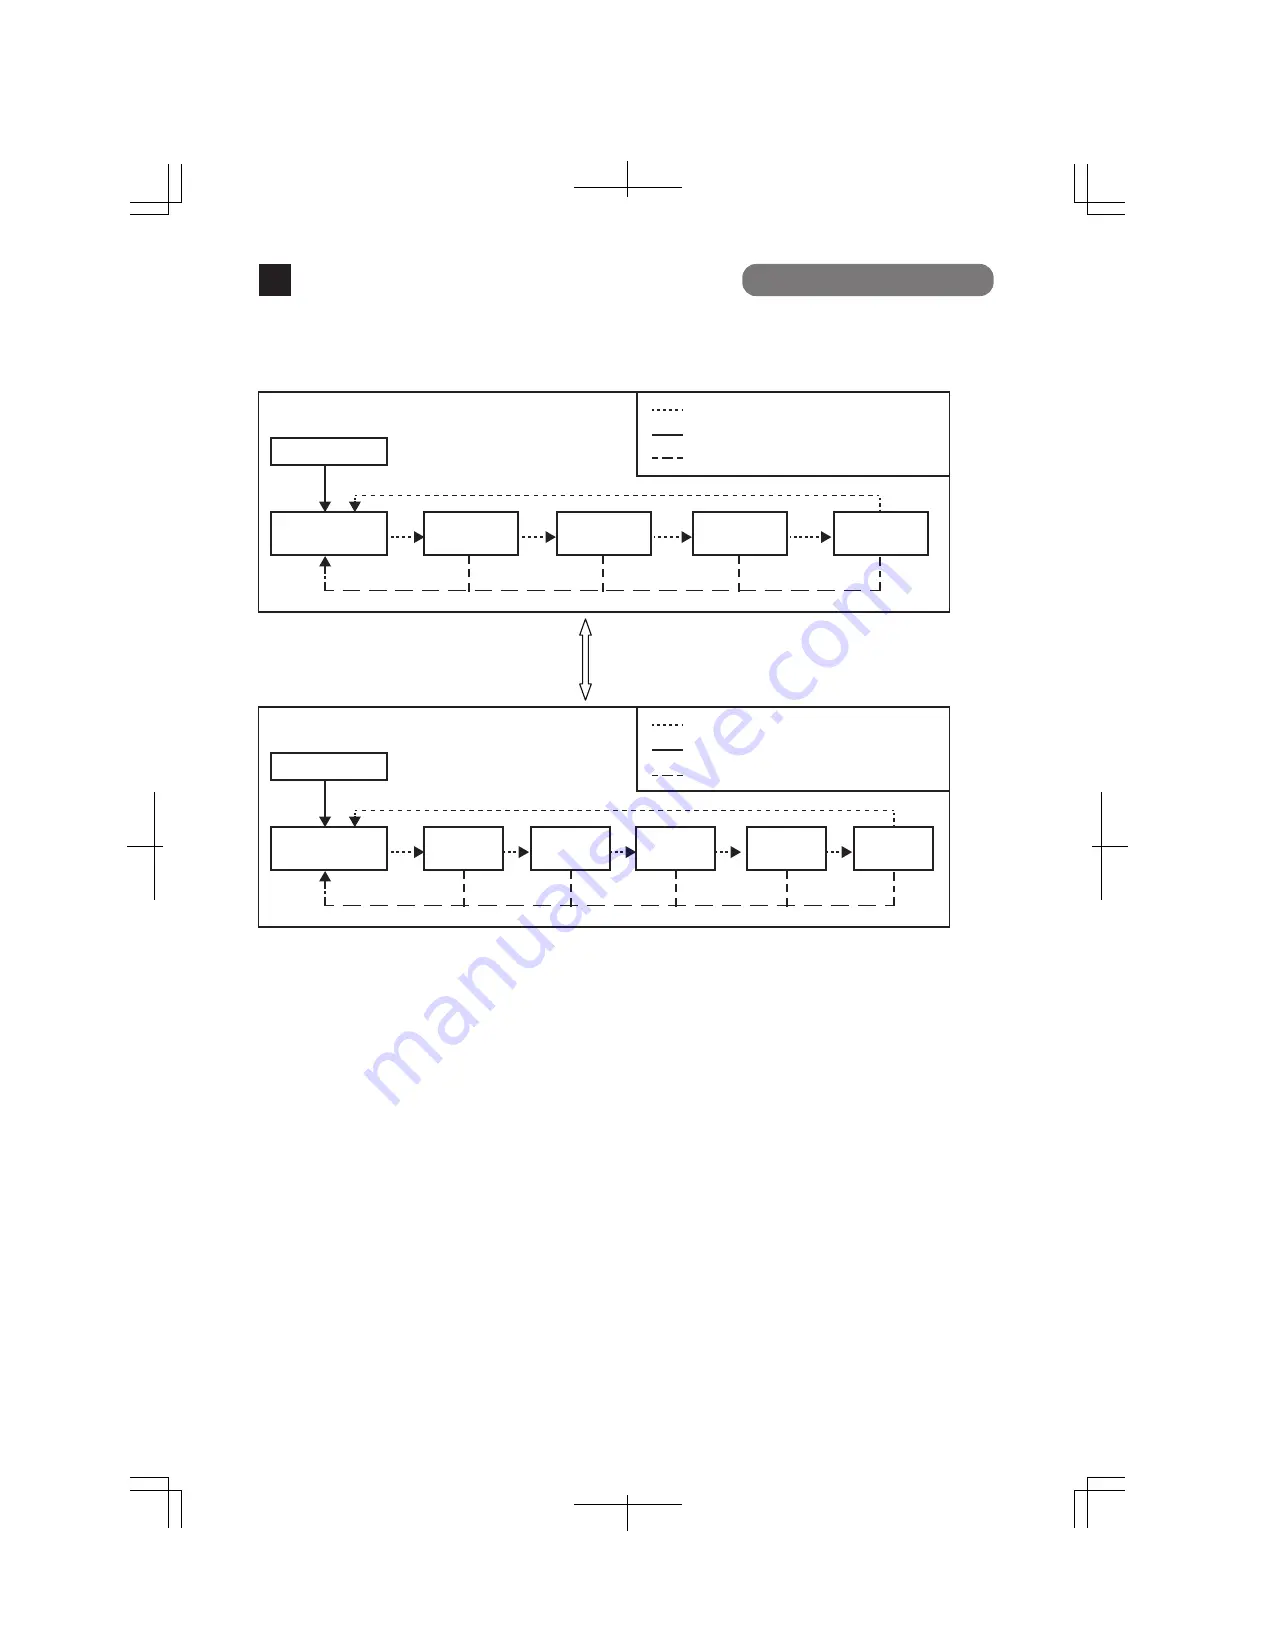
Switch two types of Base modes and their LEDs in the following way:

When Base mode is Status mode (factory default setting)

When Base mode is ECO mode

Switch Base mode (keep pressing "LED DISPLAY 
CHANGE BUTTON" over 3 seconds)

Press "LED DISPLAY CHANGE BUTTON" manually.

Automatic

Automatically returns to Base mode after 1 minute.

Boot

Status mode
(Base mode)

GIGA mode

Speed mode

DUPLEX

mode

Loop History

mode

Note: The base mode is maintained even when the power is turned OFF.
 

LED lamps for each mode and LED lamps for ports 1 to 9 correspond as shown in 

Table 1 (see page 10).


About Loop detection

Turns on the port LED with a orange light when a loop occurs in the corresponding port. At 

this time, the relevant port automatically shuts down (default setting: 60 sec.) to prevent 

loop from occurring.

If the loop is still not removed, the port will shut down again. Remove the loop while the 

port is shut down.

During loop is occurring, or if loop has occurred within the latest 3 days, LOOP HISTORY LED 

blinks to notify this.

It is possible to switch loop detection setting (OFF/ON) by using a console cable (for detail, 

see the attached CD-ROM) or by pressing "LED DISPLAY CHANGE BUTTON" for 10 seconds 

or more. (The default setting is ON.) When it is switched successfully, LOOP HISTORY LED 

lights up and setting is complete.

If you wish to clear loop detection history, turn OFF once the power supply of the Switching 

Hub and turn it ON again.

Then, loop detection history is deleted.

The Switching Hub can hold up to 64 loop history logs.


Press "LED DISPLAY CHANGE BUTTON" manually.

Automatic

Automatically returns to Base mode after 1 minute.

Boot

ECO mode

(Base mode)

Status 

mode

GIGA 

mode

Speed 

mode

DUPLEX 

mode

Loop history 

mode

Part Names and Functions

2

Содержание PN28080K-TH

Страница 1: ...ing Hub Please read the Important Safety Instructions on pages from 3 to 5 Any problems or damage resulting from disassembly of this Switching Hub by customers are not covered by the warranty I0716 10719 Printed in Japan Swtich M8eG Model No PN28080K TH PN28080K MY PN28080K ID PN28080K SG 2 12 7 Higashi Shimbashi Minato ku Tokyo Japan 105 0021 2019 ...

Страница 2: ...roduct 1 Product Outline 1 1 Features 1 2 Specifications 1 3 Accessories 1 4 Basic operation 2 Part Names and Functions 2 1 LED display change 3 Installation and Configuration 3 1 Mounting to rack 3 2 Configuration of IP address BASIC Troubleshooting 3 6 7 7 8 9 9 10 13 15 15 17 19 ...

Страница 3: ... Do not disassemble and or modify this Switching Hub Deviation could lead to fire electric shock and or equipment failure Do not damage the power cord Do not bend too tightly stretch twist bundle Do not unplug nor plug in the power plug with wet hands Deviation could lead to electrical shock and or equipment failure Do not insert nor drop any foreign objects such as metal or readily combustible th...

Страница 4: ...ction Unplug the power cord if the STATUS LED blinks in orange system fault Deviation such as keeping connected for a long time could lead to fire Handle the Switching Hub carefully so that fingers or hands may not be damaged by twisted pair port SFP extension slot console port or power cord hook block Do not connect any other devices except for 10BASE T 100BASE TX 1000BASE T devices to the twiste...

Страница 5: ...ereas the influence rate due to communications failures is extremely high in regard to systems that directly affect systems and human lives which require extremely high reliability It is strongly recommended that a lightning arrester SPD be installed on the twisted pair port side and the power supply side of this Switching Hub Malfunctions might be caused due to overcurrent and overvoltage due to ...

Страница 6: ...e static charge such as carpet Under direct sunlight Possible condensation High low temperature exceeding the specifications environment Strong vibration and or strong shock Failure to satisfy the conditions above may result in fire electric shock equipment failure and or malfunction Note that such events are not covered by the warranty Please use this Switching Hub in places where the ambient tem...

Страница 7: ...e auto negotiation ready 10 100 1000BASE T ports Their speed and communication mode can be changed by configuration Port 9 can be exclusively used as an SFP extension slot All twisted pair ports support straight cross cable auto sensing function Simply connect devices with straight cables whether it is a terminal or a network device This function does not work if the port communication configurati...

Страница 8: ...l compatible Max 256 groups including the default VLAN Port based VLAN Internet Mansion function QoS IEEE802 1p compatible Supports 4 priority queues Port monitoring 1 n Port grouping Communication control is available only for ports in the same group Up to 256 groups can be registered Management method SNMPv1 v2c v3 Telnet SSHv2 WEB Console Loop detection Ports 1 7 ON Ports 8 9 OFF default settin...

Страница 9: ...n orange and self diagnosis of hardware is executed On completion of self diagnosis PWR LED Power and STATUS ECO LED Status ECO mode light in green and the Switching Hub starts operation as a Switching Hub When this Switching Hub successfully communicates with a terminal connected to a port the Port LED lights up When the terminal is not operating normally for example when power is not supplied to...

Страница 10: ... minimum 18AWG green and yellow stranded copper wire to Ground terminal screw 10 100 1000BASE T port ports 1 8 Devices such as 10 100 1000BASE T terminal hub repeater bridge and Switching Hub can be connected to this port Install the device so that the length of twisted pair cable CAT5e or above becomes 100 m or less SFP extension slot port 9 Install SFP extension module here SFP port supports onl...

Страница 11: ...dication of communication speed at 1000 Mbps GIGA mode indication of communication speed at 100 Mbps or 10 Mbps Speed mode indication of transmission mode of full duplex or half duplex DUPLEX mode indication of a port having a history of loop occurrence Loop History mode or turning off LEDs of all ports ECO mode Mode at booting is called as Base mode There are two types of Base modes which are Sta...

Страница 12: ...t 100 Mbps or 10 Mbps or no device is connected 100M Green Light Link is established at 100 Mbps Off Link is established at 1000 Mbps or 10 Mbps or no device is connected FULL Green Light Link is established at full duplex Off Link is established at half duplex or no device is connected Orange Light Shutting down by loop detection Off Not shutting down by loop detection LOOP HISTORY Green Light Lo...

Страница 13: ...s Base mode There are two types of Base modes which are Status mode default setting at shipment and ECO mode To switch the Base mode keep pressing LED DISPLAY CHANGE BUTTON for 3 seconds or more When switching is done successfully 5 LEDs of STATUS ECO LED GIGA LED 100M LED and FULL LED are lighted once at the same time they turned off and then it enters a Base mode After switching to PoE mode GIGA...

Страница 14: ...revent loop from occurring If the loop is still not removed the port will shut down again Remove the loop while the port is shut down During loop is occurring or if loop has occurred within the latest 3 days LOOP HISTORY LED blinks to notify this It is possible to switch loop detection setting OFF ON by using a console cable for detail see the attached CD ROM or by pressing LED DISPLAY CHANGE BUTT...

Страница 15: ...tching Hubs can be connected When connecting two Switching Hubs and installing them on a rack use the two 19 inch rack mount brackets and eight screws for fixing the mount brackets to the Switching Hub to fix the mount brackets to the four holes on a side of the Switching Hubs Then use the two connection brackets and eight screws for fixing the connection brackets to securely fix the connection br...

Страница 16: ...Installation on a rack one unit Installation on a rack two units connected Connection screw hole 19 inch rack mount brackets Connection brackets 19 inch rack mount brackets Back Back Front Front 16 Installation and Configuration 3 ...

Страница 17: ... 3 4 Press I to select System I P Configuration The screen to enter some addresses is displayed Screen 4 5 Press I to set an IP Address press M to set a Subnet Mask or press G to set a Default Gateway Then enter the specified address Screen 4 6 After completing the settings select Q uit to previous menu twice to return to Main Menu Screen 2 Here select Save Configuration to F lash Screen 5 and the...

Страница 18: ... Screen 4 For the following please see the PDF version Operating Instructions in CD ROM Detailed configuration and management methods using the CLI Configuration and management method from ZEQUO assist Plus Installation and Configuration 3 ...

Страница 19: ...hich a loop is occurring or has been removed within 3 days Communications are slow Are the communication speed and mode settings correct If the communication mode setting is incorrect the operation may be being performed in the half duplex mode Please reconfirm autonegotiation setting Do not set the connected equipment to forced full duplex Is not the utilization ratio of the network to which this...

Отзывы: