


- 6 -
EXT LINK TV ASPECT TV/TEXT
TRACKING/V-LOCK
VOLUME
INPUT SELECT
INPUT SELECT
INDEX
PROG PLAY
PROG PLAY AUDIO
REC
CH
CH
ENTER
VIDEO Plus+
5
2
3
3
1
1
2
3
4
5
TV screen
The picture with interference
The clear picture
On-Screen Display
Test pattern indication
VCR display
Indication when the RF output
channel is 28 (example)
Indication after changing the RF
output channel to 31 (example)
Test pattern indication
21
68
(RF OFF)
...
VCR
TV
MENU
1
2
3
7
8
0
9
4
5
6
- - - - - - - - - - - - - - - - - - - - - - - - - - - - - - - - - - - - - - - - - - - - - - - - - - - - - - - - - - - - - - -- - - - - - - - - - - - - - - - - - - - - - - - - - - - - - - - - - - - - - - - - - - - - - - - - - - -
- - - - - - - - - - - - - - - - - - - - - - - - - - - - - - - - - - - - - - - - - - - - - - - - - - - - - - - - - - - - - - -- - - - - - - - - - - - - - - - - - - - - - - - - - - - - - - - - - - - - - - - - - - - - - - - - - - -
- - - - - - - - - - - - - - - - - - - - - - - - - - - - - - - - - - - - - - - - - - - - - - - - - - - - - - - - - - - - - - -- - - - - - - - - - - - - - - - - - - - - - - - - - - - - - - - - - - - - - - - - - - - - - - - - - - -
- - - - - - - - - - - - - - - - - - - - - - - - - - - - - - - - - - - - - - - - - - - - - - - - - - - - - - - - - - - - - - -- - - - - - - - - - - - - - - - - - - - - - - - - - - - - - - - - - - - - - - - - - - - - - - - - - - -
CH
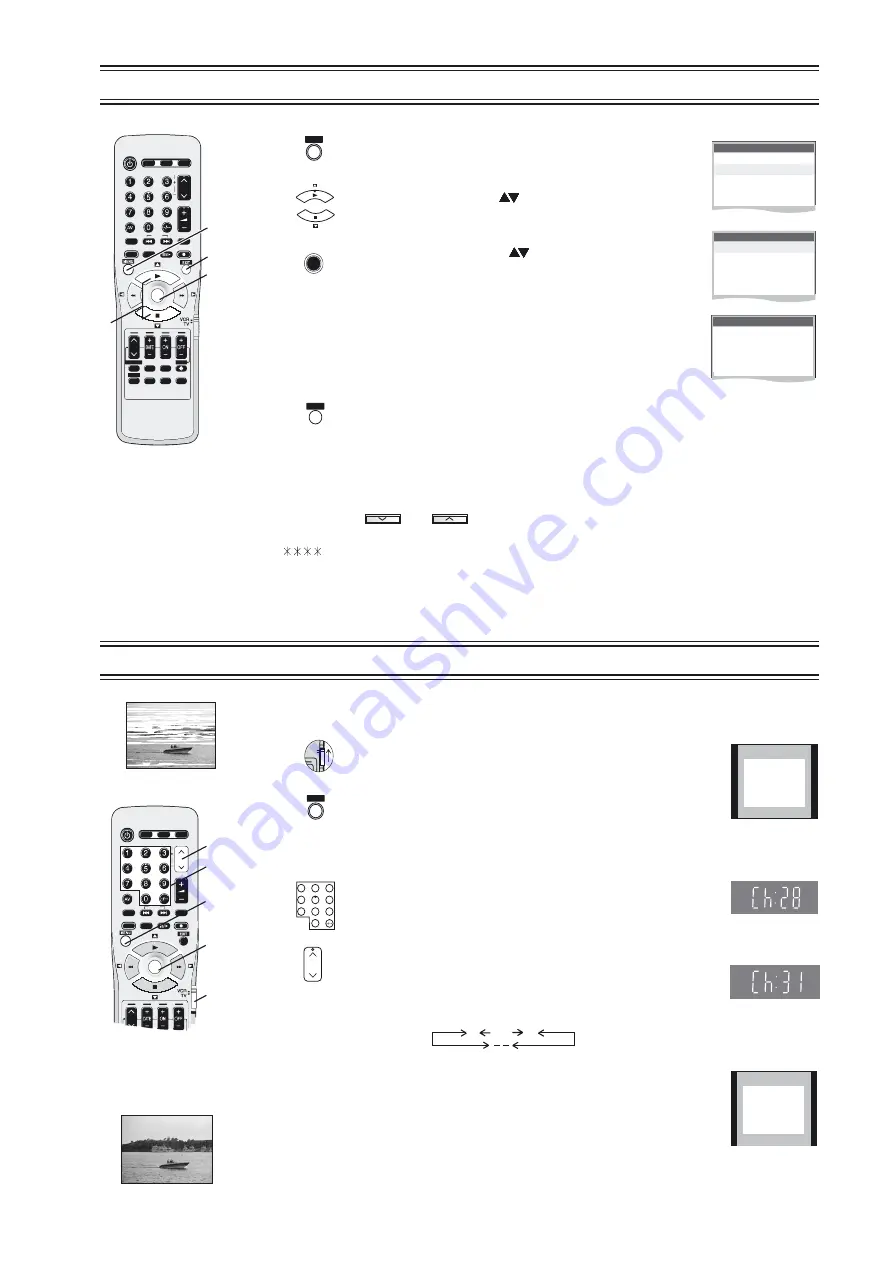
Removing Interference
Removing Interference
In some cases, interference (lines or patterning) or a very poor picture may appear on the TV when the
VCR is connected. If this happens, follow the steps below to change the video playback channel (RF
output channel) to remove the interference.
Set the
switch to
.
VCR/TV
VCR
Press the
button for more than 5 seconds.
MENU
The RF output channel number is displayed on the
VCR display.
Press the
buttons or use the
button
Numeric
Channel
to select a channel number, which differs by 2 or 3 from
the present channel number. (For example, if the
original channel number was 28, enter 31.)
Set the RF output channel of the VCR to [- -] (RF OFF)
if the VCR is connected to the TV via the 21-pin Scart
cable.
Press the
numeric button or
button to
0
Channel
display
[- -]. Skip step 4, if using a 21-pin Scart cable.
Retune your TV until you receive the Test pattern. It
may be necessary to repeat steps
and
above until
you can see the Test pattern clearly.
2
3
Press the
button to finish this setting.
ENTER
VCR Ch:28
VCR Ch:31
EXT LINK TV ASPECT TV/TEXT
TRACKING/V-LOCK
TRACKING/V-LOCK
VOLUME
INPUT SELECT
INPUT SELECT
INDEX
PROG PLAY
PROG PLAY AUDIO
REC
PDC
SL/LP/EP
PROG./CHECK
PROG./CHECK
TIMER
OFF TIMER OSD/DISPLAY RESET/CANCEL
RESET/CANCEL
CH
CH
I-TIMER
ENTER
VIDEO Plus+
2,3
2,3
1
4
On-Screen Display
MENU
EXIT
1
2
3
4
- - - - - - - - - - - - - - - - - - - - - - - - - - - - - - - - - - - - - - - - - - - - - - - - - - - - - - - - - - - - - - -- - - - - - - - - - - - - - - - - - - - - - - - - - - - - - - - - - - - - - - - - - - - - - - - - - - -
- - - - - - - - - - - - - - - - - - - - - - - - - - - - - - - - - - - - - - - - - - - - - - - - - - - - - - - - - - - - - - -- - - - - - - - - - - - - - - - - - - - - - - - - - - - - - - - - - - - - - - - - - - - - - - - - - - -
- - - - - - - - - - - - - - - - - - - - - - - - - - - - - - - - - - - - - - - - - - - - - - - - - - - - - - - - - - - - - - -- - - - - - - - - - - - - - - - - - - - - - - - - - - - - - - - - - - - - - - - - - - - - - - - - - - -
Notes:
Tuning
Pos Name
Ch
Pos Name
Ch
6 - - - -
- - -
7
8
9
10
- - - -
- - -
- - - -
- - -
- - - -
- - -
- - - -
- - -
1 BBC1
22
2 BBC2
23
3 ITV
24
4 CH4
25
5 CH5
26
ENTER
Tuning
Manual
Auto-Setup
Shipping condition
Owner ID
Menu
Timer recording
Tuning
Clock set
Others
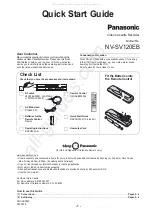
Checking the Settings for Auto Setup
To confirm that the TV Stations have been tuned correctly by Auto Setup
Press the
button to display the OSD Menu on
the TV screen.
MENU
Press the
buttons (
) to select [Tuning] then
press the
button.
Cursor
ENTER
Press the
buttons (
) to select [Manual] then
press the
button to display the list of tuned TV
stations and confirm that all available TV stations have
been set correctly. Positions 5 and 6 may differ from the
example shown. If Channel 5 is received, it is usually
found on programme position 5 and a connected
satellite receiver on programme position 6. If Channel 5
is not received but a satellite receiver is connected, then
the satellite receiver is found on programme position 5.
Cursor
ENTER
List of tuned TV stations
(example)
Press the
button to exit the On-Screen Display.
EXIT
If the station names and/or channel numbers have not been set correctly.
See page 40
for details.
of Operating Instructions
!
!
If the station name is [
]:
The asterisks indicate that Auto Setup found a station but did not assign a name to it (due to a weak signal).
If the station name is [- - - -]:
The dashes represent unused channel positions.
Stations on the list marked by an asterisk will need to be named manually. (See page 41 of Operating Instructions.)
Stations on the list marked by dashes will need to be set manually. (See page 40 - 42 of Operating Instructions.).
When no stations have been set, confirm all connections and restart Auto Setup.
You can restart Auto Setup, without using remote controller, by pressing some buttons on the front
of the unit. Hold down
and
on the main unit simultaneously for about 5 seconds.
All manuals and user guides at all-guides.com
all-guides.com


