background image

Playback mode

42

VQT0T16

If you attempt to play back file recorded in a 
different format or file data is defective, the 
whole display becomes bluish and the 
“UNPLAYABLE CARD’’ indication may appear 
as warning.

When playing back still pictures recorded in 4:3 
mode 

(

, , , ) 

on 

wide-screen 

TV, 

the picture quality may deteriorate.

When playing back a file recorded on other 
equipment, the date and time display is different 
from when it was recorded.

ª

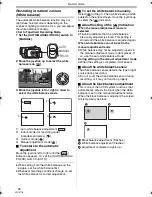
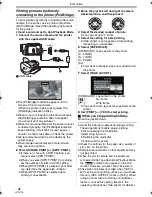
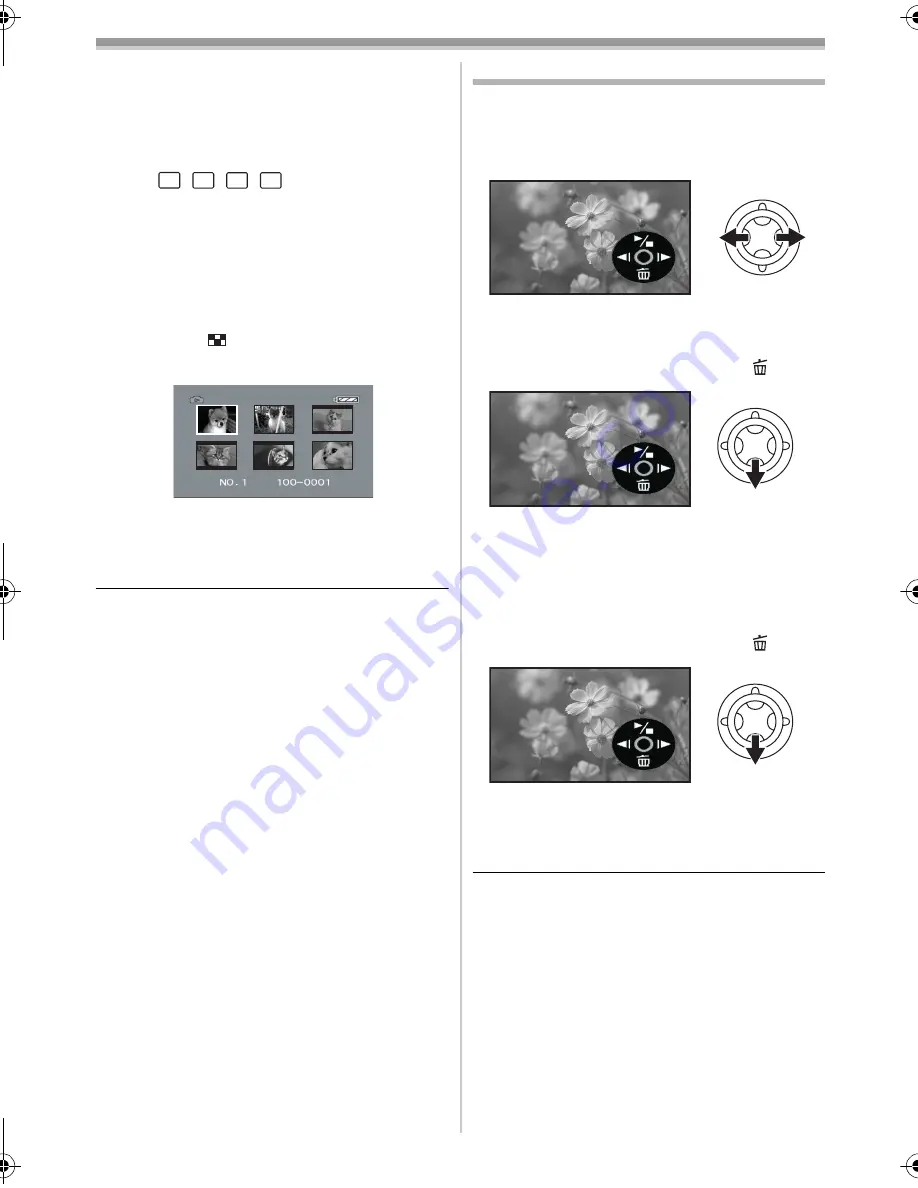
To display multiple playback files

Multiple files on the card (6 files on 1 screen) are 
displayed.

1

Move the [

s

/VOL

r

] lever to switch the 

images.

Towards [

r

]:

Full-screen display 
(Displays 1 image.) 

Towards [

`

]:

Multi-screen display 
(Displays 6 files on 1 screen.) 

In the multi-screen display,

Move the joystick to select a file (The 
selected file will be encircled by a orange  
frame) and press to determine it. The 
selected file is full-screen displayed.

If there are 7 files or more, then move the 
joystick. The next, or previous multi-screen 
will be displayed.

ª

About the compatibility of still 
pictures

The movie camera is compliant with the unified 
standard DCF (Design rule for Camera File 
system) established by JEITA (Japan 
Electronics and Information Technology 
Industries Association).

The file format supported by this movie camera 
is JPEG. (Not all JPEG formatted files will be 
played back.) 

If an out-of-specs file is played back, the folder/
file name may not be displayed.

The movie camera may degrade or not play 
back data recorded or created on another 
product and another product may degrade or 
not play back data recorded on the movie 
camera.

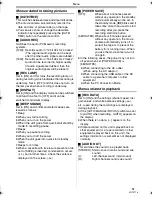
Deleting files recorded on a card

The deleted files cannot be restored.

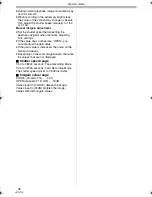
Set to Card Playback Mode.

1

Move the joystick left or right to select a file 
to delete.

You can select a file in the multi-screen display. 
After selecting the file, press the joystick and 
display the operation icon.

2

Move the joystick down to select [

].

3

Move the joystick up or down in order to 
select [DELETE 1 FILE] and then press it.

4

When the confirming message appears, 
select [YES] and press the joystick.

In order to stop deletion, select [NO].

ª

To delete all files

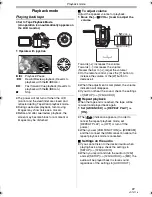
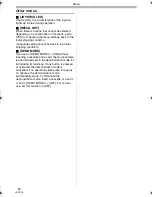
1

Move the joystick down to select [

].

2

Move the joystick up or down in order to 
select [ALL FILES] and then press it.

3

When the confirming message appears, 
select [YES] and press the joystick.

Do not turn off the power while deleting.

To delete files, use the AC adaptor or a 
sufficiently charged battery.

In case of [ALL FILES], the deletion may take 
time if there are many files on the card.

If the “CARD FULL” indication appears when 
recording, the card is full and no further data 
can be recorded. Insert a new card or set the 
camera to Card Playback Mode and delete 
unnecessary files.

If files conforming to DCF standard are deleted, 
all the data related to the files will be deleted.

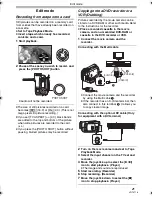
3.1

M

2

M

1

M

0.3

M

VQT0T16_EP_eng.book  42 ページ  2005年11月21日 月曜日 午後10時23分

Содержание NV-GS280

Страница 1: ...ukcja obsługi Digital Video Camera Model No NV GS300 NV GS280 Before use please read these instructions completely Przed pierwszym włączeniem kamery prosimy o dokładne przeczytanie instrukcji obsługi VQT0T16 NV GS300 NV GS280 DV IN j ...

Страница 2: ...o disassemble or modify the Movie Camera SD Logo is a trademark Leica is a registered trademark of Leica microsystems IR GmbH and Dicomar is a registered trademark of Leica Camera AG All other company and product names in the operating instructions are trademarks or registered trademarks of their respective corporations Files recorded on SD Memory Card It may not be possible to play back the files...

Страница 3: ...will help to save valuable resources and prevent any potential negative effects on human health and the environment which could otherwise arise from inappropriate waste handling Please contact your local authority for further details of your nearest designated collection point Penalties may be applicable for incorrect disposal of this waste in accordance with national legislation For business user...

Страница 4: ...n 30 Wind noise reduction function 31 Anti Ground Shooting AGS 31 Using the built in video flash 32 Self timer recording 33 Wide 4 3 Function 33 Image stabilizer function 34 Continuous Photoshot 34 Recording in various situations Scene mode 35 Recording in natural colours White balance 36 Manual focus adjustment 37 Manual shutter speed aperture adjustment 37 Playback mode Playing back tape 39 Slow...

Страница 5: ... DV cable VW CD1E 15 Jacket pouch VW SJ05E Some optional accessories may not be available in some countries Parts identification and handling ª Camera 1 Built in video flash 32 2 White balance sensor 36 Remote control sensor 22 3 Recording lamp 51 4 Grip belt One touch free style grip belt 8 5 Lens LEICA DICOMAR 6 Lens cover 7 Microphone built in stereo 28 31 8 Speaker 39 9 Audio video S Video out...

Страница 6: ...d slot cover 15 30 Cassette holder 14 31 Accessory shoe Accessories such as a stereo microphone VW VMS2E optional are attached here 32 Cassette eject lever OPEN EJECT 14 33 Cassette cover 14 34 Zoom lever W T 28 Volume lever s VOLr 39 35 Photoshot button PHOTO SHOT 25 Due to limitations in LCD production technology there may be some tiny bright or dark spots on the Viewfinder screen However this i...

Страница 7: ...r to remove the lens hood rotate it counterclockwise 1 In order to fit it put into slot 2 and then rotate it clockwise Fit the MC protector or the ND filter of the Filter Kit VW LF37WE optional in front of the lens hood Do not fit the other accessories on the hood Except for the lens cap Refer to the operating instructions for the Filter Kit When fitting the tele conversion lens VW LT3714ME option...

Страница 8: ...WE optional hold both sides of the lens cap with the tips of your first 2 fingers The lens cap removed can be hung on the lens cap fixture It cannot be hung if the grip belt is used as a hand strap The one touch free style grip belt ª To use as a grip belt Adjust the belt length so it fits your hand 1 Adjust the belt length and the pad position 1 Flip the belt 2 Adjust the length 3 Fix the belt ª ...

Страница 9: ...l charging will start When the battery temperature is excessively high or low the CHARGE lamp flashes and the charging time will be longer than normal ª Connecting to the AC outlet 1 Connect the AC mains lead to the AC adaptor and the AC mains socket 2 Connect the DC input lead to the AC adaptor 3 Connect the DC input lead to this product The output plug of the AC mains lead is not completely conn...

Страница 10: ...u use this camera with the LCD monitor lit up by pressing the POWER LCD button The batteries heat up after use or charging The main unit of the movie camera being used will also heat up This is normal Along with the reduction of the battery capacity the display will change If the battery discharges then will flash Turning the camera on ª How to turn on the power 1 While pressing the button 1 set t...

Страница 11: ...ntre of the joystick Do steps 2 and 3 below to set the date time If the screen shows the incorrect date time then adjust it Set to Tape Recording Mode or Card Recording Mode 1 Set BASIC CLOCK SET YES 18 2 Move the joystick left or right in order to select the item to be set Then move the joystick up or down to set the desired value The year will change as follows 2000 2001 2089 2000 The 24 hour cl...

Страница 12: ...otated the camera may be damaged or fail If the LCD monitor is rotated by 180o towards the lens and the viewfinder is extended when recording yourself the LCD monitor and the viewfinder simultaneously light Using the viewfinder ª Extending the viewfinder 1 Pull out the viewfinder and extend it by pinching the extension knob The viewfinder will be activated If the LCD monitor is opened the viewfind...

Страница 13: ...se approx 1 7 seconds after it is turned on ª To cancel Quick Start 1 Set SETUP QUICK START OFF 18 If the OFF ON switch is set to OFF while the unit is in quick start standby the lens cover closes and the power turns off If the standby continues for approx 30 minutes then the Status indicator will go off and the camera will be completely turned off If the Mode dial is moved or the battery is remov...

Страница 14: ...rding When closing the cassette cover do not get anything such as a cable caught in the cover After use be sure to rewind the cassette completely remove it and put it in a case Store the case in an upright position 62 If the indicator of the condensation does not display on the LCD monitor and or viewfinder and you notice condensation on the lens or the main unit do not open the cassette cover oth...

Страница 15: ...amera or the card may damage or erase the data stored on the card We recommend saving important data on a personal computer by using a USB cable PC card adaptor and USB reader writer ª Card access lamp When the camera accesses the card reading recording playback erasing etc the access lamp lights up If the following operations are performed when the access lamp is lit then the card or the recorded...

Страница 16: ... the menu screen and selection of files to be played back on the multi image display Move the joystick up down left or right to select an item or file and then push in the centre to set it ª Joystick and screen display Push the centre of the joystick and icons will be displayed on the screen Each time the joystick is moved down the indication changes In the Tape playback mode or the Card Playback ...

Страница 17: ...US switch is set to FOCUS 6 Card Playback Mode 5 5 2 Iris or gain value 37 3 White balance 36 1 Shutter speed 37 6 6 2 Manual focus adjustment When set to FOCUS 37 1 3 Playback pause 39 4 Stop 39 2 Rewind review playback 39 1 Fast forward cue playback 39 2 1 2 1 2 2 Self timer recording 33 3 Backlight compensation 29 1 Help mode 18 2 2 2 Soft skin mode 30 1 Tele macro 30 3 3 2 Iris or gain value 3...

Страница 18: ...selected icon is displayed on the screen Each time the joystick is moved down the indication changes ª To exit the Help mode Select EXIT icon or press the MENU button When the Help mode is used functions cannot be set Switching the language You can switch the language on the screen display or the menu screen 1 Set LANGUAGE select the desired language Using the menu screen For each individual menu ...

Страница 19: ...get back to the previous screen Move the joystick left ª About the menu setting The menu is not displayed while recording on a tape or a card Also you cannot record on a tape or a card while the menu is displayed ª Operating with remote control The menu screen transition is the same as when the buttons on the main unit are used 1 Press the MENU button 2 Select a menu item Use the direction buttons...

Страница 20: ...ice as bright as the normal When the POWER LCD button is pressed again the indication disappears and the original brightness is restored This will not affect the images to be recorded If you turn on the camera when the AC adaptor is used the POWER LCD function will automatically be activated You cannot use this function in PC Connection Mode ª Changing the picture quality on the LCD monitor 1 Set ...

Страница 21: ...se button 13 Stop button 14 Recording start stop button START STOP 15 Playback button PLAY 1 16 Fast forward cue button 5 17 Enter button ENTER 19 means that these buttons function in the same manner as the corresponding buttons on the movie camera ª Install a button type battery Install the button type battery supplied in the remote control before using it 1 While pressing the stopper 1 pull out ...

Страница 22: ...e button type battery runs down replace it with a new battery part number CR2025 The battery is normally expected to last about 1 year but it depends on operation frequency Keep the button type battery out of the reach of children If the remote control mode of the camera and that of the remote control do not match with each other REMOTE will appear When the remote control is operated for the first...

Страница 23: ... Auto white balance 63 Auto focusing 63 Depending on the brightness of the subject etc the aperture and shutter speed are automatically adjusted for an optimum brightness When set to the Tape recording mode The shutter speed is adjusted to a maximum of 1 250 Colour balance and focus may not be adjusted depending on light sources or scenes If so manually adjust the white balance and focus Scene mod...

Страница 24: ...utton half way while a card is inserted These are not displayed when using the remote control 1 Recording time elapse 2 Remaining tape indication 3 Still picture size 4 Card indication 53 5 Number of recordable still pictures When no picture can be recorded this indication will flash in red 6 Quality of still pictures ª Concerning the remaining tape time indication on the screen The remaining tape...

Страница 25: ... midway through Move the joystick down to select the icon If the cassette tape has no blank part then the camera will stop at the end of the tape The camera stops at a point approx 1 second before the end of the last image recorded When you start recording at that point the image can be recorded seamlessly from the last image Recording still pictures on a card while recording image onto a tape You...

Страница 26: ...o reduce the slight shaking from holding the movie camera by hand We recommend decreasing the zoom magnification and approaching the subject when recording When recording still pictures hold the movie camera firmly with your hands and keep your arms stationary at your side so as not to shake the movie camera You can record stable pictures without shaking by using a tripod and the remote control Fo...

Страница 27: ...rk does not appear in manual focus mode When the subject is not easily focused focus on the subject manually You can record still pictures on the card even if the shutter chance mark does not appear but pictures may be recorded without being focused The shutter chance mark does not appear or becomes difficult to be displayed in the following cases When the zoom magnification is high When the movie...

Страница 28: ...tivated The digital zoom function allows you to select a magnification from 25k to 700k Set to Tape Recording Mode 1 Set ADVANCED D ZOOM 25k or 700k OFF Optical zoom only Up to 10k 25k Digital zoom Up to 25k 700k Digital zoom Up to 700k The larger the digital zoom magnification the more the image quality is degraded When the Card Recording mode is used the digital zoom function cannot be used ª Ab...

Страница 29: ...gain The BACKLIGHT COMPENSATION OFF indication appears on the screen of the movie camera If you turn off the power or operate the mode dial the backlight compensation is cancelled Colour night view functions This function allows you to record colour subjects in dark locations to stand out against the background Attach the camera to a tripod and you can record images free from vibration Only manual...

Страница 30: ...DE OFF indication appears on the screen of the movie camera If the background or anything else in the scene has colours similar to the skin colour they will also be smoothed If the brightness is insufficient the effect may not be clear Tele macro function By focusing only on the subject and blurring the background the image can be impressive This camera can focus on the subject at a distance of ap...

Страница 31: ...g is ON Reduces the wind noise depending on the wind strength If this function is activated in strong winds the stereo effect may be reduced When the wind weakens the stereo effect will be restored Anti Ground Shooting AGS This function prevents unnecessary recording when you forget to pause recording and walk with the camera tilted upside down while recording continues If the movie camera continu...

Страница 32: ...d the shutter speed iris or gain is adjusted the indication either ßA ßAi or ßAj may disappear and the video flash may not be lighted Using the video flash fixes the shutter speed of 1 750 s or faster to 1 500 The picture may become out of focus in a dark place If so adjust the focus manually The picture may appear dark if video flash is lit in front of a white background A conversion lens optiona...

Страница 33: ...mages are recorded with a 16 9 aspect ratio 4 3 Function Images are recorded with a 4 3 aspect ratio Set to Tape Card Recording Mode 1 Wide Function Set BASIC REC ASPECT 16 9 4 3 Function Set BASIC REC ASPECT 4 3 ª To Cancel the Wide 4 3 Function Wide Function Set BASIC REC ASPECT 4 3 4 3 Function Set BASIC REC ASPECT 16 9 The default setting is 16 9 In the wide screen mode the menu screens operat...

Страница 34: ...PHOTO SHOT button ª To stop continuous photoshot midway through Release the PHOTO SHOT button You can press the PHOTO SHOT button halfway and then start continuous photoshot Focusing is fixed If the image stabilizer function is turned on then MEGA OIS will be activated The camera records up to 10 still pictures at intervals of 0 5 seconds If the shutter speed is manually set to 1 25 then the still...

Страница 35: ... playback pause of recorded pictures this mode presents free of camera shakes During normal playback the image movement may not look smooth Avoid recording under fluorescent light mercury light or sodium light because the colour and brightness of the playback image may change If you record a subject illuminated with strong light or a highly reflective subject vertical lines of light may appear If ...

Страница 36: ...t on the entire screen move the joystick up to select the indication ª About flashing of the indication When the manual adjustment mode is selected Flashing indicates that the white balance previously adjusted is stored This setting is stored until the white balance is adjusted again When white balance cannot be set in the manual adjustment mode White balance may not be adjusted properly in the ma...

Страница 37: ...Tape Card Recording Mode 1 Set the AUTO MANUAL FOCUS switch to MANUAL 2 Move the joystick left or right to select the aperture icon or shutter speed icon 3 Move the joystick left or right in order to adjust the shutter speed or aperture 1 Shutter speed 2 Aperture Iris gain value ª To restore to automatic adjustment Set the AUTO MANUAL FOCUS switch to AUTO Manual shutter speed adjustment Avoid reco...

Страница 38: ...tings If the value does not become OPEN you cannot adjust the gain value If the gain value is increased the noise on the screen increases Depending on the zoom magnification there are iris values that are not displayed ª Shutter speed range 1 50 to 1 8000 seconds Tape Recording Mode 1 25 to 1 2000 seconds Card Recording Mode The shutter speed closer to 1 8000 is faster ª Iris gain value range CLOS...

Страница 39: ...ume Towards decreases the volume Nearer the bar to r larger the volume On the remote control press the T button to increase the volume or the W button to decrease it When the adjustment is completed the volume indication will disappear If you do not hear the sound check the settings of SETUP 12bit AUDIO ª Repeat playback When the tape end is reached the tape will be rewound and played back again 1...

Страница 40: ...ever then the images will continuously be played back frame by frame ª To return to normal playback Press the PLAY 1 button on the remote control or move t he joystick up to the 1 icon to start playback Slow motion playback In the reversed slow motion playback the time code indication may be unstable Frame by frame playback Press and hold the E or the D button in the playback pause and then the im...

Страница 41: ...s not output on the TV Check that the plugs are inserted as far as they go Check the 12bit AUDIO settings 47 Check the connected terminal Check the TV s input setting input switch For more information please read the operating instructions for the TV ª To display the on screen information on the TV The information displayed on the LCD monitor or the viewfinder operation icon time code and mode ind...

Страница 42: ...ill be played back If an out of specs file is played back the folder file name may not be displayed The movie camera may degrade or not play back data recorded or created on another product and another product may degrade or not play back data recorded on the movie camera Deleting files recorded on a card The deleted files cannot be restored Set to Card Playback Mode 1 Move the joystick left or ri...

Страница 43: ... is formatted on other equipment the time spent for recording may become longer If the SD Memory Card is formatted on a PC it cannot be used on the Movie Camera Format the SD Memory Card on the Movie Camera in this case Do not remove the card or turn off the power while formatting The Movie Camera supports SD Memory Cards formatted in FAT12 system and FAT16 system based on SD Memory Card Specifica...

Страница 44: ...nd then press it You can select from 0 to 999 Selected number of pictures can be printed as you set the number of prints with the printer supporting DPOF 2 or more files can be set in succession ª To complete the settings Press the MENU button DPOF setting made on another camera may not be recognised by this camera Please perform the DPOF settings on your movie camera ª To set so that all pictures...

Страница 45: ...ed by the movie camera can be stored on a DVD RAM or other such media Refer to the instructions for the recorder Place a recorded cassette in the movie camera and an unrecorded DVD RAM or cassette in the DVD recorder or VCR 1 Connect the movie camera and the recorder Connecting with the Multi cable Connect the movie camera and the recorder by using the Multi cable 1 If the recorder has an S Video ...

Страница 46: ...en the remote control is used in the digital dubbing 3 Start playback Player 4 Start recording Recorder When operating with the main unit Move the joystick up to select icon When operating with the remote control While pressing the REC button on the remote control press the PLAY 1 button 5 Move the joystick up to select the icon again or press the button on the remote control to stop recording Rec...

Страница 47: ...O DUB button on the remote control to make audio dubbing ready 4 Press the button on the remote control to start audio dubbing Be sure that the sound is directed towards either the external microphone or the built in microphone 5 Press the button on the remote control to stop audio dubbing If a tape has a non recorded portion when the tape is dubbed images and sounds may be disturbed when this por...

Страница 48: ...cted date printing is unavailable 3 Move the joystick left and right to select a desired picture and then press it 4 Select the desired number of prints You can set up to 9 prints 5 Select the setting for date printing If the printer is not capable of date printing this setting is unavailable 6 Select PAPER SIZE STANDARD Size specific to the printer 4a5 INCH 5a7 INCH 4a6 INCH A4 You cannot set pap...

Страница 49: ...perating instructions for PC connection D ZOOM 28 ZOOM MIC 28 3 SETUP DISPLAY 51 DATE TIME 51 POWER SAVE 51 QUICK START 13 AGS 31 REMOTE 22 BEEP SOUND 51 LCD AI 20 LCD SET 20 EVF SET 20 JOYSTICK LED 52 INITIAL SET 52 DEMO MODE 52 4 LANGUAGE 18 ª TAPE PLAYBACK MENU 1 BASIC DATE TIME 51 USB FUNCTION Refer to the operating instructions for PC connection 2 ADVANCED REC SPEED NV GS300 only 23 REC STDBY...

Страница 50: ...LAMP 51 SHTR EFFECT 27 3 SETUP DISPLAY 51 DATE TIME 51 POWER SAVE 51 QUICK START 13 REMOTE 22 BEEP SOUND 51 LCD AI 20 LCD SET 20 EVF SET 20 INITIAL SET 52 JOYSTICK LED 52 4 LANGUAGE 18 ª CARD PLAYBACK MENU 1 BASIC DATE TIME 51 PROTECT 43 2 ADVANCED DPOF SET 44 FORMAT CARD 43 3 SETUP DISPLAY 51 REMOTE 22 LCD SET 20 EVF SET 20 LCD AI 20 POWER SAVE 51 TV ASPECT 41 JOYSTICK LED 52 4 LANGUAGE 18 ...

Страница 51: ...e with its erasure prevention tab set to SAVE is inserted condensation occurs 59 and at other times Check the sentence displayed on the screen 54 ª POWER SAVE OFF When about 5 minutes passed without any operation the standby mode automatically will be set In the standby mode blinks and it takes time more than usual to start recording after you press the recording start stop button 5 MINUTES When a...

Страница 52: ...ing cannot be back to the initial shipping condition ª DEMO MODE If you set to DEMO MODE ON without inserting a cassette and a card the movie camera is automatically set to the demonstration mode for introducing its functions If any button is pressed or operated the demonstration mode is cancelled If no operations take place for approx 10 minutes the demonstration mode automatically starts To term...

Страница 53: ...rait mode Scene mode 35 Low light mode Scene mode 35 Spotlight mode Scene mode 35 Surf snow mode Scene mode 35 Auto white balance 36 Indoor mode recording under incandescent lamp 36 Outdoor mode 36 White balance adjustment mode 36 In Tape Recording Mode these are only displayed when you press the PHOTO SHOT button half way while a card is inserted These are not displayed when using the remote cont...

Страница 54: ...dental erasure prevention slider placed in the SAVE position You are attempting audio dubbing or digital dubbing on a tape with the accidental erasure prevention slider placed in the SAVE position CHECK REMOTE MODE An incorrect remote control mode has been selected This is only displayed at the first operation of the remote control after powering on 22 WRONG TAPE FORMAT You are attempting to play ...

Страница 55: ...ERSE THE LCD MONITOR At the time of 0 Lux colour night view mode when LCD monitor is not reversed it displays When the LCD monitor is rotated by 180 towards the lens the brightness of the LCD monitor cannot be adjusted Functions cannot be used simultaneously Some functions in the movie camera are disabled or cannot be selected due to its specifications The table below shows examples of functions r...

Страница 56: ...ttery has run down Charge the battery or attach a fully charged battery 9 Has condensation occurred When you carry the movie camera from a cold place into a warm place condensation may occur inside it If so the power is turned off automatically disabling all operations except for taking cassettes out Wait until the condensation indication disappears 59 4 Battery runs down quickly Is the battery fu...

Страница 57: ...er is open the movie camera may not operate normally Close the cassette cover 14 2 The screen has changed suddenly Has the demonstration started In the Tape Recording mode if you set DEMO MODE ON without inserting a cassette and a card the demonstration starts For normal use set this function to OFF 52 3 A cassette cannot be inserted Has condensation occurred Wait until the condensation indication...

Страница 58: ...s of your TV and select the channel that matches the input terminals used for the connection Is the TV ASPECT setting correct Change the setting to match the aspect ratio of the TV SETUP TV ASPECT 16 9 or 4 3 2 Mosaic pattern noise appears on images during cue or review playback This phenomenon is characteristic of digital video systems It is not a malfunction 3 Horizontal stripes appear on images...

Страница 59: ...a point where the mode switches When you edit do not record in multiple modes 6 The warning alarm indication appears when the camera is operated in the WEB camera mode Did you press the menu button or the recording start stop button You cannot use the menu or record onto the tape card in the WEB camera mode Is the setting for the remote control correct Did you attempt to play a tape without insert...

Страница 60: ... equipment If you use the movie camera on or near a TV images or sounds may be disturbed due to electromagnetic wave radiation Recordings on the tape may be damaged or images may be distorted by strong magnetic fields created by speakers or large motors Electromagnetic wave radiation generated by digital circuits including microprocessor may adversely affect the movie camera causing the disturbanc...

Страница 61: ...t and cause malfunctions To store the battery for a long period of time we recommend you charge it once every year and store it again after you have completely used up the charged capacity Dust and other matter attached to the battery terminals should be removed Prepare spare batteries when going out for recording Prepare batteries appropriate to 3 to 4 times the period during you want to record p...

Страница 62: ...r the contents of the card may be destroyed or erased After use be sure to remove the card from the movie camera for storage After use or when storing or carrying the card put it in the storage case Do not allow dust water or foreign substances to adhere to the terminals on the back of the card Moreover do not touch the terminals with your hand ª Folder structure of the card The folder structure o...

Страница 63: ...mera can adjust the balance among the other colours Since white colour is the reference of all colours light the movie camera can record pictures in a natural hue if it can recognize the reference white colour ª Auto focus Auto focus automatically moves the focusing lens forward and backward inside the movie camera to bring the subject into focus Auto focus has the following characteristics Adjust...

Страница 64: ... Audio output level Line 316 mV 600 Mic input Mic sensitivity 50 dB 0 dB 1 V Pa 1 kHz Stereo mini jack USB Card reader writer function USB 2 0 compliant Hi Speed No copyright protection support PictBridge compliant Digital interface NV GS300 DV input output terminal IEEE1394 4 pin NV GS280 DV output terminal IEEE1394 4 pin Video flash GN 4 8 Dimensions Approx 76 mm W k73 mm H k135 mm D excluding t...

Страница 65: ...Maximum number of still pictures recordable on an SD Memory Card optional 16 9 mode PICTURE SIZE PICT QUALITY 8 MB 45 95 4 7 16 MB 100 200 11 18 32 MB 220 440 24 39 64 MB 440 880 51 81 128 MB 880 1760 99 155 256 MB 1760 3520 210 330 512 MB 3520 7040 410 650 1 GB 7040 14080 820 1290 2 GB 14080 28160 1680 2630 PICTURE SIZE PICT QUALITY 8 MB 45 95 9 15 5 9 3 5 16 MB 100 200 21 35 13 21 8 13 32 MB 220...

Страница 66: ...asności intelektualnej w Japonii i Stanach Zjednoczonych Korzystanie z powyższych technologii wymaga zgody firmy Macrovision Company Demontaż oraz modyfikacja kamery są zabronione Logo SD jest znakiem towarowym Leica jest zastrzeżonym znakiem towarowym firmy Leica Microsystems IR GmbH a Dicomar jest zastrzeżonym znakiem towarowym firmy Leica Camera AG Wszystkie pozostałe nazwy firm oraz produktów ...

Страница 67: ...ub elektronicznych utylizacji powtórnego użycia lub odzysku podzespołów polega na przekazaniu urządzenia do wyspecjalizowanego punktu zbiórki gdzie będzie przyjęte bezpłatnie W niektórych krajach produkt można oddać lokalnemu dystrybutorowi podczas zakupu innego urządzenia Prawidłowa utylizacja urządzenia umożliwia zachowanie cennych zasobów i uniknięcie negatywnego wpływu na zdrowie i środowisko ...

Страница 68: ... 98 Anti ground Shooting AGS 99 Korzystanie z wbudowanej lampy błyskowej 99 Zdjęcia z samowyzwalaczem 100 Funkcja panoramiczna 4 3 101 Funkcja stabilizatora obrazu 101 Zdjęcia seryjne 102 Zdjęcia w różnych sytuacjach tryb sceny 102 Wykonywanie zdjęć w naturalnych kolorach balans bieli 103 Ręczne ustawianie ostrości 104 Ręczne ustawianie szybkości migawki i przesłony 105 Tryb odtwarzania Odtwarzani...

Страница 69: ...S2E 13 Statyw VW CT45E 14 Kabel DV VW CD1E 15 Futerał VW SJ05E Pewne akcesoria opcjonalne mogą być niedostępne w niektórych krajach Wykaz elementów i zasady ich obsługi ª Kamera 1 Wbudowana lampa błyskowa 99 2 Czujnik balansu bieli 104 Czujnik zdalnego sterowania 87 3 Kontrolka nagrywania 120 4 Pasek uchwytu typu One Touch Free Style Grip Belt 72 5 Obiektyw LEICA DICOMAR 6 Osłona obiektywu 7 Mikro...

Страница 70: ...80 30 Kieszeń na kasetę 79 31 Stopka do akcesoriów Tutaj podłącza się akcesoria takie jak mikrofon stereofoniczny VW VMS2E wyposażenie opcjonalne 32 Suwak wysuwania kasety OPEN EJECT 79 33 Pokrywa kieszeni na kasetę 79 34 Regulator zoomu W T 94 Regulator głośności s VOLr 106 35 Przycisk migawki PHOTO SHOT 92 W związku z ograniczeniami w zakresie technologii wytwarzania ekranów ciekłokrystalicznych...

Страница 71: ...z obiektywu należy obrócić ją w kierunku przeciwnym do ruchu wskazówek zegara 1 Aby ją zamocować należy wsunąć ją w szczelinę 2 a następnie obrócić w kierunku zgodnym z ruchem wskazówek zegara Założyć osłonę obiektywu MC lub filtr ND z zestawu filtrów VW LF37WE wyposażenie opcjonalne na nasadkę na obiektyw Nie mocować na niej innych akcesoriów oprócz przykrywki obiektywu Zestaw filtrów został opis...

Страница 72: ...obiektywu Przy zakładaniu lub zdejmowaniu przykrywki obiektywu VW LF37WE wyposażenie opcjonalne należy przytrzymać ją dwoma palcami Po zdjęciu z obiektywu przykrywka zwisa na lince mocującej O ile pasek uchwytu nie zostanie założony na dłoń Pasek uchwytu typu One Touch Free Style ª Zakładanie paska na dłoń Długość paska należy dopasować do dłoni 1 Dopasuj długość paska i położenie ochraniacza 1 Po...

Страница 73: ...Ładowanie zostało zakończone Pulsuje Akumulator uległ nadmiernemu rozładowaniu Po chwili kontrolka zaświeci ciągłym światłem co oznacza rozpoczęcie normalnego ładowania Zbyt wysoka lub zbyt niska temperatura akumulatora jest sygnalizowana pulsowaniem kontrolki ładowania CHARGE W takim przypadku czas ładowania ulega wydłużeniu ª Podłączanie do gniazda sieciowego 1 Podłącz kabel sieciowy do zasilacz...

Страница 74: ...zinę i 10 minut Wraz z urządzeniem dostarczany jest akumulator CGA DU12 W tabeli podano przybliżone czasy ładowania i nagrywania W tabeli podano osobno czas nagrywania za pomocą wizjera oraz w nawiasie za pomocą wyświetlacza LCD W przypadku długotrwałych nagrań trwających 2 godziny lub dłużej bez przerwy albo 1 godzinę lub dłużej z przerwami zaleca się korzystanie z akumulatorów CGA DU12 CGA DU14 ...

Страница 75: ... wskaźnik trybu pracy zaświeci się na czerwono W trybie nagrywania taśmy lub karty zostanie otwarta osłona obiektywu Jeśli w trybie nagrywania taśmy lub na karcie zostanie zamknięty wyświetlacz LCD lub wizjer kiedy wyłącznik OFF ON jest ustawiony w pozycji ON zasilanie zostanie wyłączone a osłona obiektywu zamknie się ª Wyłączanie zasilania 1 Naciśnij i przytrzymaj przycisk 1 a następnie ustaw wył...

Страница 76: ...ZEG TAK 84 2 Poruszając joystickiem w lewo lub w prawo wybierz ustawiany element a następnie ustaw żądaną wartość poruszając joystickiem w górę lub w dół Rok zmienia się w następujący sposób 2000 2001 2089 2000 Stosuje się 24 godzinny format czasu 3 Naciśnij środkową część joysticka aby potwierdzić ustawienie Działanie zegara rozpoczyna się od 00 sekund ª Uwagi dotyczące daty i godziny Ustawienia ...

Страница 77: ... za pomocą menu Posługiwanie się nadmierną siłą przy otwieraniu bądź obracaniu wyświetlacza może spowodować uszkodzenie kamery Obrócenie wyświetlacza LCD o 180o w kierunku obiektywu kiedy wizjer jest wysunięty np w celu sfilmowania samego siebie powoduje jednoczesne podświetlenie wyświetlacza i wizjera Korzystanie z wizjera ª Wysuwanie wizjera 1 Chwyć wizjer za nasadkę i wysuń go Wizjer zostanie u...

Страница 78: ...ję USTAWIENIA SZYBKI START WYŁĄCZ 84 Jeśli wyłącznik OFF ON jest ustawiony w pozycji OFF kiedy urządzenie znajduje się w trybie gotowości szybkiego startu osłona obiektywu zamyka się i zasilanie zostaje wyłączone Jeśli kamera pozostaje w trybie gotowości przez około 30 minut wskaźnik trybu pracy gaśnie a kamera zostaje całkowicie wyłączona Jeśli w trybie gotowości szybkiego startu zostanie obrócon...

Страница 79: ...y uważać aby nie przyciąć np kabla Po użyciu kasetę należy przewinąć do początku wyjąć z kamery i umieścić w pudełku Pudełko należy przechowywać w pozycji pionowej 133 Jeśli na wyświetlaczu LCD lub w wizjerze nie pojawi się wskaźnik skraplania choć na obiektywie lub urządzeniu widać skroploną parę wodną nie należy otwierać pokrywy kieszeni ponieważ para może osiąść na głowicach lub taśmie 130 ª Ro...

Страница 80: ...anych znajdujących się na karcie Zaleca się zapisywanie ważnych danych na komputerze osobistym za pośrednictwem kabla USB adaptera karty PC bądź czytnika rejestratora USB ª Kontrolka dostępu do karty Kontrolka dostępu świeci w czasie gdy kamera korzysta z karty podczas odczytu zapisu odtwarzania usuwania itd Aby zapobiec utracie zapisanych danych bądź uszkodzeniu kamery w czasie gdy świeci kontrol...

Страница 81: ...twarzania Karty Tryb ten służy do wyświetlania zdjęć zapisanych na karcie Podłączenie do Komputera Tryb ten umożliwia wyświetlanie lub edycję obrazu zapisanego na karcie za pomocą komputera osobistego Należy zapoznać się z instrukcją obsługi połączenia z komputerem Korzystanie z joysticka ª Podstawowe funkcje joysticka Wykonywanie operacji na ekranie menu i wybór odtwarzanych plików na ekranie z w...

Страница 82: ...S w pozycji MANUAL Przy nagrywaniu na taśmie wyświetlany jest symbol 1 2 jest wyświetlany tylko jeśli przełącznik AUTO MANUAL FOCUS jest ustawiony w pozycji FOCUS 3 Tryb odtwarzania taśmy 1 4 2 Wygaszanie 98 3 Komp przeciwośw 96 1 Tryb pomocy 83 2 4 2 Soft Skin 97 1 Tele makro 97 3 4 3 kolorowych zdjęć nocnych 0 lux kol obraz 96 4 4 2 Spraw nagrywania 91 1 Szukanie przerw 91 1 5 5 2 Wartość przesł...

Страница 83: ...tawieniu przełącznika AUTO MANUAL FOCUS w pozycji AUTO w trybie nagrywania taśmy karty 3 Poruszaj joystickiem w górę w lewo lub w prawo aby wybrać żądaną ikonę Na wyświetlaczu pojawi się wyjaśnienie wybranej ikony Każdy ruch joysticka w dół powoduje zmianę trybu wyświetlania ª Aby zakończyć korzystanie z trybu pomocy Wybierz ikonę EXIT lub naciśnij przycisk MENU W trybie pomocy nie można ustawiać ...

Страница 84: ...by potwierdzić wybór 4 Poruszając joystickiem w górę lub w dół wybierz menu podrzędne 5 Porusz joystickiem w lewo lub naciśnij jego środkową część aby potwierdzić wybór 6 Poruszając joystickiem w górę lub w dół wybierz element który ma zostać ustawiony 7 Naciśnij środkową część joysticka aby potwierdzić ustawienie ª Zamykanie ekranu menu Naciśnij przycisk MENU ª Powrót do poprzedniego ekranu Porus...

Страница 85: ...zęść joysticka aby zapisać ustawienia W czasie gdy wyświetlacz LCD jest obrócony o 180 w stronę obiektywu nie można regulować jego jasności Aby ustawić jasność obrazu wyświetlanego w wizjerze należy zamknąć wyświetlacz LCD i uaktywnić wizjer wysuwając go Powyższe ustawienia nie mają wpływu na nagrywany obraz ª Zwiększanie jasności całego wyświetlacza LCD 1 Naciśnij przycisk POWER LCD Na wyświetlac...

Страница 86: ...ej niezależnie wyłączyć NORMALNY Nie ma to wpływu na nagrywany obraz W czasie gdy wyświetlacz LCD jest obrócony o 180 w stronę obiektywu jakość jego obrazu zostaje ustawiona w taki sposób jak po wybraniu w opcji AI LCD wartości NORMALNY Korzystanie z pilota ª Pilot zdalnego sterowania Za pomocą pilota dostarczonego wraz z kamerą można sterować prawie wszystkimi jej funkcjami 1 Przycisk menu ekrano...

Страница 87: ...óż baterię pastylkową znakiem i do góry i wsuń uchwyt baterii na miejsce ª Zasięg działania pilota Maksymalna odległość między pilotem a kamerą wynosi około 5 m Kąt działania to około 10o w górę oraz 15o w dół i na boki 10 14 17 15 16 11 12 13 1 Uwaga Niewłaściwa wymiana baterii może spowodować rozlanie elektrolitu Do wymiany należy stosować wyłącznie baterie tego samego lub równoważnego typu zgod...

Страница 88: ...ypadku całkowitego rozładowania baterii należy wymienić ją na nową typ CR2025 Czas pracy baterii wynosi około 1 roku ale jej faktyczna żywotność zależy od intensywności użytkowania Baterie pastylkowe należy przechowywać w miejscu niedostępnym dla dzieci W przypadku niezgodności trybu zdalnego sterowania kamery i pilota wyświetlany jest komunikat REMOTE W przypadku korzystania z pilota po raz pierw...

Страница 89: ...zamknięty lub wizjer zostanie wsunięty w trakcie nagrywania zasilanie nie wyłączy się do czasu zakończenia operacji Regulacja wyświetlacza LCD i wizjera 85 Sprawdzenie zasilania 73 Włożenie kasety lub karty 79 80 Ustawienie daty i godziny 76 Przygotowanie pilota 86 Ustawienie trybu SP lub LP 90 ª Uwagi dotyczące trybu automatycznego Po ustawieniu przełącznika AUTO MANUAL FOCUS w pozycji AUTO korek...

Страница 90: ... z trybem SP mogą jednak występować zakłócenia mozaikowe w odtwarzanym obrazie a ponadto może nie działać Odtwarzanie w innych cyfrowych urządzeniach wideo lub urządzeniach bez trybu LP Odtwarzanie obrazu nagranego w trybie LP za pomocą innych cyfrowych urządzeń wideo Odtwarzanie w zwolnionym tempie poklatkowe Nagrywanie na taśmie Włącz tryb nagrywania taśmy Przykrywka obiektywu otworzy się automa...

Страница 91: ...zna ilość miejsca pozostałego na taśmie Spraw nagrywania Funkcja ta umożliwia wyświetlenie 2 3 sekund ostatnio nagranego obrazu Po sprawdzeniu nagrania kamera powraca do pauzy w nagrywaniu Włącz tryb nagrywania taśmy 1 Naciśnij joystick aby wyświetlić ikonę w trakcie pauzy w nagrywaniu Poruszaj joystickiem w dół aż pojawi się wskaźnik 1 2 Porusz joystickiem w dół aby wybrać ikonę sprawdzania nagra...

Страница 92: ...ybu nagryw karty Aby uniknąć drżenia kamery podczas wykonywania zdjęć należy ją trzymać mocno oburącz przy czym ramiona powinny znajdować się blisko tułowia Wykonywanie zdjęć na karcie funkcja Photoshot Włącz tryb nagryw karty Przykrywka obiektywu otworzy się automatycznie 1 Naciśnij przycisk PHOTO SHOT do połowy aby ustawić ostrość Tylko w trybie automatycznej regulacji ostrości Jeśli dla opcji S...

Страница 93: ...wać zniekształcenia w postaci mozaiki Ustawienie w opcji ROZM OBR wartości innej niż lub powoduje uaktywnienie trybu rejestrowania w rozdzielczości megapikselowej ª Menu ekranowe w trybie nagryw karty 1 Wielkość zdjęcia 2 Wskaźnik karty 123 3 Liczba zdjęć pozostałych do zapisania Jeśli nie można zapisać zdjęć pulsuje czerwona kontrolka 4 Jakość zdjęć ª Wybór rozdzielczości zdjęć zapisywanych na ka...

Страница 94: ...tyczące obszaru ustawiania ostrości Jeśli przed fotografowanym obiektem lub za nim w obszarze ustawiania ostrości znajduje się inny kontrastujący z nim obiekt ustawienie ostrości może okazać się niemożliwe W takim przypadku należy wybrać takie ujecie aby kontrastujący obiekt znalazł się poza obszarem ustawiania ostrości Nawet jeśli ustawienie ostrości sprawia kłopoty należy ją ustawić ręcznie Funk...

Страница 95: ...stanie z funkcji zoomu mikrofonu Funkcja ta umożliwia sprzężenie mikrofonu z funkcją zbliżenia zoomu a tym samym rejestrowanie dźwięków dochodzących z oddali podczas filmowania odległych obiektów oraz z bliska w przypadku szerokich ujęć Włącz tryb nagrywania taśmy 1 Wybierz opcję ZAAWANSOW ZOOM MIKR ZAŁĄCZ Filmowanie samego siebie Wyświetlacz LCD kamery można odwrócić do przodu w stronę obiektywu ...

Страница 96: ...zas odtwarzania zarejestrowanej sceny powstaje wrażenie że brakuje klatek obrazu Funkcja obraz nocny kolor Funkcja ta umożliwia filmowanie obiektów w kolorze przy słabym oświetleniu Funkcja obraz nocny kolor 0 lux Funkcja ta umożliwia filmowanie przy całkowitym braku oświetlenia z wykorzystaniem światła wyświetlacza LCD Włącz tryb nagrywania taśmy 1 Naciśnij joystick aby wyświetlić ikonę w trakcie...

Страница 97: ...skóry Na ekranie kamery zostanie wyświetlony komunikat TRYB SOFT SKIN WŁ ª Wyłączanie trybu wygładzania skóry Wybierz ponownie ikonę Na ekranie kamery zostanie wyświetlony komunikat TRYB SOFT SKIN WYŁ Stonowaniu ulegają także kolory tła bądź innych obiektów w ramach sceny które są zbliżone do odcienia skóry Efekt może być nieprawidłowy przy niedostatecznym oświetleniu Funkcja Tele Makro Ustawienie...

Страница 98: ...anie zatrzymane ª Wyłączanie funkcji przejścia Wybierz ponownie ikonę Na ekranie kamery zostanie wyświetlony komunikat WYGASZANIE WYŁĄCZONE ª Wybór koloru przejścia Funkcja ta umożliwia wybór koloru efektu przejścia 1 Wybierz opcję ZAAWANSOW WYGAŚ KOL BIAŁY lub CZARNY Wybranie funkcji pojawiania się zanikania obrazu powoduje że po rozpoczęciu nagrywania obraz jest wyświetlany z opóźnieniem Także p...

Страница 99: ...ie zdjęć przy słabym oświetleniu Włącz tryb nagrywania taśmy lub na karcie 1 Wybierz opcję ZAAWANSOW FLASH ß lub ßA Wybranie opcji ßA powoduje automatyczne uaktywnianie lampy błyskowej w zależności od potrzeb 2 Naciśnij przycisk PHOTO SHOT Spowoduje to uaktywnienie lampy błyskowej i wykonanie zdjęcia Z wbudowanej lampy błyskowej nie można korzystać w przypadku gdy w kamerze brak karty Kamera autom...

Страница 100: ...RW OKO ZAŁĄCZ Pojawi się wskaźnik Lampa błyskowa zostanie uaktywniona 2 razy Nie ruszaj kamerą do czasu drugiego błysku Ta funkcja służy do robienia zdjęć osobom w ciemnych pomieszczeniach Efekt czerwonych oczu pojawia się zależnie od warunków w jakich są wykonywane zdjęcia Zdjęcia z samowyzwalaczem Kamera umożliwia wykonywanie zdjęć z samowyzwalaczem Włącz tryb nagryw karty 1 Naciśnij joystick ab...

Страница 101: ... elementów pojawi się na czarnych pasach po lewej i prawej stronie obrazu Uwagi dotyczące podłączanego i używanego do odtwarzania odbiornika TV Odtwarzając na ekranie telewizora obrazy nagrane tą kamerą należy zmienić ustawienie wybrane przez tryb odtwarzania z taśmy karty USTAWIENIA FORMAT TV aby dopasować proporcje 4 3 lub 16 9 podłączonego odbiornika TV 108 W zależności od ustawień podłączonego...

Страница 102: ...ku korzystania z niektórych kart odstęp między kolejnymi zdjęciami może ulec wydłużeniu Zaleca się korzystanie z kart pamięci SD firmy Panasonic W przypadku korzystania z karty sformatowanej za pomocą innego urządzenia bądź karty na której wielokrotnie zapisywano i kasowane dane odstęp między zdjęciami może ulec wydłużeniu W takim przypadku należy wykonać kopię ważnych danych na komputerze osobist...

Страница 103: ...ć migotanie obrazu W takim przypadku należy wyłączyć tryb sceny ustawienie WYŁĄCZ Tryb słabego oświetlenia Odpowiednie zarejestrowanie szczególnie ciemnych scen może okazać się niemożliwe Tryb światła punktowego Jeżeli filmowany obiekt jest bardzo jasny zarejestrowany obraz może być wyblakły a na obrzeżach bardzo ciemny Tryb zdjęć na śniegu Jeżeli filmowany obiekt jest bardzo jasny zarejestrowany ...

Страница 104: ...ª Uwagi dotyczące balansu czerni Ustawianie balansu czerni to jedna z funkcji systemu 3CCD która umożliwia automatyczną korekcję balansu czerni podczas ustawiania balansu bieli w trybie ręcznym Podczas ustawiania balansu czerni ekran zostaje chwilowo wygaszony 1 Korekcja balansu czerni pulsuje 2 Korekcja balansu bieli pulsuje 3 Zakończenie korekcji świeci Ręczne ustawianie ostrości W sytuacjach w ...

Страница 105: ...nie oświetlony lub silnie odbijał światło na odtwarzanym obrazie mogą pojawić się pionowe refleksy świetlne Nie jest to oznaka usterki Podczas standardowego odtwarzania ruch obrazu może nie być płynny Podczas nagrywania przy bardzo silnym oświetleniu kolor ekranu może ulec zmianie może też wystąpić migotanie W takim przypadku należy ustawić ręcznie szybkość migawki na wartość 1 50 lub 1 100 Ręczne...

Страница 106: ...latora s VOLr ustaw odpowiednią głośność W stronę pozycji r większa głośność W stronę pozycji mniejsza głośność Im bliżej symbolu r znajduje się pasek tym większa głośność W przypadku pilota do zwiększania głośności służy przycisk T a do jej zmniejszania przycisk W Po zakończeniu regulacji symbol głośności znika Jeśli nie słychać dźwięku należy sprawdzić ustawienie opcji USTAWIENIA FONIA12bit ª Po...

Страница 107: ...cej 2 minutom w trybie SP lub 3 minutom w trybie LP Odtwarzanie poklatkowe 1 Naciśnij podczas odtwarzania przycisk na pilocie 2 Naciśnij przycisk E lub D na pilocie Poruszenie regulatorem s VOLr w stronę pozycji T normalny kierunek lub W odwrotny kierunek podczas pauzy w odtwarzaniu także powoduje rozpoczęcie odtwarzania poklatkowego Po kolejnym przesunięciu regulatora obraz jest odtwarzany klatka...

Страница 108: ... Podłącz kamerę do telewizora za pomocą Multi cable 1 Jeśli odbiornik TV posiada gniazdo S Video podłącz ją również do tego gniazda 2 Umożliwi to uzyskanie lepszego obrazu Pamiętaj aby podłączyć także gniazda wideo i audio 2 Włącz kamerę i wybierz za pomocą pokrętła wyboru trybu pracy tryb odtwarzania taśmy lub tryb odtwarzania karty 3 Wybierz odpowiedni sygnał wejściowy w telewizorze Jeśli obrazy...

Страница 109: ... dostępu nie należy wkładać ani wyjmować karty Wyświetlanie pliku może chwilę potrwać zależnie od rozdzielczości Próba odtworzenia pliku zapisanego w innym formacie lub uszkodzonych danych powoduje wyświetlenie niebieskiego ekranu i ostrzeżenia KARTA NIESTANDARDOWA Odtwarzając zdjęcia zarejestrowane w trybie 4 3 na ekranie telewizora panoramicznego jakość obrazu może się pogorszyć Podczas odtwarza...

Страница 110: ...stickiem w dół wybierz opcję 3 Poruszając joystickiem w górę lub w dół wybierz opcję USUŃ1PLIK a następnie naciśnij środkową część joysticka 4 Po wyświetleniu monitu o potwierdzenie wybierz odpowiedź TAK i naciśnij środkową część joysticka Aby nie usuwać pliku wybierz odpowiedź NIE ª Usuwanie wszystkich plików 1 Poruszając joystickiem w dół wybierz opcję 2 Poruszając joystickiem w górę lub w dół w...

Страница 111: ...żeniu Ponadto karty SD sformatowane za pomocą komputera PC nie są obsługiwane przez kamerę W takim przypadku kartę należy sformatować ponownie za pomocą kamery Nie wyjmuj karty ani nie wyłączaj zasilania w trakcie formatowania Kamera obsługuje karty pamięci typu SD sformatowane w systemie plików FAT12 i FAT16 w sposób zgodny ze standardem SD Ochrona plików zapisanych na karcie Pliki zapisane na ka...

Страница 112: ...iśnij środkową część joysticka Dopuszczalne są wartości w przedziale od 0 do 999 W przypadku niektórych obrazów liczbę kopii można ustawić w drukarce obsługującej standard DPOF Kamera umożliwia ustawienie kolejno kilku plików ª Potwierdzanie ustawień Naciśnij przycisk MENU Kamera może nie rozpoznać ustawień DPOF dokonanych za pomocą innego urządzenia w związku z czym wszelkich ustawień należy doko...

Страница 113: ...rozmytego obrazu Kopiowanie za pomocą rejestratora DVD lub magnetowidu kopiowanie synchroniczne Obraz nagrany za pomocą kamery można przechowywać na płytach DVD RAM lub innych tego rodzaju nośnikach Więcej informacji na ten temat znajduje się w instrukcji obsługi rejestratora Umieść w kamerze zapisaną kasetę a w rejestratorze DVD lub magnetowidzie czystą płytę DVD RAM lub kasetę 1 Podłącz kamerę d...

Страница 114: ...razu lub dźwięku z kamery w telewizorze Wszystkie wtyki muszą być wsunięte do oporu Sprawdź ustawienia FONIA12bit 116 Kable muszą być podłączone do właściwych gniazd Nagrywanie za pomocą kabla DV cyfrowe kopiowanie synchroniczne Podłączenie innego cyfrowego urządzenia wideo do gniazda DV kamery za pomocą kabla DV VW CD1E wyposażenie opcjonalne 1 umożliwia wykonywanie wysokiej jakości kopii w forma...

Страница 115: ...dczas odtwarzania taśmy Obraz na ekranie urządzenia rejestrującego może ulec zniekształceniu ale nie ma to wpływu na faktycznie zapisywany materiał Przy próbie skopiowania za pomocą kamery materiału zabezpieczonego przed kopiowaniem podczas odtwarzania na ekranie zamiast obrazu wyświetlane są wzory w postaci mozaiki Należy odłączyć kabel USB ponieważ w przeciwnym przypadku sygnał wejściowy z gniaz...

Страница 116: ...MIX Jednoczesne odtwarzanie pierwotnie zarejestrowanego dźwięku oraz dźwięku podłożonego pod nagranie W trakcie podkładania dźwięku zostaje automatycznie wybrana opcja ST2 Bezpośrednie drukowanie zdjęć na drukarce funkcja PictBridge Kamera umożliwia drukowanie zdjęć po bezpośrednim podłączeniu jej do drukarki zgodnej ze standardem PictBridge Więcej informacji na ten temat znajduje się w instrukcji...

Страница 117: ...ony w drukarce Bez ramki Z ramką Nie można wybrać układu który nie jest obsługiwany przez drukarkę 8 Wybierz opcję DRUKUJ TAK aby rozpocząć drukowanie ª Przerywanie drukowania Porusz joystickiem w dół Podczas drukowania nie należy wykonywać pewnych czynności ponieważ uniemożliwiają one właściwe drukowanie Są to Odłączanie kabla Wyjmowanie karty Korzystanie z pokrętła wyboru trybu pracy Wyłączenie ...

Страница 118: ...się z instrukcją obsługi połączenia z komputerem ZOOM CYFR 95 ZOOM MIKR 95 3 USTAWIENIA WYŚWIETL 120 DATA CZAS 120 OSZCZ EN 120 SZYBKI START 78 SAMOWYŁĄCZ 99 ZDALNY 88 DźW BIP 120 AI LCD 86 USTAW LCD 85 USTAW EVF 85 LED JOY STICK 121 UST WST 121 F CJA DEMO 121 4 LANGUAGE 84 ª TRYB ODTWARZANIA Z TAŚMY 1 PODSTAWOWE DATA CZAS 120 F CJA USB Należy zapoznać się z instrukcją obsługi połączenia z kompute...

Страница 119: ... SKRÓTU 93 3 USTAWIENIA WYŚWIETL 120 DATA CZAS 120 OSZCZ EN 120 SZYBKI START 78 ZDALNY 88 DźW BIP 120 AI LCD 86 USTAW LCD 85 USTAW EVF 85 UST WST 121 LED JOY STICK 121 4 LANGUAGE 84 ª TRYB WYŚWIETLANIA OBRAZU 1 PODSTAWOWE DATA CZAS 120 CHROŃ 111 2 ZAAWANSOW UST DPOF 112 FORM KARTY 111 3 USTAWIENIA WYŚWIETL 120 ZDALNY 88 USTAW LCD 85 USTAW EVF 85 AI LCD 86 OSZCZ EN 120 FORMAT TV 108 LED JOY STICK 1...

Страница 120: ... Ustawienie ZAŁĄCZ powoduje odtwarzanie sygnałów dźwiękowych pełniących rolę potwierdzeń lub ostrzeżeń 1 sygnał Rozpoczęcie nagrywania Włączenie zasilania Przełączenie urządzenia z trybu gotowości szybkiego startu do pauzy w nagrywaniu 2 sygnały Pauza w nagrywaniu Wyłączenie zasilania Przełączenie urządzenia w tryb gotowości szybkiego startu 2 sygnały powtórzone czterokrotnie Kaseta zabezpieczona ...

Страница 121: ...ka dźwiękowa LEWY lewy kanał podstawowa ścieżka dźwiękowa PRAWY prawy kanał podstawowa ścieżka dźwiękowa Inne menu ª LED JOY STICK Po wybraniu opcji ZAŁĄCZ w trakcie pracy wokół joysticka świeci się niebieskie światło ª UST WST W przypadku gdy określona kombinacja funkcji uniemożliwia wybór jednego z menu opcja TAK umożliwia przywrócenie ustawień fabrycznych Nie można przywrócić fabrycznych ustawi...

Страница 122: ...zona 99 Lampa błyskowa wyłączona 100 ßi ßAi Siła lampy błyskowej i 100 ßj ßAj Siła lampy błyskowej j 100 Redukcja efektu czerwonych oczu 100 Mikrofon zbliżeniowy 95 Redukcja szumu wiatru 98 5 Tryb sportowy tryb sceny 102 Tryb portretowy tryb sceny 102 Tryb słabego oświetlenia tryb sceny 102 Tryb światła punktowego tryb sceny 102 Tryb zdjęć na śniegu tryb sceny 103 Automatyczny balans bieli 103 Try...

Страница 123: ...ła kaseta z suwakiem zabezpieczenia przed zapisem w pozycji SAVE Nie włożono kasety 0 Wbudowany akumulator uległ rozładowaniu 76 Ostrzeżenie to pojawia się podczas nagrywania samego siebie W takim przypadku należy obrócić wyświetlacz LCD w stronę wizjera i sprawdzić wyświetlone ostrzeżenie Nie włożono karty REMOTE Wybrano niewłaściwy tryb pracy pilota 88 2END Podczas nagrywania skończyła się taśma...

Страница 124: ...PCJĘ 0 3M Podczas wykonywania zdjęć seryjnych należy ustawić opcję ROZM OBR na lub NACIŚ PRZYC ZEROW Wykryto nieprawidłowość w pracy urządzenia Naciśnij przycisk RESET 70 co powinno rozwiązać problem NIE MOŻNA UŻYĆ USB ZMIEŃ USTAWIENIA Do kamery pracującej w trybie nagryw karty podłączony jest kabel USB ODŁĄCZ KABEL USB Pokrętło wyboru trybu pracy zostało obrócone podczas komunikacji z komputerem ...

Страница 125: ...nie na taśmie Tryb demonstracyjny Wykonywanie zdjęć seryjnych Korzystanie z funkcji obraz nocny kolor Mikrofon zbliżeniowy Redukcja szumu wiatru Podłączono zewnętrzny mikrofon Tryb sceny Ustawienie przełącznika AUTO MANUAL FOCUS w pozycji AUTO Korzystanie z funkcja kolorowych zdjęć nocnych 0 2 0 3M Zmiana balansu bieli Korzystanie z powiększenia cyfrowego 10k lub większego Korzystanie z funkcja ko...

Страница 126: ...ależy ładować przy użyciu zasilacza sieciowego 73 Czy akumulator był używany w bardzo niskiej temperaturze Temperatura otoczenia w dużym stopniu wpływa na pracę akumulatora nadmierne wychłodzenie powoduje skrócenie czasu pracy Czy okres eksploatacji akumulatora dobiegł końca Akumulator ma ograniczony cykl eksploatacji Jeśli czas pracy po właściwym naładowaniu jest zbyt krótki przy normalnym użytko...

Страница 127: ... nagrywanie Czy funkcja AGS jest uaktywniona Nagrywaj w normalnej poziomej pozycji lub ustaw opcję SAMOWYŁĄCZ na WYŁĄCZ 99 Wskaźniki 1 Na środku ekranu wyświetlany jest komunikat w kolorze czerwonym Należy przeczytać komunikat i zastosować się do jego treści 123 2 Kod czasu staje się niedokładny 0 Podczas korzystania z funkcji odtwarzania w zwolnionym tempie do tyłu kod czasu może być niestabilny ...

Страница 128: ...rzewijania z podglądem pojawiają się zakłócenia obrazu w postaci mozaiki Zjawisko to jest charakterystyczne dla cyfrowego systemu wideo i nie oznacza usterki 3 Podczas przewijania z podglądem pojawiają się poziome pasy W przypadku niektórych scen mogą występować poziome pasy Nie jest to oznaką usterki 4 Odtwarzany obraz jest niewyraźny Czy głowice kamery są zabrudzone Jeżeli głowice są zabrudzone ...

Страница 129: ...czenia z komputerem osobny dokument 4 Po odłączeniu kabla USB na monitorze komputera wyświetlany jest komunikat o błędzie Aby bezpiecznie odłączyć kabel USB należy kliknąć dwukrotnie ikonę na pasku zadań i postępować zgodnie z wyświetlanymi instrukcjami 5 Kamera nie działa prawidłowo podczas edycji kopiowania synchronicznego z cyfrowych urządzeń wideo bądź korzystania z programu MotionDV STUDIO 5 ...

Страница 130: ...dzinę Gdy temperatura soczewki obiektywu zrówna się z temperaturą otoczenia zaparowanie zniknie samoczynnie ª Uwagi dotyczące zabrudzenia głowic Jeśli głowice wideo które stykają się bezpośrednio z taśmą ulegną zabrudzeniu mogą wystąpić problemy z odtwarzaniem i nagrywaniem W takim przypadku głowice należy wyczyścić za pomocą odpowiedniej kasety czyszczącej Po włożeniu kasety czyszczącej do kamery...

Страница 131: ... którym znajduje się dużo piasku lub pyłu np na plaży należy uważać aby piasek oraz drobny pył nie przedostały się do wnętrza kamery i nie zanieczyściły jej gniazd Ponadto należy chronić kamerę przed zamoczeniem Piasek oraz pył mogą spowodować uszkodzenie kamery lub kasety W związku z tym należy zachować szczególną ostrożność przy wkładaniu i wyjmowaniu kasety W przypadku zmoczenia kamery wodą mor...

Страница 132: ...a okres 3 4 razy dłuższy niż faktyczny czas trwania nagrywanego materiału Należy również pamiętać że czas nagrywania ulega skróceniu przy niskiej temperaturze np podczas wyjazdu na narty Wybierając się w podróż należy koniecznie zabrać ze sobą zasilacz sieciowy który umożliwia ładowanie akumulatorów Po przypadkowym upuszczeniu akumulatora należy sprawdzić czy jego styki nie zostały odkształcone Wł...

Страница 133: ...ą emitować nadspodziewanie silne pole magnetyczne które może powodować wykasowanie nagrań bądź wzmożone szumy ª Uwagi dotyczące karty Podczas wyjmowania lub wkładania karty należy zawsze ustawiać wyłącznik OFF ON w pozycji OFF W czasie gdy świeci się kontrolka dostępu sygnalizująca korzystanie z karty nie należy wyjmować karty obracać pokrętłem wyboru trybu pracy wyłączać zasilania ani powodować w...

Страница 134: ...li tylko dla kilku źródeł światła automatyczna korekcja nie działa w przypadku występowania innych źródeł Poza zakresem skutecznego działania automatycznej korekcji balansu bieli obraz może mieć odcień czerwonawy lub niebieskawy Nawet w ramach podanego zakresu automatyczna korekcja balansu bieli może nie działać prawidłowo jeśli występuje kilka źródeł światła Należy wówczas skorzystać z funkcji rę...

Страница 135: ...acjach które opisano poniżej Konieczne jest wtedy ręczne ustawienie ostrości Wykonywanie zdjęć obiektów których jeden koniec znajduje się blisko a drugi koniec daleko od kamery Ponieważ funkcja automatycznego ustawiania ostrości działa w środku kadru często niemożliwe jest ustawienie ostrości obiektu zajmującego zarówno pierwszy jak i drugi plan Wykonywanie zdjęć obiektów znajdujących się za brudn...

Страница 136: ...3 Vp p 75 Poziom sygnału wyjściowego audio wyjście liniowe 316 mV 600 Wejście mikrofonowe Czułość mikrofonu 50 dB 0 dB 1 V Pa 1 kHz mini wtyk stereo USB Czytnik rejestrator kart interfejs zgodny z USB 2 0 Hi Speed Brak obsługi funkcji ochrony praw autorskich Zgodność z funkcją PictBridge Interfejs cyfrowy NV GS300 Gniazdo wejściowe wyjściowe DV IEEE1394 4 stykowe NV GS280 Gniazdo wyjściowe DV IEEE...

Страница 137: ... wys k91 mm dł Masa Około 110 g Masę i wymiary podano w przybliżeniu Dane techniczne mogą ulec zmianie bez powiadomienia Zasilanie Prąd przemienny o napięciu 110 V do 240 V i częstotliwości 50 60 Hz Pobór mocy 19 W Wyjście prądu stałego Prąd stały 7 9 V 1 4 A zasilanie kamery Prąd stały 8 4 V 0 65 A ładowanie akumulatora ...

Страница 138: ...440 880 51 81 128 MB 880 1760 99 155 256 MB 1760 3520 210 330 512 MB 3520 7040 410 650 1 GB 7040 14080 820 1290 2 GB 14080 28160 1680 2630 WIELKOŚĆ ZDJĘCIA JAKOŚĆ ZDJĘĆ 8 MB 45 95 9 15 5 9 3 5 16 MB 100 200 21 35 13 21 8 13 32 MB 220 440 47 75 30 47 18 29 64 MB 440 880 98 155 63 98 39 62 128 MB 880 1760 185 300 120 185 75 120 256 MB 1760 3520 390 620 250 390 160 250 512 MB 3520 7040 780 1230 500 7...

Страница 139: ...139 VQT0T16 ...

Страница 140: ...L VQT0T16 F1105Nw0 3000 A C Matsushita Electric Industrial Co Ltd Web site http www panasonic co jp global ...

Отзывы: