
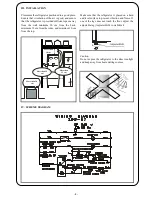
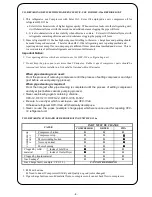
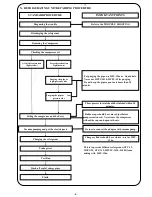

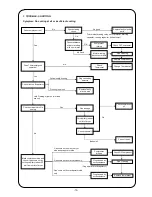
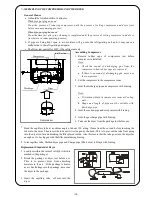


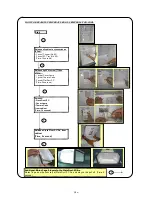


Check pressure at High Pressure side
1.
Note:
a.
b.
2. Suitable pressure measurement, next action is:
A. Gas Leakage ( A area / B area ) ……………..Can not repair
B.
Switch off theCompressorn then cut Capillary pipe ± 35 mm from Dryer out line. This action for
protect if clogged at Cooling Unit by refrigerant HFC-134a, then solid substance will collect about ±
35 mm around Dryer out line.
Compression not perfect and clogged by solid substance ( C area )
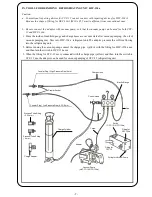
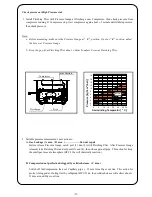
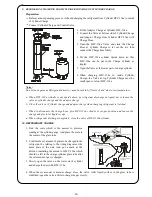
Install Pierching Plier with Pressure Gauge at Discharge near Compressor, then check pressure from
compressor running. If Compressor stop, start compressor again about ± 5 minute until stabile pressure,
then check pressure
Before measuring, make sure the Pressure Gauge at " 0 " position. If not at " 0 " position, adjust
the Screw at Pressure Gauge.
Keep the gap from Pierching Plier about ± 4mm by adjust Screw at Pierching Plier.
Before release Pressure Gauge, catch poit (1) dan (2) with Pierching Plier. After Pressure Gauge
released, take Pierching Plier and cut point (3) and (4), then close again all pipe. This action for keep
the smell gas loose at atmosphere (HFC-134a will chemically reaction ).
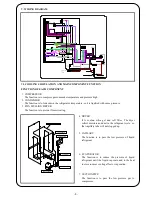
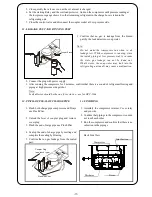
Area A
Area C
Area B
Normal
0
5
10
15
20
25
30
35
Sorrounding Temperatur [
o
C ]
P
re
s
s
u
re
[
k
g
f/
c
m
2
(
b
a
r)
]
-1
0
2
4
6
8
10
12
14
16
18
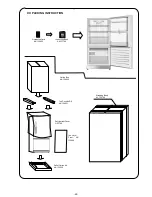
Drye
Discharge
Compressor
Joint Suction
-11-
Содержание NR-B203G-S7
Страница 10: ... 9 ...
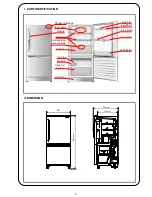
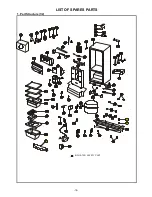
Страница 22: ...1 Part Structure 1 2 LIST OF SPARES PARTS INDICATED SAFETY PART 52 90 91 19 ...
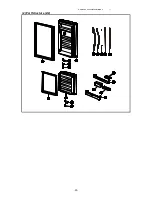
Страница 23: ...PMIRF0806022AI 1 2 Part Structure 2 2 20 ...
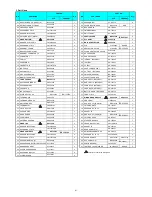
Страница 26: ... 22 ...