Panasonic LUMIX DMC-GM5K Скачать руководство пользователя страница 26

Recording

26

SQT0426 (ENG) 

Recording Snap Movies

Applicable modes: 

You can specify the recording time in advance and record motion pictures casually like you 
take snapshots. The function also allows you to shift a focus at the start of recording and 
add fade in/out effects in advance.

Motion pictures will be recorded with [FHD/20M/25p] in [MP4].

Using the smartphone/tablet app “Panasonic Image App”, you can combine motion pictures 
recorded with the camera. Music can be added and various editing operations can be 
performed when you combine them. In addition, you can send the combined motion picture to a 
web service.

1

Select the menu. (P20)

2

Select [SET] with 

3

/

4

, and then press [MENU/SET].

3

Press 

3

/

4

 to select an item and then press [MENU/SET].

4

Press [

].

5

Press [MENU/SET].

6

Select [ON] with 

3

/

4

, and then press [MENU/SET].

Press the shutter button halfway to exit the menu.

If [Pull Focus] is set to [ON], set its focus.
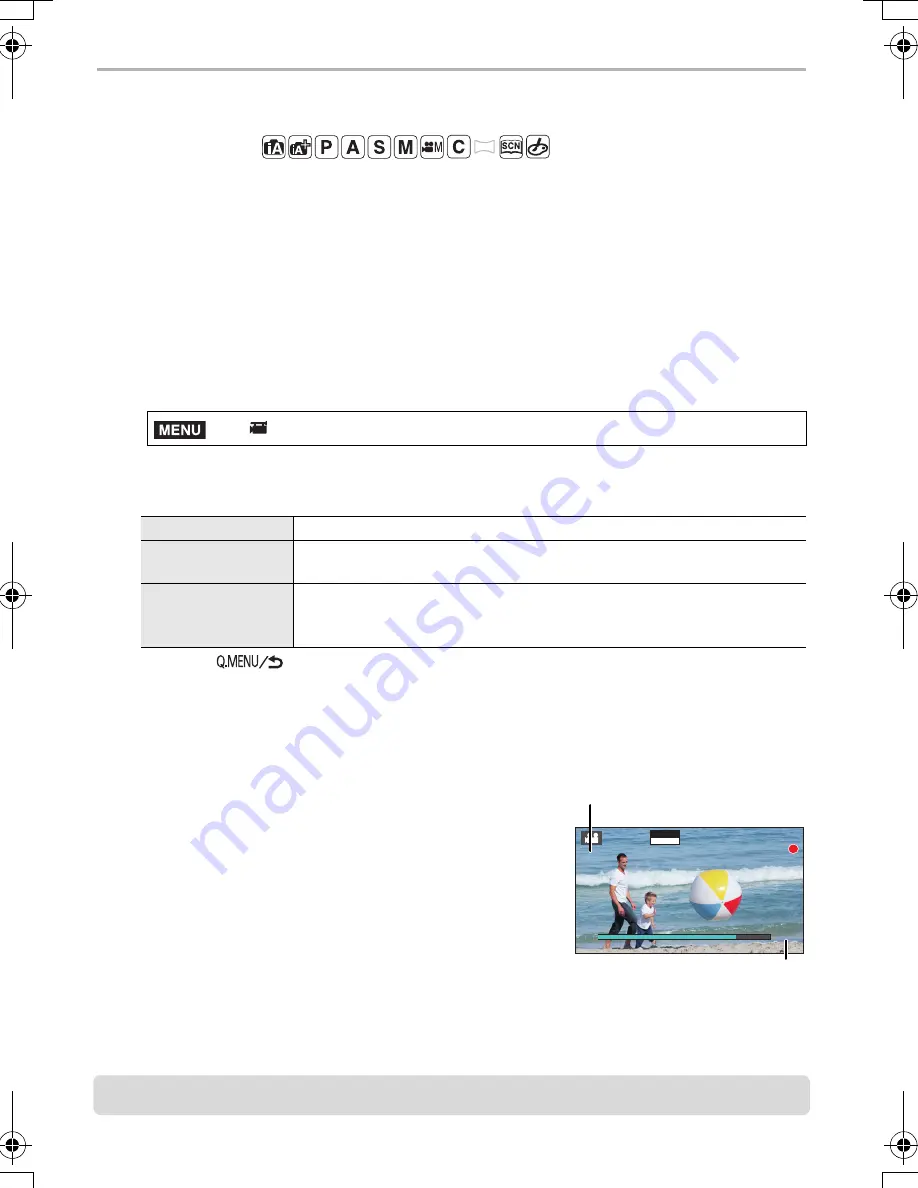
7

Start recording by pressing the motion 
picture button.

A

Elapsed recording time

B

Set recording time

Release the motion picture button right after you press it.

You cannot stop motion picture recording in the 
middle.The recording will stop automatically when the 
set recording time has elapsed.

To deactivate Snap Movie

Select [OFF] in step 

2

.

For details, refer to the “Operating Instructions for advanced features (PDF format)”.

>

 [Motion Picture] 

>

 [Snap Movie]

[Record time]

Sets the recording time of motion pictures.

[Pull Focus]

Allows dramatic imaging expression by shifting focus gradually at 
the start of recording.

[Fade]

Adds a fade-in (gradual appearance) effect to an image and audio 
as recording starts or adds a fade-out (gradual disappearance) 
effect to them as recording ends.

MENU

3

s

3

s

3

s

4

s

4

s

4

s

SNAP

4SEC

A

B

DMC-GM5K&GM5L&GM5W-SQT0426_eng.book  26 ページ  2014年9月10日 水曜日 午後11時1分

Содержание LUMIX DMC-GM5K

Страница 1: ...t Model No DMC GM5K DMC GM5L DMC GM5W Please read these instructions carefully before using this product and save this manual for future use More detailed instructions on the operation of this camera...

Страница 2: ...or other published or broadcast material for purposes other than your own private use may infringe copyright laws Even for the purpose of private use recording of certain material may be restricted I...

Страница 3: ...TTE products from our DoC server http www doc panasonic de Contact to Authorized Representative Panasonic Marketing Europe GmbH Panasonic Testing Centre Winsbergring 15 22525 Hamburg Germany This pro...

Страница 4: ...etic wave radiation Do not use this unit near cell phones because doing so may result in noise adversely affecting the pictures and or sound Recorded data may be damaged or pictures may be distorted b...

Страница 5: ...or breakdown of the camera or the card We recommend storing important data on a PC etc Do not format the card on your PC or other equipment Format it on the camera only to ensure proper operation The...

Страница 6: ...g frequently used functions to the buttons 19 Touch screen Touch operations 19 Calling frequently used menus instantly Quick Menu 20 Setting the Menu 20 Recording Taking Pictures using the Automatic F...

Страница 7: ...the digital camera body Since the sensor unit is a precision apparatus it may cause a malfunction or damage About Condensation When the lens the viewfinder or monitor is fogged up Condensation occurs...

Страница 8: ...e supplied fitted together at the time of purchase 5 This is attached to the lens hood at the time of purchase DMC GM5K DMC GM5W DMC GM5L 1 Interchangeable Lens 1 3 3 3 2 Lens Cap 2 2 2 2 3 Lens Rear...

Страница 9: ...ts may not be commercially available in some regions Consult the dealer or Panasonic if you lose the supplied accessories You can purchase the accessories separately DMC GM5K DMC GM5W DMC GM5L 1 2 3 4...

Страница 10: ...ifficult to record 7 Hot shoe Hot shoe cover P12 Keep the Hot Shoe Cover out of reach of children to prevent swallowing 8 Focus distance reference mark 9 Diopter adjustment lever P16 10 Status indicat...

Страница 11: ...rsor button as 3 4 2 1 3 ISO sensitivity 1 White Balance 2 Auto Focus Mode 4 Drive mode Single Burst Auto bracket Self timer 30 MENU SET button P20 31 DISP button Each time this is pressed the display...

Страница 12: ...ng the lock release button B H FS12032 H FS35100 H X015 1 Lens surface 2 Tele 3 Zoom ring 4 Wide 5 Contact point 6 Lens fitting mark P15 7 Focus ring 8 Decoration ring Remove this cover when using the...

Страница 13: ...at can be used with this unit is DMW BLH7E 1 Attach the battery paying attention to the direction of the battery 2 Connect the AC mains lead The CHARGE indicator A lights up and charging begins About...

Страница 14: ...f this product Being careful about the battery orientation insert all the way until you hear a locking sound and then check that it is locked by lever A Pull the lever A in the direction of the arrow...

Страница 15: ...nt swallowing Format the card before recording a picture with this unit Since data cannot be recovered after formatting make sure to back up necessary data in advance Select Format in the Setup menu C...

Страница 16: ...racters displayed in the viewfinder can be seen clearly How to Extend the Lens Rotate the zoom ring in the direction of arrow 1 from position A the lens is retracted to position B 12 mm to 32 mm H FS1...

Страница 17: ...utton fully push it in further and take the picture When the image is correctly focused the picture will be taken since the Focus Release Priority is set initially to FOCUS The focus range is differen...

Страница 18: ...ords at the aperture value and shutter speed set by the camera Aperture Priority AE Mode The shutter speed is automatically determined by the aperture value you set Shutter Priority AE Mode The apertu...

Страница 19: ...o touch the centre of the desired icon Drag A movement without releasing the touch screen This can also be used to move to the next image during playback etc Pinch enlarge reduce Pinch the touch scree...

Страница 20: ...ce the setting is complete You can close the menu by pressing the shutter button halfway Setting the Menu 1 Press MENU SET 2 Press 3 4 of the cursor button to select the menu item and press MENU SET 3...

Страница 21: ...on of the scene concerned is displayed in blue for 2 seconds after which its colour changes to the usual red Automatic scene detection Switching between Intelligent Auto Plus Mode and Intelligent Auto...

Страница 22: ...and normal operation 2 Set the blurriness by rotating the rear dial Recording Mode This mode enables you to change the brightness and colour tone to your preferred settings from the ones set by the c...

Страница 23: ...ding Recording can also be ended by moving the camera to the end of the guide Taking Pictures with Manual Focus Applicable modes Use this function when you want to fix the focus or when the distance b...

Страница 24: ...You can perform the following operations When using an interchangeable lens with no focus ring you can perform these operations after pressing 4 to display the screen that lets you set the area to be...

Страница 25: ...mbient temperature continuous recording or other conditions cause the camera to overheat the following restrictions will occur to protect the camera Wait until the camera cools down Continuous recordi...

Страница 26: ...ENU SET 6 Select ON with 3 4 and then press MENU SET Press the shutter button halfway to exit the menu If Pull Focus is set to ON set its focus 7 Start recording by pressing the motion picture button...

Страница 27: ...web service If you press 4 when displaying images one by one you can easily send an image to a web service For details refer to the Operating Instructions for advanced features PDF format Button oper...

Страница 28: ...1 In Playback Mode press 2 Press 3 4 to select Delete Multi or Delete All and then press MENU SET Delete All Confirmation screen is displayed Pictures are deleted by selecting Yes It is possible to de...

Страница 29: ...anced features PDF format Installing the smartphone tablet app Image App OS App for AndroidTM Android 2 3 3 or higher Search the Google PlayTM Store for Panasonic Image App or LUMIX and install the ap...

Страница 30: ...with a passcode enter the passcode to unlock the smartphone tablet 6 Press the home button to close the browser 7 Turn on the Wi Fi function in the setting menu of the smartphone tablet 8 Select the...

Страница 31: ...2 Operate the smartphone When a high ambient temperature continuous recording or other conditions cause the camera to overheat the following restrictions will occur to protect the camera Wait until t...

Страница 32: ...is being recorded the recording will stop Using a smartphone you can combine motion pictures recorded with the camera s Snap Movie function P26 Music can be added to motion pictures to be combined In...

Страница 33: ...ws 8 Windows 8 1 you can display the menu by clicking a message that is displayed after inserting the DVD and then selecting and executing Launcher exe You can also display the menu by double clicking...

Страница 34: ...P26 Picture size Aspect Ratio Extra Tele Conversion when taking still pictures Image effect filter adjustment display Image effect filter setting Card displayed only during recording Elapsed recording...

Страница 35: ...estination setting 4 Exposure meter Focal distance display Step zoom 4 AF area Spot metering target Self timer 5 Mic level display Silent Mode AE Lock Metering Mode Programme Shift 3 5 Aperture value...

Страница 36: ...ure Assistance Flash Mode Flash 98 AWB 0 0 0 ISO AUTO AFS AFS Fn Wi Fi L 4 3 F 3 5 1 60 C1 1 EXPS EXPS ISO AUTO 0 0 WL 3 Single Burst Auto Bracket Self timer Focus Mode AF Mode A Quality Picture size...

Страница 37: ...Resolution ISO Increments Filter Settings iHandheld Night Shot Extended ISO Aspect Ratio iHDR Long Shtr NR Picture Size HDR Shading Comp Quality Multi Exp Ex Tele Conv AFS AFF Time Lapse Shot Digital...

Страница 38: ...a Setup This menu lets you perform the clock settings select the operating beep tone settings and set other settings which make it easier for you to operate the camera You can also configure the setti...

Страница 39: ...SE The shutter speed will become slower and the Optical Image Stabiliser function may not work properly when taking pictures especially in dark places We recommend holding the camera firmly with both...

Страница 40: ...affected This is a characteristic of the camera s monitor and is not a malfunction Images to be recorded will not be affected Is the card inserted Is there a picture on the card Is this a folder or pi...

Страница 41: ...ireless access point Change the direction of this unit Change the location and orientation of the wireless access point Perform the Manual Input It may not display even if the radio waves exist depend...

Страница 42: ...web service link settings If the camera is shaken it may cause the shutter to close This is not a malfunction Do not put your finger in the mount Turning on the camera will re open the shutter It is a...

Страница 43: ...used Camera effective pixels 16 000 000 pixels Image sensor 4 3q Live MOS sensor total pixel number 16 840 000 pixels Primary colour filter Digital Zoom Max 4k Extra Tele Conversion When taking still...

Страница 44: ...approx 60 seconds 60 seconds to 1 500th of a second Mechanical shutter 1 second to 1 16000th of a second Electronic shutter Motion picture 1 25th of a second to 1 16000th of a second Metering range E...

Страница 45: ...nsor output is 25 frames sec 24 Mbps 1920k1080 24p Sensor output is 24 frames sec 24 Mbps MP4 1920k1080 50p Sensor output is 50 frames sec 28 Mbps 1920k1080 25p Sensor output is 25 frames sec 20 Mbps...

Страница 46: ...Approx 346 g 0 76 lb with the Interchangeable lens H FS35100 card and battery Approx 326 g 0 72 lb with the Interchangeable lens H X015 card and battery Operating temperature 0 oC to 40 oC 32 oF to 1...

Страница 47: ...mm to 20 mm 0 3 m 0 98 feet to from the focus distance reference line focal length 21 mm to 32 mm 0 9 m 3 0 feet to from the focus distance reference line Maximum image magnification 0 13k 35 mm film...

Страница 48: ...ture type 7 diaphragm blades circular aperture diaphragm Maximum aperture F1 7 Minimum aperture value F16 Lens construction 9 elements in 7 groups 3 aspherical lenses Nano surface coating Yes In focus...

Страница 49: ...public holidays For further support on your product please visit our website www panasonic co uk Direct Sales at Panasonic UK Order accessory and consumable items for your product with ease and confid...

Страница 50: ...del 3 Select the desired language and then click Operating Instructions to install A To return to the install menu 4 Double click the Operating Instructions shortcut icon on the desktop When the Opera...

Страница 51: ...rademarks or registered trademarks of Olympus Imaging Corporation in Japan the United States the European Union and other countries SDXC Logo is a trademark of SD 3C LLC AVCHD AVCHD Progressive and th...

Страница 52: ...f DENSO WAVE INCORPORATED Other names of systems and products mentioned in these instructions are usually the registered trademarks or trademarks of the manufacturers who developed the system or produ...

Отзывы: