


Connecting the Unit
This section describes how to connect the main video
camera, display, microphone, LAN cable, AC adaptor
and power cord.
G
F
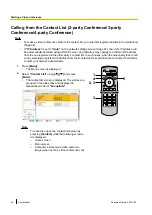
To each device
To a router
To a display
To a general - purpose microphone
To an AC outlet
A
D
C
B
E
Notice
•
Use only the included power cord.
Note
•
Make sure to read the instruction manuals for
all devices being connected.
1.
Connect the main video camera.
•
Connect the main video camera to the Main
Camera terminal on the back of the unit using
an HDMI cable (
A
).
2.
Connect the display.
•
Connect the display to the HDMI terminal on the
back of the unit using an HDMI cable (
B
).
Note
•
If your display is not compatible with HDMI,
use a component cable (Page 34). Since
sound signals are not transmitted when
using a component cable, connect an
amplifier/active speaker (Page 33), or use
the display’s speakers (Page 34).
3.
Connect a microphone.
Digital Boundary Microphone (optional)
(KX-VC600 only)
Connect the Digital Boundary Microphone to the
MIC (Digital) jack on the back of the unit using the
proprietary cable (
C
).
•
Use only the included cable.
•
Push and turn the connector of the proprietary
cable until it clicks. If the connector does not
click, try reconnecting the cable with the top and
bottom of the connector reversed.
Analogue Boundary Microphone (optional)
Connect the Analogue Boundary Microphone to the
MIC (Analog) jack on the back of the unit using the
proprietary cable (
D
).
•
Use only the included cable.
•
Ensure that the arrow on the connector of the
proprietary cable is facing up when you insert
the cable. When you disconnect the cable, grip
the connector securely and pull it out.
General-purpose microphone
Connect the microphone to the Audio In L/R jack on
the back of the unit using the stereo pin plug cable
(
E
) after amplifying the signal to line level using a
device such as a microphone amplifier.
•
Connect the microphone correctly, as follows:
–
Left channel
®
L
–
Right channel
®
R
Note
•
When connecting both the Boundary
Microphone and a general-purpose
microphone, both microphones can be used
simultaneously.
•
When connecting a headset, refer to "About
Headset (Page 33)".
4.
Connect to the network.
•
Connect a router to the LAN jack on the back of
the unit using a category 5 or greater LAN cable
(
F
).
Document Version 2013-09
User Manual
29
Preparation


