


L
This unit is compatible with Caller ID. You must subscribe to the appropriate service offered
by your service provider/telephone company.
Operating Instructions
Color Laser Multi-Function Printer
Model No.
KX-MC6040
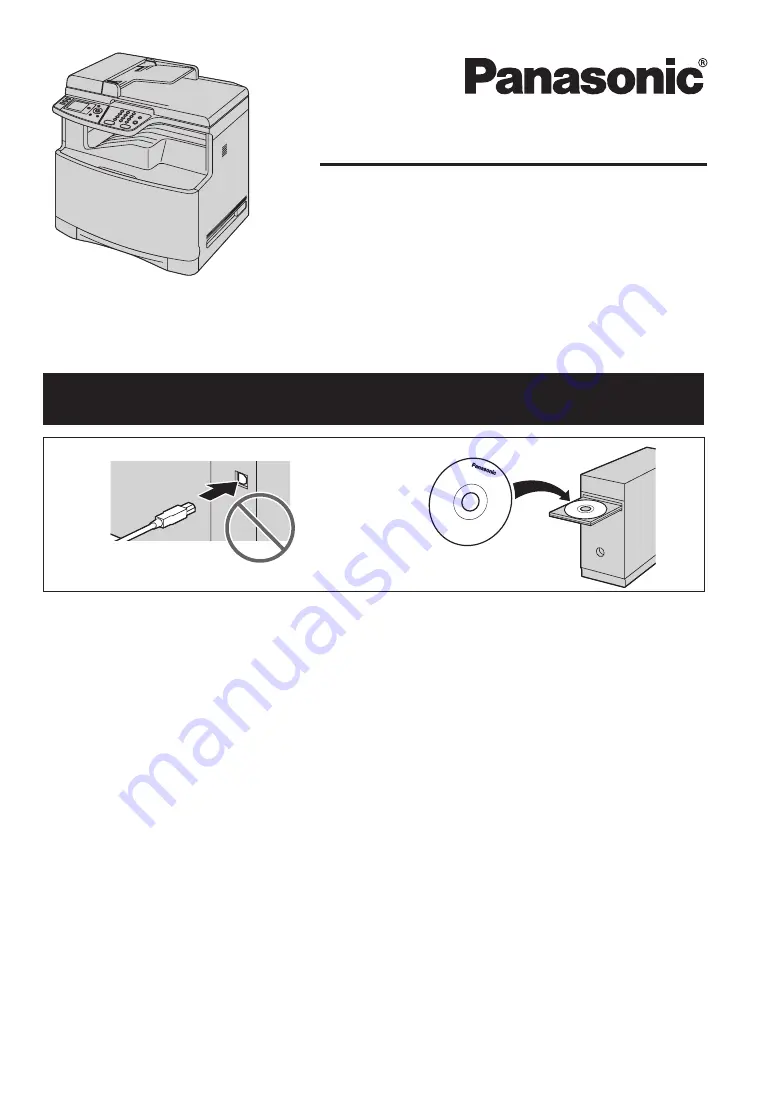
Do NOT connect the unit to a computer with the USB cable until prompted by the Multi-
Function Station (CD-ROM).
1
2
Содержание KX-MC6040 - Color Laser Multi-Function Printer
Страница 121: ...121 Notes ...
Страница 122: ...122 Notes ...
Страница 123: ...123 Notes ...
Страница 124: ...PNQX1560ZA CM0708DY0 CD For hearing or speech impaired TTY users TTY 1 877 833 8855 ...


