background image

1. Introduction and Preparation

15

Detailed operating instructions are on the CD-ROM.

cable. If the unit is connected to a computer with 
USB cable before installing Multi-Function 
Station, the 

[

Found New Hardware Wizard

]


dialogue box will appear. Click 

[

Cancel

]

 to close 

it.

L

Software features and appearance are subject to 
change without notice.

Warning:

L

To assure continued emission limit compliance, use 
only shielded USB cable.

1

Start Windows

®

 and exit all other applications.

L

For Windows 2000, Windows XP and Windows 
Vista™ operating system users, you must be 
logged in as an administrator in order to install 
Multi-Function Station.

2

Insert the supplied CD-ROM into your CD-ROM 
drive.

3

[

Easy installation

]

L

The installation will start.

4

When the setup program starts, follow the on-screen 
instructions.

5

The 

[

Connect Type

]

 dialogue box appears, select 

[

Connect directly with a USB cable.

]

i


[

Next

]

L

The 

[

Connect Device

]

 dialogue box will appear.

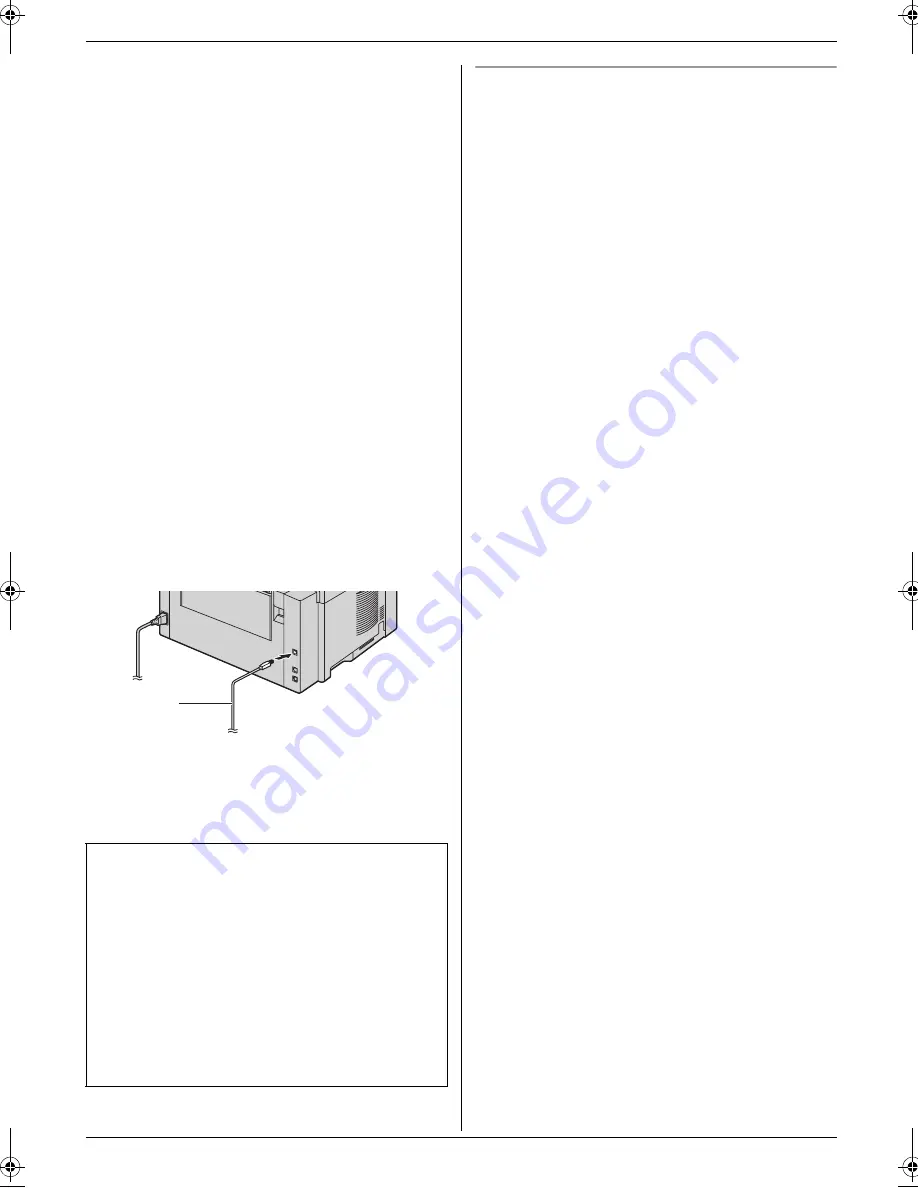
6

Connect the unit with the USB cable (

1

), then click 

[

Next

]

.

* The pictured model is KX-MB771.

7

Click 

[

Install

]

, then follow the on-screen 

instructions.

L

The files will be copied to your computer.

To view or install the operating instructions in the 
CD-ROM

1.

Start Windows and insert the supplied CD-ROM into 
your CD-ROM drive.

2.

Click 

[

Operating Instructions

]

, then follow the on-

screen instructions to view or install the operating 
instructions in PDF format.

L

Adobe Reader is required to view them.

Note:

L

If you install the operating instructions, you can view 
it anytime from 

[o]

 on the Multi-Function Station 

launcher.

Important notice

If you use Windows XP or Windows Vista, a message 
may appear after connecting the unit with the USB 
cable. This is normal and the software will not cause 
any difficulties with your operating system. You can 
continue the installation with no problem. The kind of 
message is displayed:

L

For Windows XP users

“The software you are installing for this hardware 
has not passed Windows Logo testing to verify its 
compatibility with Windows XP.”

L

For Windows Vista users

“Would you like to install this device software?”

1

MB261_771E-PFQW2656ZA-QRG-en.book  Page 15  Monday, June 25, 2007  3:13 PM

Содержание KX-MB261E

Страница 1: ...cription on how to use the unit Adobe Reader is required to view them Quick Reference Guide KX MB771E Multi Function Printer Model No KX MB261E This pictured model is KX MB261 Do NOT connect the USB c...

Страница 2: ...Hamburg Germany Notice for product disposal transfer or return KX MB771 only L This product can store your private confidential information To protect your privacy confidentiality we recommend that yo...

Страница 3: ...unit If you are not sure of the type of power supplied to your home consult your dealer or local power company For safety purposes this unit is equipped with a grounded plug If you do not have this t...

Страница 4: ...wet at all This may cause a fire If the telephone line cord plug becomes wet immediately pull it from the telephone wall socket and do not use KX MB771 only Unplug this unit from power outlets and ref...

Страница 5: ...when in the vicinity of the leak KX MB771 only When moving the unit make sure you are using the side grips 1 CLASS 1 LASER PRODUCT The printer of this unit utilises a laser Use of controls or adjustm...

Страница 6: ...ew product Disposing of this product correctly will help to save valuable resources and prevent any potential negative effects on human health and the environment which could otherwise arise from inap...

Страница 7: ...lier of the apparatus should be consulted for an up to date list of PBX s with which the apparatus is compatible It cannot be guaranteed that the apparatus will operate under all possible conditions o...

Страница 8: ...T OFF PLUG IS INSERTED INTO ANY 13 AMP SOCKET If a new plug is to be fitted please observe the wiring code as shown below If in any doubt please consult a qualified electrician WARNING THIS APPLIANCE...

Страница 9: ...on L Main settings prior to activating the unit such as Multi function software information 3 Printer L More ways to use the printer such as printing on special media 4 Scanner L More ways to use the...

Страница 10: ...ly 14 Initial Programming 1 9 Date and time KX MB771 only 14 1 10 Your logo KX MB771 only 14 1 11 Your fax number KX MB771 only 14 1 12 Installing Multi Function Station 14 2 How to Use Printer 2 1 Pr...

Страница 11: ...iday 9 30am 5 30pm Excluding public holidays L Or go on line through our Internet Accessory ordering application at www panasonic co uk L Most major credit and debit cards accepted L All enquires tran...

Страница 12: ...e pictured model is KX MB771 A N C N C b1 S E a1 view A S E b1 a1 To EXT socket contact side a1 b1 Line S Shunt E Earth Recall This function is not provided on this fax machine To telephone line cord...

Страница 13: ...s KX MB771 SCAN Select this mode when using the unit as a scanner for the computer COPY Select this mode when using the unit as a copier FAX KX MB771 only Select this mode when using the unit as a fax...

Страница 14: ...itor volume While using the monitor press V or Initial Programming 1 9 Date and time KX MB771 only 1 MENU i 1 0 1 i SET D 01 M 01 Y 07 TIME 00 00 2 Enter the current date month year hour minute by sel...

Страница 15: ...Connect the unit with the USB cable 1 then click Next The pictured model is KX MB771 7 Click Install then follow the on screen instructions L The files will be copied to your computer To view or inst...

Страница 16: ...g a copy Illegal copies L It is unlawful to make copies of certain documents Copying certain documents may be illegal in your country Penalties of fines and or imprisonment may be imposed on those fou...

Страница 17: ...ving Faxes 2 6 Receiving a fax automatically Auto answer ON KX MB771 only 2 6 1 Activating FAX ONLY mode Press FAX AUTO ANSWER repeatedly to display FAX ONLY MODE How faxes are received When receiving...

Страница 18: ...COVER L The rear cover is open Close it L A recording paper jam occurred near the manual input tray Remove the jammed paper DIRECTORY FULL L There is no space to store new items in navigator directory...

Страница 19: ...e sheets and try again REMOVE PAPER IN INPUT TRAY 2 L The recording paper is installed in the manual input tray when trying to copy receive faxes or print reports Remove the recording paper from manua...

Страница 20: ...to identify and possibly correct the problem b If the problem is not resolved after referring to the user guide please contact our customer helpline on 0844 844 3878 for UK or 01 6130082 for the Repu...

Страница 21: ...21 Notes...

Страница 22: ...22 Notes...

Страница 23: ...23 Notes...

Страница 24: ...ess Systems U K Panasonic House Willoughby Road Bracknell Berkshire RG12 8FP Manufacturer Panasonic Communications Co Ltd 1 62 4 chome Minoshima Hakata ku Fukuoka 812 8531 Japan Global web site http p...

Отзывы: