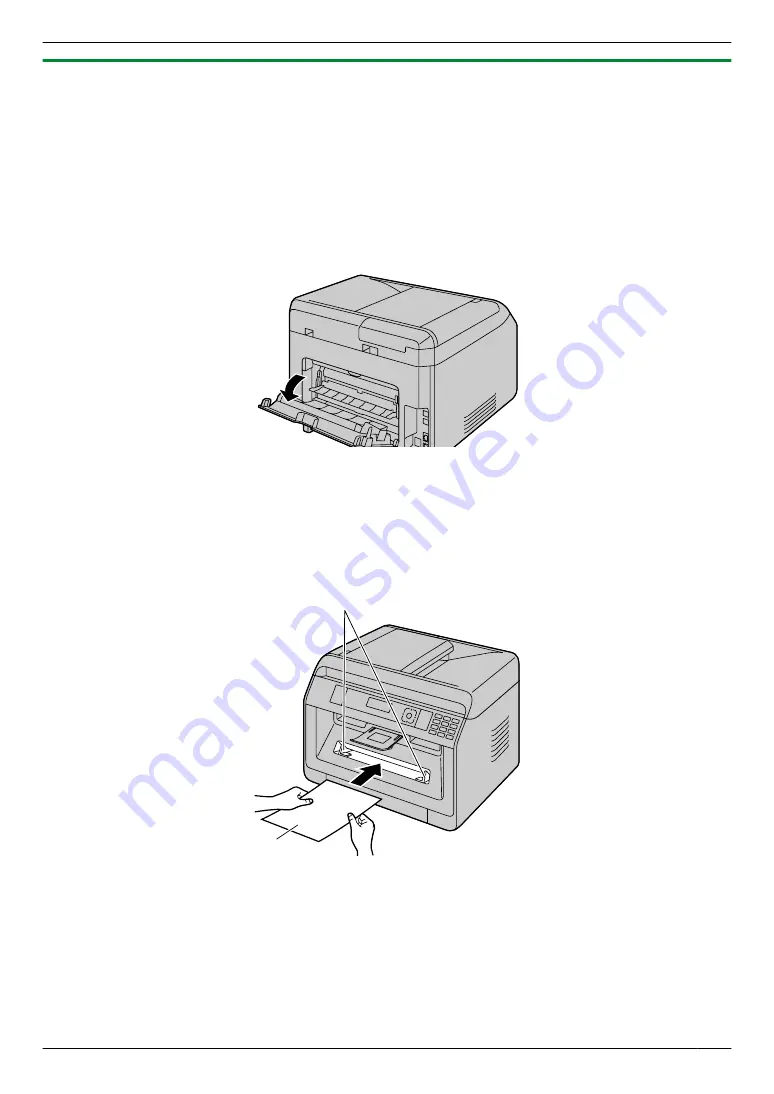
3.2.2 Manual tray
y
R
When printing with the computer, custom size recording paper can also be used (page 50).
R
To print from the manual tray, change the paper tray setting beforehand.
–
Select #2 for the printer properties when printing with the computer.
–
Set the copy input tray setting to “
#2
” (feature #460) when making a copy.
Important:
R
To print on thick paper, label or envelope:
–
Be sure to open the rear cover before starting and print one sheet at a time. The recording paper will
be printed from the rear side. Therefore, if you print with the cover closed, the paper may jam inside
the unit.
–
Be sure to close the rear cover after printing.
It can hold one sheet at a time. When printing or copying multiple sheets, add the next sheet after the first sheet has
been fed into the unit.
1
Adjust the width of the guides (
A
) to the size of the recording paper.
R
If the unit is in sleep mode, press a key to put the unit in standby mode for the next process.
2
Insert the paper, print-side up (
B
) until the unit grasps the paper and a single beep is heard.
A
B
Note:
R
The manual tray cannot be used for receiving faxes.
R
If the copy input tray setting (feature #460) is not set
“
#2
”
beforehand, when printing or copying multiple pages,
the 1st page will be printed from the manual tray, but the rest of the pages will be printed from the standard input
tray.
31
3. Basic Operations
Содержание KX-MB2100 series
Страница 53: ...Clasp Transparent window 53 5 Printing ...
Страница 137: ...137 Notes ...
Страница 138: ...138 Notes ...
Страница 139: ...139 Notes ...
Страница 140: ...PNQX6667ZA D0514KU0 Panasonic System Networks Co Ltd 2014 ...


