

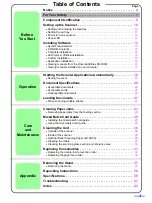
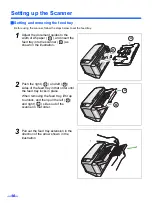


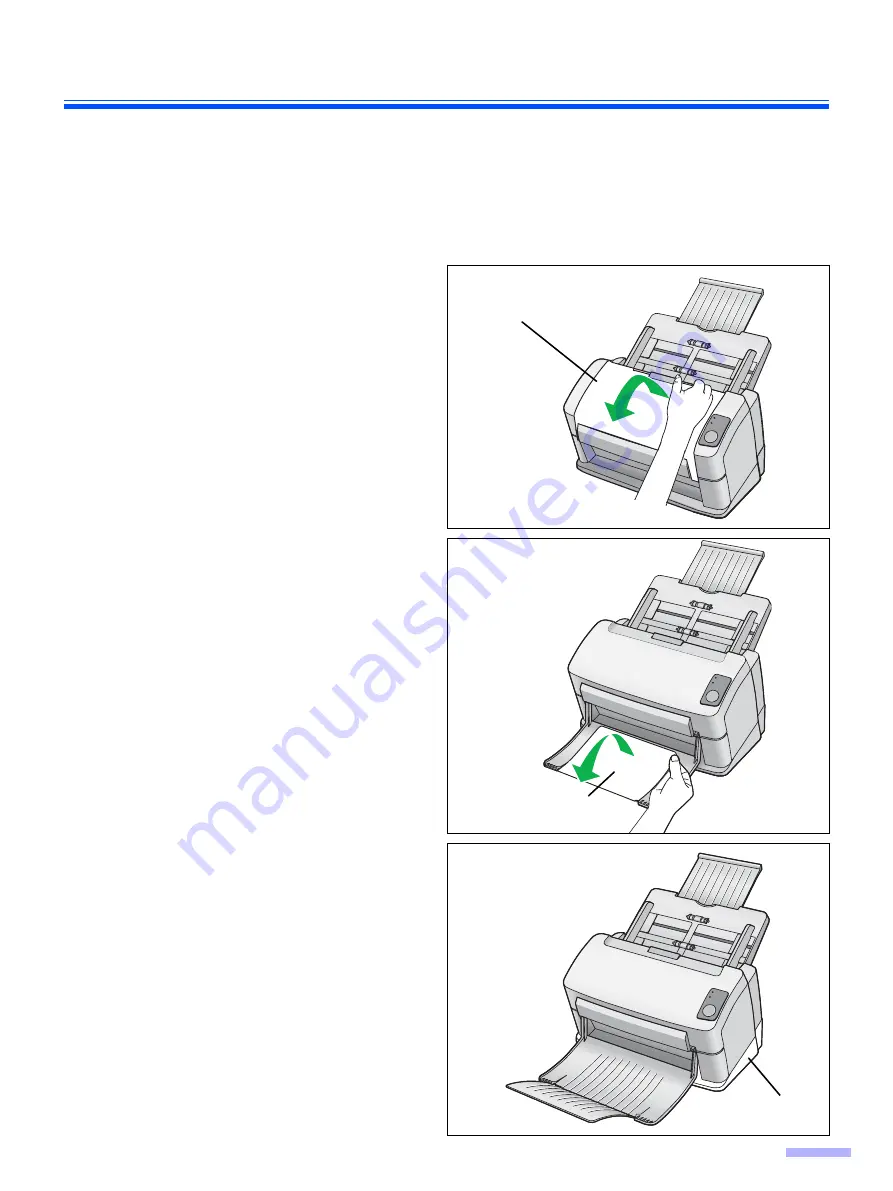
Setting up the Scanner
11
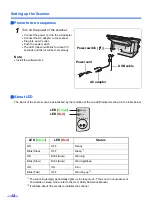
Setting the exit tray
The exit tray prevents documents from dropping after they are scanned.
Follow the steps below to set the exit tray.
Note:
•
Documents can be fed through the scanner even if the exit tray is closed.
1
Open the exit tray.
2
Open the exit tray extension.
Note:
•
The stand can be easily removed if so desired. For
removing the stand, see
.
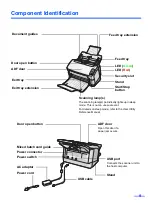
Exit tray
Exit tray extension
Stand


