35
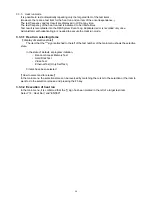
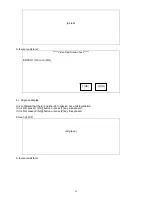
The AC Power is turned off by user manually within 10 seconds. (The power supply keeps from the battery.)
And then, user needs to turn ON again manually.
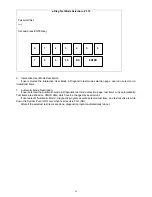
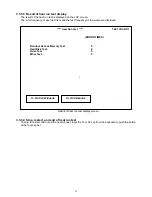
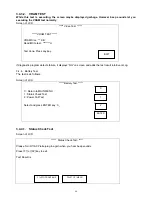
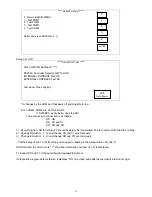
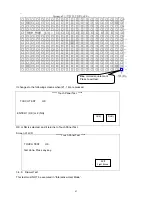
******* Status Check Test. *****
Please Turn Off AC Power, re-plug in again when you hear beep sounds
Press [F1] key to exit.
Test Result is ok
Battery Status is Good. (or Low Battery.)
ENTER 1 (OK) or 2 (NG)
OK or NG is selected.
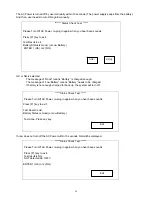
The message of “Good” means “Battery” is charged enough.
The message of “Low Battery” means “Battery” needs to be charged.
If battery is not enough charged for back up, the system will turn off.
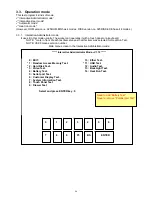
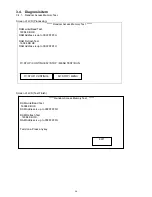
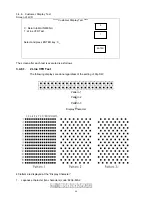
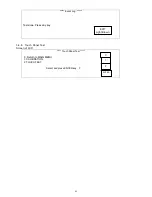
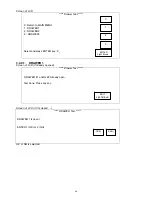
***** Status Check Test. *****
Please Turn Off AC Power, re-plug in again when you hear beep sounds
Press [F1] key to exit.
Test Result is ok!
Battery Status is Good (or Low Battery.)
Test done. Press any key.
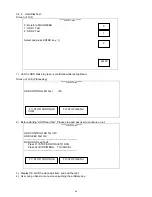
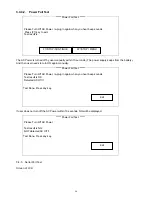
If user does not turn off the AC Power within 10 seconds, NG will be displayed.
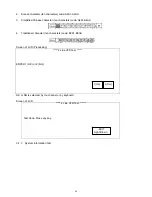
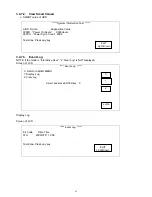
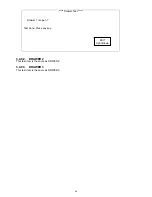
***** Status Check Test. *****
Please Turn Off AC Power, re-plug in again when you hear beep sounds
Press [F1] key to exit.
Test result is NG.
NOT detected AC OFF !!
ENTER 1 (OK) or 2 (NG)
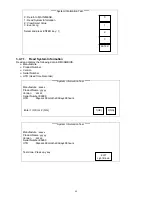
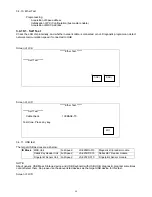
1(OK)
2(NG)
Exit
Exit
Содержание JS-925WS-010
Страница 11: ...5 1 3 Outside drawing 12 Touch Screen 15 Touch Screen ...
Страница 22: ...14 U214 U291 U292 U322 1 5V generation area 0 9V for Memory Terminator generation area ...
Страница 25: ...17 U1 U2 U7 Audio AMP area ...
Страница 27: ...19 U7 Q8 Y3 ...
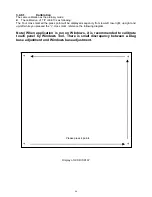
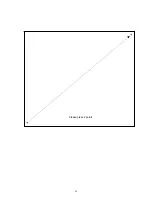
Страница 53: ...45 Please press 2 points ...
Страница 66: ...58 3 5 13 BackLight Test Only OK NG ...
Страница 67: ...59 4 PCB 4 1 Main PCB 4 1 1 Schematic Diagram p49_MAIN_schemati c pdf 40 pages ...
Страница 69: ......
Страница 74: ...96 4 2 Switch LED PCB 4 2 1 Schematic Diagram 93_SW LED_schematic pdf 3 pages ...
Страница 75: ...97 4 2 2 Parts Location p95_SW LED_PCB pdf 1 page Total 4 pages ...
Страница 77: ...99 4 3 Touch Panel PCB 4 3 1 Schematic Diagram p99_TOUCH PANEL_scematic pdf ...
Страница 78: ...100 4 3 2 Parts Location p100_TOUCH PANEL PCB pdf ...
Страница 80: ...102 4 4 JS 925CB 010 Optional I O PCB 4 4 1 Schematic Diagram p102_IO_schematic pdf 6 pages ...
Страница 81: ...103 4 4 2 Parts Location p103_IO_PCB pdf 1page Total 7 pages ...
Страница 82: ......
Страница 84: ...110 4 5 JS 925HU 010 USB HUB PCB 4 5 1 Schematic Diagram p110_USB_schemati c pdf 4 pages ...
Страница 85: ...111 4 5 2 Parts Location p111_USB_PCB pdf ...
Страница 86: ......
Страница 91: ...119 1 3 Disconnect Cables 1 4 Remove 4 screws 1 5 Lift up LCD Unit 1 6 Remove 2 screws ...
Страница 92: ...120 1 7 Remove LCD unit Connect Earth Cable such as the following picture in case of assembly ...
Страница 93: ...121 2 Removal Rear Cover 2 1 Loosen screw 2 2 Lift up Rear Cover Lift up here 2 3 Open Rear Cover ...
Страница 94: ...122 2 4 ...
Страница 96: ...124 3 4 Disconnect the cable 3 5 Remove the 2 screws 3 6 Remove Front PCB ...
Страница 97: ...125 3 7 Disconnect the cable 7 8 28 ...
Страница 98: ...126 3 8 Remove the 2 screws 3 9 Remove Power Supply Shield 9 ...
Страница 99: ...127 Check some points as shown in the following pictures in case of assembly ...
Страница 100: ...128 ...
Страница 101: ...129 3 10 Disconnect the cable 10 ...
Страница 103: ...131 11 ...
Страница 106: ...134 4 4 Remove the 2 screws 4 5 Remove PCB Shield such as shown in the following picture ...
Страница 107: ...135 4 5 Disconnect the cable 4 6 Disconnect the cable 30 ...
Страница 108: ...136 4 7 Remove the 4 screws 4 8 Remove HDD 13 14 15 ...
Страница 109: ...137 4 9 Remove the 3 screws 4 10 Disconnect the cable 4 11 Remove Communication Board ...
Страница 110: ...138 JS 925CB 010 4 12 Remove the 11 screws 4 13 Disconnect the cables ...
Страница 111: ...139 4 14 Remove Main PCB 4 15 Remove DIMM 16 ...
Страница 112: ...140 Side A Side B 17 ...
Страница 113: ...141 Mount the Main PCB with fitting the holes and bosses such as shown in the following pictures in case of assembly ...
Страница 114: ...142 5 Removal Base Frame 5 1 Remove the 2 screws ...
Страница 115: ...143 5 2 Remove the 2 screws 5 3 Remove the base frame ...
Страница 116: ...144 5 4 Remove the 2 screws 5 5 Remove I O Panel 29 ...
Страница 117: ...145 5 6 Remove the 4 hex screws 5 7 Remove the 2 connector cables 18 19 ...
Страница 118: ...146 20 ...
Страница 119: ...147 5 8 Remove the 3 screws 5 9 Remove the 2 pillars 23 22 21 ...
Страница 120: ...148 5 10 Remove 5 screws 24 25 26 27 ...
Страница 124: ...152 3 Remove the 2 screws 4 Disconnect USB Hub Board JS 925HU 010 JS 925HU 010 ...
Страница 125: ...153 5 Remove the 2 screws 6 Remove the 4 screws 7 Remove Hinge ...
Страница 126: ...154 103 8 Loosen the 4 screws until sounds clicky 9 Remove the 4 screws 104 ...
Страница 127: ...155 10 Open Display Front Cover 105 11 Remove the 4 screws ...
Страница 128: ...156 12 Lift up TP LCD Then disconnect Backlight Cables 13 Disconnect LCD cable ...
Страница 129: ...157 14 Disconnect Touch Panel Cable 15 Open TP LCD ...
Страница 130: ...158 16 Remove the 4 screws 17 Remove the tape 116 117 ...
Страница 131: ...159 18 Separate Touch Panel and LCD 106 107 ...
Страница 132: ...160 19 Remove the 3 screws And remove Inverter Board 108 ...
Страница 133: ...161 20 Remove the 2 screws And remove Touch Panel Control Board 109 21 Remove the Cables ...
Страница 134: ...162 110 113 111 114 ...
Страница 136: ...164 6 3 JS 925WS 010 LCD Unit 6 3 1 Disassembly Drawing 1 Remove the 2 screws 2 Remove LCD Cable Cover A and B 201 202 ...
Страница 137: ...165 3 Remove the 2 screws 4 Disconnect USB Hub Board JS 925HU 010 JS 925HU 010 ...
Страница 138: ...166 5 Remove the 2 screws 6 Remove the 4 screws 7 Remove Hinge ...
Страница 139: ...167 203 ...
Страница 140: ...168 8 Loosen the 2 screws until sounds clicky 9 Remove the 4 screws 10 Open Display Front Cover 204 205 ...
Страница 141: ...169 11 Remove the 4 screws 12 Lift up TP LCD Then disconnect Backlight Cables 13 Disconnect LCD cable ...
Страница 142: ...170 14 Disconnect Touch Panel Cable 15 Open TP LCD ...
Страница 143: ...171 16 Remove the 4 screws 17 Remove the tape ...
Страница 144: ...172 18 Separate Touch Panel and LCD 206 207 ...
Страница 145: ...173 19 Remove the 3 screws And remove Inverter Board 208 ...
Страница 146: ...174 20 Remove the 2 screws And remove Touch Panel Control Board 209 21 Remove the Cables ...
Страница 147: ...175 210 213 211 214 ...
Страница 168: ...196 may occur Adjust Display tilt angle with two hands placed on outside bezel edges of Display unit ...
Страница 188: ...216 ...

