Setup
25
■
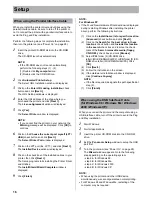
When using the USB Interface Cable
For Mac OS 8.6 - Mac OS 9.2
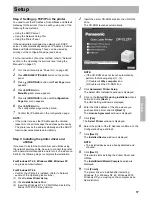
Step 1: Setting the PostScript printer driver
When you connect the printer and your Macintosh using a
USB interface cable and turn the printer on (see “Power
On” on page 28), DP-CL21M appears in the “Select a
USB Printer:” list of the Desktop Printer Utility.
1
Start the
Desktop Printer Utility
.
(Macintosh HD:AdobePS Components:Desktop
Printer Utility)
The
New Desktop Printer
window is displayed.
2
Select
AdobePS
from the
With
menu.
3
Select
Printer (USB)
from the
Create Desktop
list,
and click
[OK]
.
The
Untitled 1
window is displayed.
4
Click
[Change...]
button in the
USB Printer
Selection
group.
The
USB Printer
window is displayed.
5
Select
DP-CL21M
from the “
Select a USB Printer:
”
list, then click
[OK]
.
6
Click
[Auto Setup]
.
The “Panasonic DP-CL21M.PPD” is displayed in the
“PostScript
™
Printer Description (PPD) File”.
7
Click
[Create...]
.
The confirmation window is displayed.
8
Click
[Save]
.
9
Be sure to edit “
DP-CL21MUSB
” in the “Save
desktop printer as:”, then click
[Save]
.
The DP-CL21MUSB desktop printer icon is created
on your desktop screen.
Step 2: Setting the DP-CL21M to the Default
Printer:
1
Click the
DP-CL21MUSB
desktop printer icon.
2
Click
Printing
menu and select
Set Default Printer
.
For Mac OS X 10.1
Step 1: Setting the PostScript printer driver
Before you can use a printer, you must add it in the Print
Center. If you want to select the DP-CL21M in the Print
Center, be sure you connect the printer and your
Macintosh using a USB interface cable and turn the
printer on (see “Power On” on page 28). DP-CL21M
appears in the Print Center by choosing USB as the
connection type. Perform the following steps to select the
DP-CL21M printer.
NOTE:
•
The Print Center is in the Utilities folder (Macintosh HD:
Applications:Utilities).
1
Open the
Print Center
and choose
Add Printer...
from the
Printers
menu.
2
Choose
USB
as the connection type, and click
DP-CL21M
.
3
Confirm the Printer Model is set to
Auto Select...
and
click
Add
.
4
Close the
Print Center
.
Step 2: Setting the DP-CL21M to the Default
Printer
1
Open the
Print Center
and click
DP-CL21M
.
2
Select
Make Default
from the
Printers
menu.
3
Close the
Print Center
.
NOTE:
•
When you add a printer in the Print Center, the new
printer becomes the default printer.
Set
u
p

