


17
Connecting and Setting up (continued)
Auto Setup
Auto Setup automatically tunes all available stations and sets the
unit’s clock to the current date and time.
1
Press [DVD,
Í
]
(1)
to switch the unit on.
≥
The Country setting menu appears on the television.
2
Use [
3
,
4
,
2
,
1
]
(10)
to select the country.
3
Press [ENTER]
(10)
.
≥
Auto Setup starts. This takes about 5 minutes.
≥
Auto Setup is complete when you see the television picture.
To cancel Auto Setup before it finishes
Press [RETURN]
(23)
.
If the clock setting menu appears after Auto Setup
finishes
1) Use [
3
,
4
,
2
,
1
]
(10)
to set the correct time and date.
2) Press [ENTER]
(10)
to conclude the setting.
To confirm that stations have been tuned correctly
See page 79.
When no stations have been set, confirm all
connections and restart Auto Setup
See page 80.
When station names or channel numbers have not
been set correctly
See page 79.
Hint:
≥
If you select “Schweiz”, “Suisse”, or “Svizzera” in the Country
setting menu, another menu appears to let you set “Power Save”
to “On”. In this setting, the unit’s power consumption is minimised
when it is switched to standby. To turn the unit on, press and hold
[
Í
/I] on the main unit. On the remote control will not work.
ENTER
RETURN
SELECT
Country
RETURN : leave ENTER : access
Others
Deutschland
Österreich
Portugal
Suomi
Sverige
Schweiz
Suisse
Svizzera
België
Belgique
Belgien
Danmark
España
Italia
Nederland
Norge
Auto-Setup
Ch
1
RETURN
Auto-Setup in progress, please wait.
RETURN : to abort
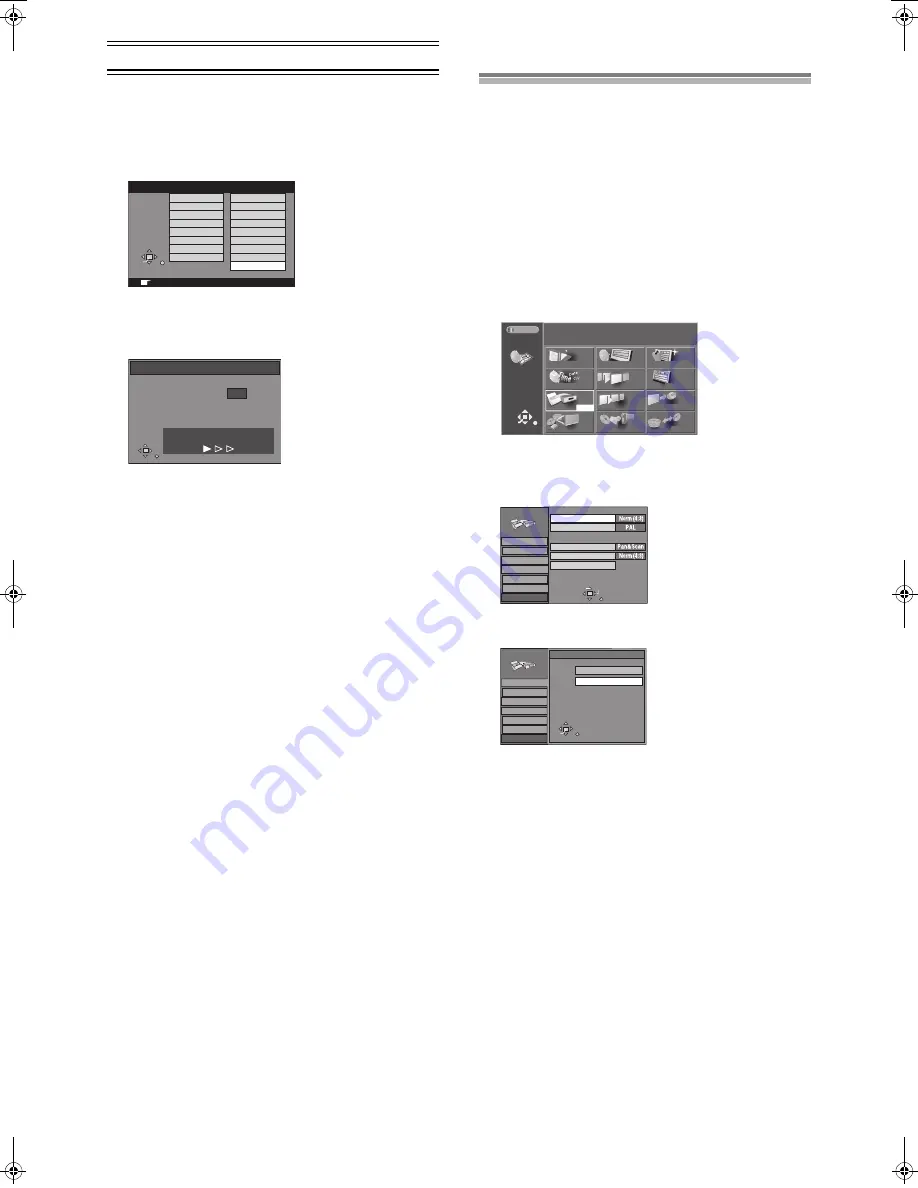
Selecting TV screen type
The aspect ratio is factory set to 4:3 for a regular television. You do
not have to change this setting if you have a regular 4:3 aspect
television.
Preparation
≥
Turn on the television and select the appropriate video input to
suit the connections to this unit.
≥
Switch [DVD, TV]
(15)
to “DVD”.
1
Press [DVD,
Í
]
(1)
to turn this unit on.
2
Press [FUNCTIONS]
(11)
to show the FUNCTIONS
window.
3
Use [
3
,
4
,
2
,
1
]
(10)
to select “SETUP” and press
[ENTER]
(10)
.
Screen displayed when selecting an HDD drive (page 18)
(example):
4
Use [
3
,
4
]
(10)
to select the “Connection” and
press [
2
] or [
1
]
(10)
.
5
Use [
3
,
4
]
(10)
to select “TV Aspect” and press
[ENTER]
(10)
.
6
Use [
3
,
4
]
(10)
to select the TV aspect and press
[ENTER]
(10)
.
≥
4:3
(factory setting)
16:9
ª
To return to the previous screen
Press [RETURN]
(23)
.
For your reference
Apart from “TV Aspect”, other settings also affect how video
appears on your television. Check the following if video doesn’t
appear correctly on your television.
≥
“Connection” — “Norm (4:3) TV Settings (DVD-RAM)” or “Norm
(4:3) TV Settings (DVD-Video)” (page 75).
≥
The video setting on the disc. How video appears is often
specified by the disc itself.
≥
The video settings on your television.
N
S
N
S
HDD
HDD
Disc Remaining
DIRECT NAVIGATOR CREATE PLAY LIST
PLAY LIST
TIMER RECORDING
SELECT
ENTER
RETURN
TOP PLAY
FLEXIBLE REC
DUBBING
DV AUTO REC
JPEG
35:39 LP
FUNCTIONS
DISC INFORMATION
PLAY
SETUP
Tab
SELECT
TV Aspect
Normal (4:3) TV
Tuning
SETUP
RETURN
Settings
Disc
Picture
Sound
Display
Connection
TV System
Norm (4:3) TV Settings (DVD-Video)
Norm (4:3) TV Settings (DVD-RAM)
AV1/AV2 Settings
SETUP
Settings
Disc
Picture
Sound
Display
Connection
Tuning
SELECT
ENTER
TV Aspect
RETURN
Norm (4:3)
Wide (16:9)
DVD(PAL).book 17 ページ 2003年5月13日 火曜日 午後12時3分
Содержание DMRHS2 - DVD RECORD.W/HD DRIV
Страница 94: ...94 ...


