DVD HDD
VHS
AV3 S VIDEO IN VIDEO IN L/MONO AUDIO IN R
AV3 S VIDEO IN VIDEO IN L/MONO AUDIO IN R
RAM
RAM
Specifying a time as the recording duration
This function is not available for Timer Recordings.
!
Press
REC
on the unit during recording.
The recording time changes each time the button is pressed on the unit display:
OFF 0:30 1:00 1:30 2:00 3:00 4:00 OFF
!
Press
STOP
. The recording is paused and the time setting is deleted.
The unit switches itself off at the end of the recording if no functions are being
executed on another drive.
Direct TV recording
If your TV is equipped with Q Link, you can record a TV programme that you are
currently watching. Other settings are not necessary. The recorder automatically
switches to the appropriate station.
!
Press
DIRECT TV REC
for 3 seconds. Recording begins.
!
Press
STOP
to stop the recording.
DIRECT TV REC
DVD/HDD
: This function is not possible with
Flexible Rec. If the channel or recording
mode (XP, SP, LP, EP) is changed while
recording is paused, the time is deleted.
VHS
: If the tape speed is changed during the
recording, a slight picture distortion will occur
at that point.
Recording from an external unit, e.g. a camera
!
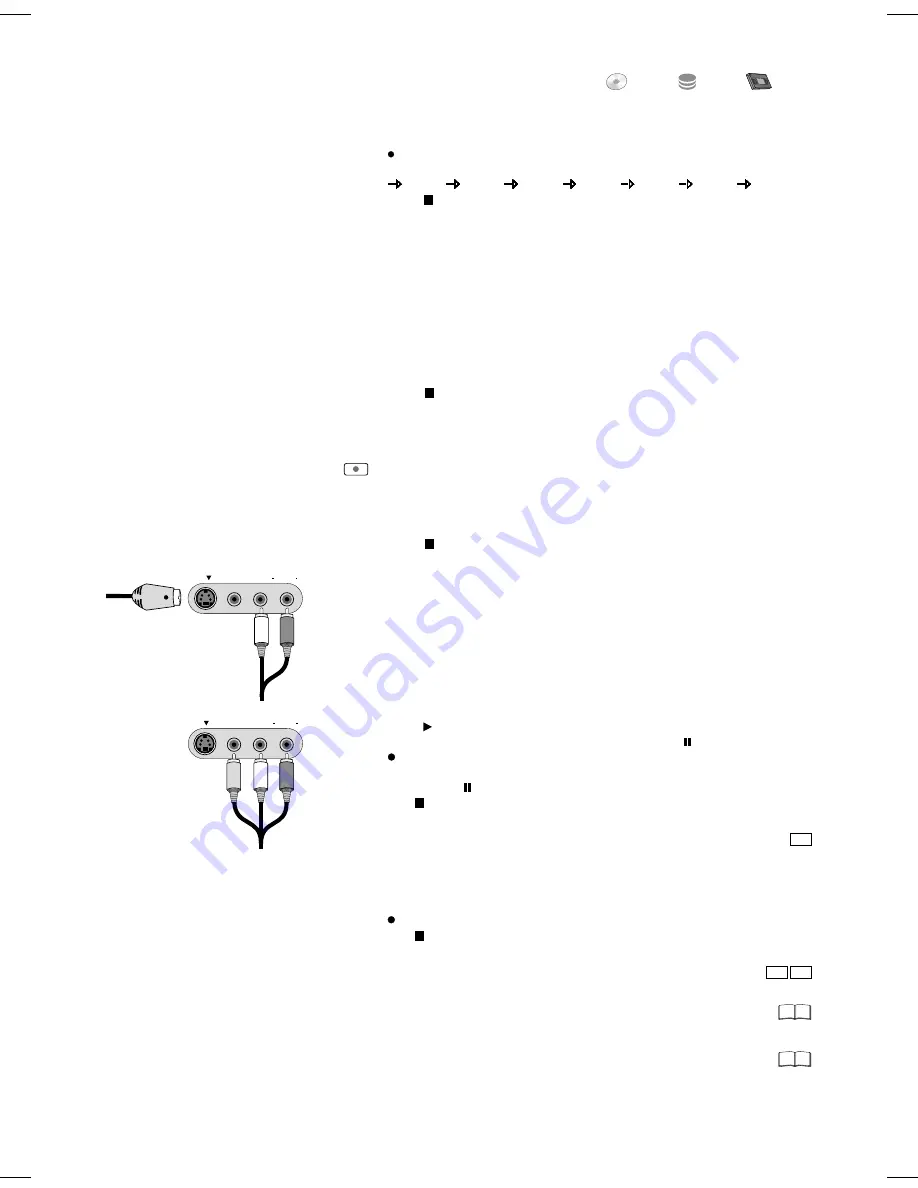
Connect the external unit to the AV3 input terminal on the front side of the unit.
!
Select one of the two connection options.
The S VIDEO cable and audio cable (L/R) connection delivers the best quality.
You cannot receive signals from PCs with this unit.
Selecting the sound track to record for programmes with dual-channel sound
Recording to VHS:
Insert a video cassette with an intact write-protection tab.
Recording to DVD/HDD:
Insert a recordable disc.
If you activated the write-protection, cancel it.
Not
!
Select the VHS drive with
DRIVE SELECT.
!
Select the DVD or HDD drive with
DRIVE SELECT
.
!
Select the recording mode with
REC MODE.
!
In
STOP
-mode use
INPUT SELECT
to select input channel AV3.
!
Start playback on the external unit.
!
Press
REC
at the point where you want to start the recording.
!
Use
STOP
to stop the recording.
!
Select the recording mode with
REC MODE.
!
In
STOP
mode, use
INPUT SELECT
to select input channel AV3.
!
Press
PLAY
.
!
At the point where you wish to start recording press
PAUSE
.
!
Press
REC
.
!
Start playback on the external unit.
!
Then press
PAUSE
to start the recording.
!
Use
STOP
to stop the recording.
Analogue channels
!
Before recording, select Sound setting Bilingual Audio Selection [M1] or [M2]
in the Setup menu.
Select [M1] or [M2] on an external unit before recording.
!
If the output signal of the external unit is an NTSC signal, set the TV System to
[NTSC] in the Setup menu.
S VIDEO-cable
Audio cable
L - White
R - Red
Audio/Video cable
Video - Yellow
L
- White
R
- Red
Recording in dual-channel audio
On DVD-RAM or HDD, both channels of a
programme in dual-channel sound are
recorded.
Use
AUDIO
to switch between the two
recorded sound tracks.
Recording
Digital channels
!
Press
DISPLAY
and select Audio setting [DVB Multi Audio].
68
69
34
Timer Recording with the television set
If your television set is equipped with the Q Link function and the possibility of
programming with Timer Recording, then you can do a Timer Recording with the
television set. To do so, connect the DVD Recorder with a fully wired 21-pin Scart
cable to the television set.
!
Program the Timer Recording on your television set.
!
Press
DRIVE SELECT
on the DVD Recorder to select the HDD or DVD drive.
!
Switch the DVD Recorder to the Standby mode.
The television set controls the beginning and end of the recording.
!
Press
STOP
to end the recording.
The recording will not start if the DVD Recorder is in Timer or EXT LINK standby.
If several Timer Recordings follow on in quick succession, they are recorded as
one title.
HDD


