33
Note:
When attaching Front Panel, in order to hook Cassette Door
Opener Lever to Cassette Door, push up cassette door in
the direction of arrow and insert a front panel.
10.6. Front Jack P.C.B. & Front
P.C.B.
1. Remove 5 screws (A) to remove Front P.C.B.
2. Remove 2 screws (B), and unlock 1 Locking Tabs (B) to
remove Front Jack P.C.B.
10.7. Rear Panel with Fan Motor
1. Disconnect Fan Connector.
2. Remove 5 Screws (A) and 1 Screw (B).
3. Unlock 2 Locking Tabs (A) to remove Rear Panel with
Fan Motor.
10.7.1.
Only Fan Motor
1. Disconnect Fan Connector.
2. Remove 2 Screws (A) to Remove Fan Motor.
Содержание DMR-ES40VP
Страница 9: ...9 4 Specifications ...
Страница 11: ...11 6 Location of Controls and Components 6 1 Each Buttons ...
Страница 12: ...12 ...
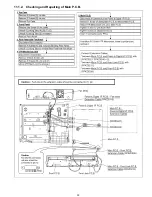
Страница 39: ...39 11 1 2 Checking and Repairing of Main P C B ...
Страница 40: ...40 11 1 3 Checking and Repairing of Digital P C B ...
Страница 41: ...41 11 1 4 Checking and DVD RAM Drive ...
Страница 102: ...S 51 ...
Страница 111: ...S 60 ...
Страница 112: ...S 61 ...
Страница 113: ...S 62 ...
Страница 114: ...S 63 ...
Страница 115: ...S 64 ...
Страница 116: ...S 65 ...
Страница 117: ...S 66 ...
Страница 119: ...S 68 ...
Страница 123: ...S7 4 Packing Parts Accessories Section S 72 A1 BATTERY REMOTE CONT A2 A3 A4 A1 1 A5 PC1 PC4 PC2 A6 A8 A7 ...

