16
RQT7305
Re
cor
d
ing
Recording television programs
[HDD]
[RAM]
[DVD-R]
≥
It is not possible to record to both HDD (Hard Disk Drive) and DVD
drive simultaneously.
≥
It is not possible to record continuously from one side of a double
sided disc to the other. You will need to eject the disc and turn it over.
≥
When using 8 cm (3
″
) DVD-RAM, remove the disc from the cartridge.
≥
You can record up to 500 titles on HDD, 99 titles on one disc.
≥
It is not possible to record CPRM (
➡
page 46) protected material
onto DVD-R or 2.8 GB DVD-RAM discs.
Preparation
Press [RETURN] to exit the television program list if it is displayed on
the television. To turn off auto start up of the television program list
➡
page 23, Selecting the TV Guide On Screen system start up
pattern.
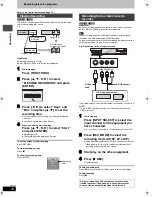
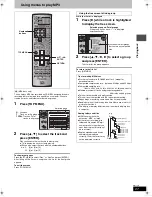
1
Press [HDD] or [DVD] to select the
recording drive.
The HDD or DVD indicator lights up on the unit.
2
If you selected the DVD drive
Press [
<
OPEN/CLOSE] on the main
unit to open the tray and insert a disc.
≥
Press the button again to close the tray.
≥
If you put a disc in while the HDD is selected, the DVD
indicator on the unit will flash while the unit reads the disc.
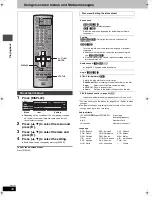
3
Press [
W X
CH] to select the channel.
To select with the numbered buttons:
≥
Select the audio to record (
➡
page 17).
4
Press [REC MODE] to select the
recording mode (XP, SP, LP, or EP).
≥
To record sound using LPCM (XP mode only):
Set “Audio for XP Recording” to “LPCM” in the SETUP
menu. (
➡
page 42)
5
Press [
¥
REC] to start recording.
Recording will take place on open space on the HDD or on
disc. Data will not be overwritten.
≥
You cannot change the channel or recording mode during
recording.
≥
You can record while the unit is on standby for timer recording, but
once the time for the timer recording to begin is reached, any
recording taking place will stop and the timer recording will begin.
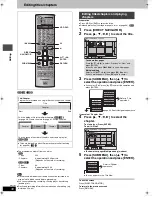
∫
To stop recording
Press [
∫
].
Recorded as 1 title until the position where stopped.
[HDD]
When continuously recording for long durations, titles are
automatically divided every 8 hours.
[DVD-R]
It takes about 30 seconds for the unit to complete recording
management information after recording finishes.
∫
To pause recording
Press [
;
].
Press again to restart recording.
(Title is not split into separate titles.)
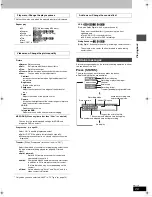
∫
To specify a time to stop recording—One Touch
Recording
During recording
Press [
¥
REC] to select the recording time.
Each time you press the button:
≥
This does not work during timer recordings (
➡
page 19) or while
using Flexible Recording (
➡
page 18).
Off Timer
The unit switches to standby after about 6 hours in the stop mode.
You can turn this feature off or change the time to 2 hours
(
➡
page 40, “Off Timer”).
Regarding DVD-R
≥
When transferring (dubbing) a title recorded with the high speed
mode to a DVD-R, set “DVD-R High-Speed Recording” to “On”
before recording to the HDD. (
➡
page 41)
≥
In order to play a DVD-R recorded using this unit on another
playback source, the disc must first be finalized (
➡
page 39).
POWER
VOLUME
CH
INPUT SELECT
DVD POWER
TV
TV/VIDEO
1
HDD
DVD
2
3
4
5
6
7
8
0
9
CM SKIP
AUDIO
PAGE
DRIVE SELECT
CH
CANCEL
VCR Plus+
SKIP
STOP
PAUSE
PLAY/x1.3
SLOW/SEARCH
FUNCTIONS
ENTER
DIRECT NAVIGATOR
TOP MENU
RETURN
SUB MENU
CHAPTER
SETUP
Info
PROG/CHECK
TV GUIDE
REC MODE
ERASE
REC
STATUS
TIME SLIP
DISPLAY
DUBBING
AUDIO
3
2
1
3
4
2
1
ENTER
RETURN
TIME SLIP
3
4
5
FUNCTIONS
STATUS
INPUT SELECT
DIRECT
NAVIGATOR
1
∫
;
PULL OPEN
OPEN/CLOSE
REC
/x1.3
TIME SLIP
POWER
CH
L2
S-VIDEO IN
VIDEO IN
AUDIO IN
R
L/MONO
TIME SLIP
HDD
DVD
DRIVE SELECT
∫
1
1
5
TIME SLIP
Numbered
buttons
L2 input terminals
Time Slip indicator
HDD, DVD indicator
Insert with the arrow facing in.
Insert fully so it clicks
into place.
Insert label-up.
TV Mode (Airwaves)
e.g., 5: [0]
➡
[5]
15: [1]
➡
[5]
CATV Mode (Cable)
e.g.,
5: [0]
➡
[0]
➡
[5]
15: [0]
➡
[1]
➡
[5]
115: [1]
➡
[1]
➡
[5]
0:30
"#
1:00
"#
1:30
"#
2:00
"#
3:00
"#
4:00
^""""""""""""
Counter (cancel)
,"""""""""""}
HDD
SP
CH
HDD
XP
CH
Remaining time on the disc
HDD
XP
CH
REC
7305en.book 16 ページ 2004年3月4日 木曜日 午後7時39分


