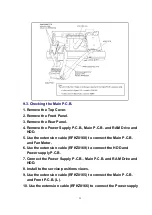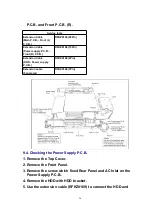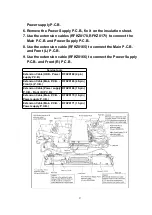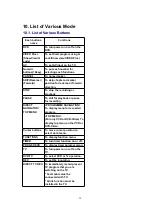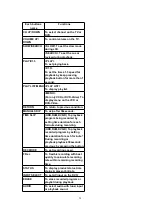
again, then the unit operates normally.
Note:
In this case, all parameters are initialized.
2. Timer Microprocessor (IC7501)
In case the unit does not operate normally after replacement of the
Timer Microprocessor with new one.
A. While power is ON, short IC7501-1 (RESET) and the GND in
order to transmit the “RESET (L)” to the reset terminal of Timer
Microprocessor (IC7501-18), then the unit operates normally.
7. Standard Inspection Specifications after Making
Repairs
7.1. Standard Inspection Specification
After making repairs, we recommend performing the following inspection, to check normal
operation.
No.
Procedure
Item to Check
1
Turn on the power.
The Panasonic RAM disc should be recognized.
2
Enter the EE (TU IN / AV IN - AV OUT) mode.
No abnormality should be seen in the picture,
sound or operation.
3
Perform auto recording and playback for one
minute using the RAM disc.
No abnormality should be seen in the picture,
sound or operation.
4
Model with the HDD : Perform auto recording and
playback for one minute using the HDD
No abnormality should be seen in the picture,
sound or operation.
5
If a problem is caused by a VCD, DVD-R, DVD-
Video, Audio-CD, or MP3, playback the test disc.
No abnormality should be seen in the picture,
sound or operation.
6
After checking and making repairs, upgrade the
firmware to the latest version.
Make sure that [FIRM_SUCCESS] appears
FL displays.
7
Transfer [9][9] in the service mode setting, and
initialize the service settings (return various
settings and error information to their default
values. The laser time is not included in this
initialization).
Make sure that [FACT INIT] appears in the
display.
After checking it, turn the power off.
8
To replace the RAM drive, reset all the information
(including the laser time) in the process mode 1
setting.
*The laser time is the total time that DVDs or CDs
have been played or recorded.It is recorded on
the Digital P.C.B..
Maku sure that [TEST L1] appears in the FL
display.
After checking it, turn the power off.
Use the following checklist to establish the judgement criteria for the picture and sound.
14
Содержание DMR-E80HPC
Страница 12: ...6 2 3 Other Items needed Digital P C B HDD Conditions Nothing special 12 ...
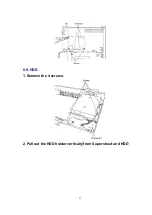
Страница 21: ...8 9 HDD 1 Remove the 4 screws 2 Pull out the HDD holder vertically from Super sheet and HDD 21 ...
Страница 47: ...16 2 Casing Parts Mechanism Section 2 47 ...
Страница 48: ...16 3 Packing Accessories Section 48 ...
Страница 56: ...LB7402 03 J0JHC0000032 COIL 2 56 ...
Страница 61: ...W501 08 ERJ3GEY0R00V 1 16W 0 8 61 ...
Страница 63: ...C50028 ECJ1VF1C104Z 16V 0 1U 1 63 ...
Страница 71: ...C122 KMG1E470 25V 47 1 71 ...
Страница 148: ...1 A B C D 2 3 4 5 6 7 8 9 FRONT L P C B DMR E80H P PC FRONT L P C B REP3528DB ...
Страница 149: ...1 A B C D 2 3 4 5 6 7 8 9 FRONT R P C B DMR E80H P PC FRONT R P C B REP3528EA ...
Страница 157: ...1 A B C 2 3 4 Location Map REAR DMR E80H P PC Main P C B REP3497M 1 4 Section 1 4 2 4 3 4 4 4 FRONT ...
Страница 158: ...5 6 7 8 Location Map DMR E80H P PC Main P C B REP3497M 2 4 Section 1 4 2 4 3 4 4 4 REAR FRONT ...
Страница 159: ...MAIN P C B D E F Location Map DMR E80H P PC Main P C B REP3497M 3 4 Section 1 4 2 4 3 4 4 4 REAR FRONT ...
Страница 160: ...Location Map DMR E80H P PC Main P C B REP3497M 4 4 Section 1 4 2 4 3 4 4 4 REAR FRONT ...
Страница 176: ...1 A B C 2 3 4 5 6 7 8 9 ATAPI P C B DMR E80H P PC ATAPI P C B REP3542A ...
Страница 179: ...Ref No MODE E C B E C B REC 0 4 1 0 0 3 8 0 PLAY 0 4 2 0 0 3 9 0 STOP 0 4 1 0 0 3 9 0 QR7002 QR7003 ...


