


VQT1X57
18
Preparation
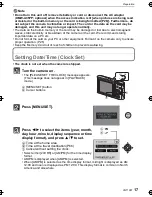
Press [MENU/SET] to set.
•
After completing the clock settings, turn the camera off. Then turn the camera back on,
switch to Recording mode, and check that the display reflects the settings that were
performed.
•
When [MENU/SET] has been pressed to complete the settings without the clock having
been set, set the clock correctly by following the
“
Changing the clock setting
”
procedure
below.
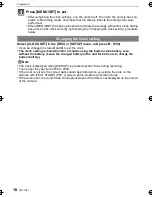
Select [CLOCK SET] in the [REC] or [SETUP] menu, and press
1
. (P20)
•
It can be changed in steps
3
and
4
to set the clock.
•
The clock setting is maintained for 3 months using the built-in clock battery even
without the battery. (Leave the charged battery in the unit for 24 hours to charge the
built-in battery.)
Note
•
The clock is displayed when [DISPLAY] is pressed several times during recording.
•
You can set the year from 2000 to 2099.
•
If the clock is not set, the correct date cannot be printed when you stamp the date on the
pictures with [TEXT STAMP] (P87) or order a photo studio to print the pictures.
•
If the clock is set, the correct date can be printed even if the date is not displayed on the screen
of the camera.
Changing the clock setting
DMC-FX48P_PC~VQT1X57_eng.book 18 ページ 2008年12月26日 金曜日 午後6時25分