RQT8950
7
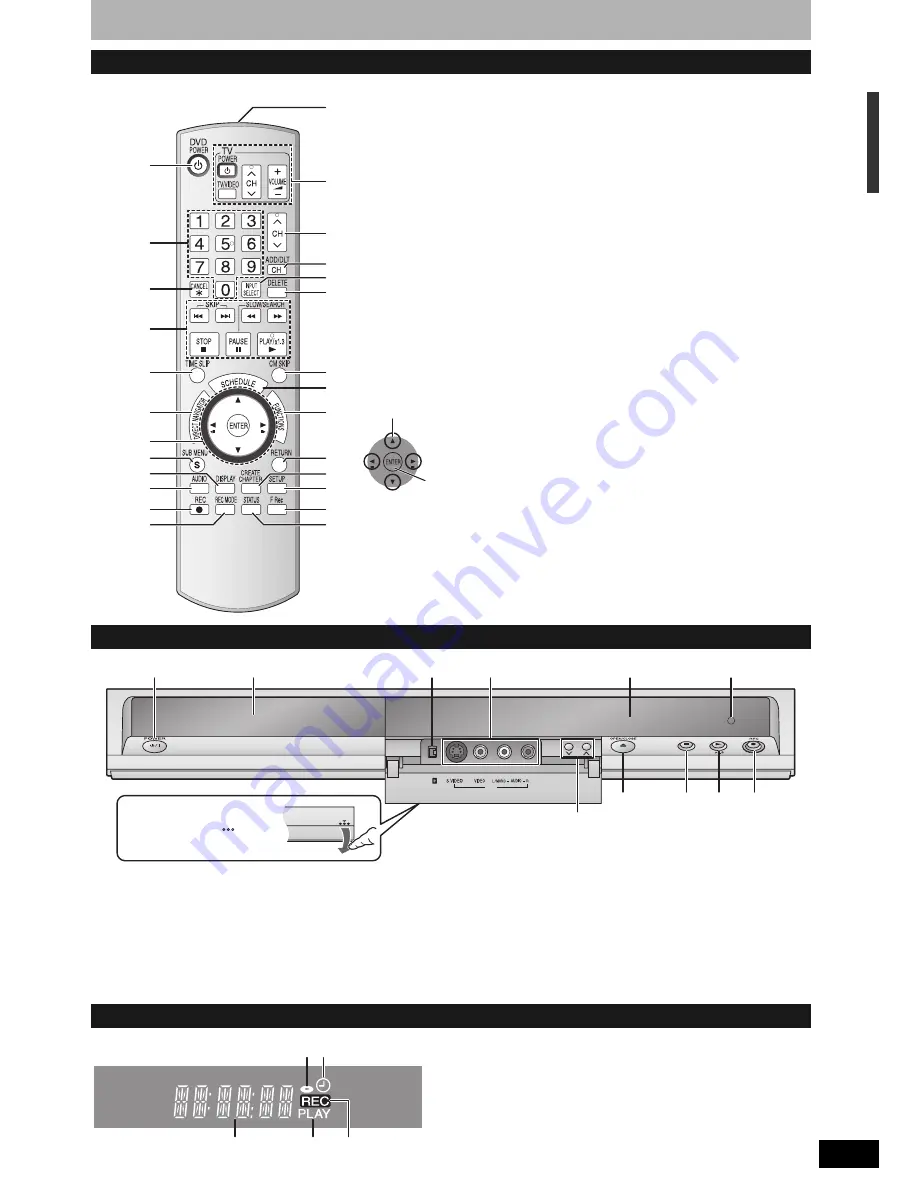
Control reference guide
Instructions for operations are generally described using the remote control.
Remote control
1
bn
bo
bt
cm
cl
bq
bp
bs
br
3
5
8
bk
bl
9
ck
6
7
4
2
bm
cq
co
cp
cn
1
Turn the unit on (
Ô
page 12)
2
Select channels and title numbers, etc./
Enter numbers
3
Cancel
4
Basic operations for recording and play
5
Skip the specified time (
Ô
page 23)
6
Show Direct Navigator/Top menu
(
Ô
page 22, 24, 30)
7
Selection/Enter, Frame-by-frame
(
Ô
page 12, 23)
8
Show sub menu (
Ô
page 25, 30, 33)
9
Show on-screen menu (
Ô
page 27)
bk
Select audio (
Ô
page 19, 23)
bl
Start recording (
Ô
page 18)
bm
Change recording mode (
Ô
page 18)
bn
Remote control signal output
bo
Television operations (
Ô
page 15)
bp
Channel select (
Ô
page 18)
bq
Add/delete channel (
Ô
page 13)
br
Input select (IN1 or IN2 or DV)
bs
Delete items (
Ô
page 29)
bt
Skip a minute forward (
Ô
page 23)
ck
Show scheduled recording list
(
Ô
page 20)
cl
Show FUNCTIONS window
(
Ô
page 28)
cm
Return to previous screen
cn
Create chapters (
Ô
page 23)
co
Show Setup menu (
Ô
page 14, 37)
cp
Start Flexible Recording (
Ô
page 19)
cq
Show status messages (
Ô
page 28)
n
Using the cursor
• Select items on menu screens and set items.
This operation is also possible...
• Frame-by-frame (backward/forward):
While paused, press [
w h
] or [
h q
] (left/right)
Press up, down, left or right to select an item.
Press [ENTER] to confirm.
Main unit
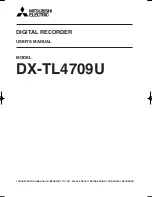
The unit’s display
CH
IN2
DV IN
1
3
5
4
2
7
6
8
9
bk
bl
Opening the front panel
Press down on the
part
with your finger.
1
POWER button (POWER
8
)
(
Ô
page 12)
Press to switch the unit from on to standby mode or vice versa. In
standby mode, the unit is still consuming a small amount of power.
2
Disc tray (
Ô
page 18)
3
Connector for a digital video (DV) camcorder (
Ô
page 34)
4
Connectors for external equipment (
Ô
page 34)
5
Channel select (
Ô
page 18)
6
Open/close disc tray (
Ô
page 18)
7
Display (
Ô
below)
8
Stop (
Ô
page 18, 23)
9
Start play (
Ô
page 22)
bk
Remote control signal sensor
bl
Start recording (
Ô
page 18)/
Specify the time to stop recording (
Ô
page 19)
1
3
5
4
2
1
Disc indicator
• This indicator lights up when a disc that is supported by this
unit is inserted.
2
Scheduled recording indicator
3
Main display section
4
Playing indicator
5
Recording indicator
T
h
e re
m
o
te
c
ont
rol
inf
o
rma
tion/Dis
c han
d
ling
/Unit c
are/Cont
rol ref
ere
nce
g
u
ide


