background image

19

1. Press the SET/CANCEL button to cancel the timer setting.

The SET/CANCEL indicator light and the display will turn
off.

1. Pulse el botón SET/C ANCEL para cancelar el

funcionamiento del temporizador. Se apagará el indicador
SET/CANCEL.

2. To operate the air conditioner before reaching the set

timer:

Press the SET/CANCEL to cancel the timer.

Press the OFF/ON button to turn on the unit.

2. Para poner el aire acondicionado en funcionamiento antes

de la hora programada en el temporizador:

Pulse el botón SET/CANCEL para cancelar el
temporizador.

Pulse el botón OPERATION para poner en marcha el
aire acondicionado.

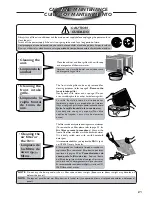
Cancel TIMER setting during ON TIMER
Cancelar el funcionamiento del TEMPORIZADOR con el  TEMPORIZADOR
ACTIVADO

Display

Pantalla de

visualización

Touch Control

Panel

Tablero de

instrumentos

Remote control

Telecontrol

SET

SET/

CANCEL

SET/

CANCEL

hr

°

F

Timer Details
Detalles del programador

The unit will turn on/off automatically according to your specified setting.
Timer duration can be set from a minimum of 1 hour to a maximum of 12 hours.

NOTE:

The last timer setting will be memorized and will appear on the display the next time you operate the unit with the
TIMER function.

La unidad se apaga automáticamente con los arreglos recuerdos.
La duración del programador puede estar arreglada desde un mínimo de 1 hora hasta un máximo de 12 horas.

NOTE:

El último arreglo del programador esta recuerdo y lucirá en la pantella de visualización la próxima vez que utiliza el
acondicionador con la función TIMER.

SET

SET/

CANCEL

SET/

CANCEL

OFF/ON

OPERATION

OPERATION

hr

°

F

Содержание CW-XC83YU

Страница 1: ...VICE 24 PRODUCT SPECIFICATIONS 26 CONTENTS Thank you for purchasing a Panasonic product This Panasonic RoomAir Conditioner has been designed for maximum energy efficiency and minimal noise while keepi...

Страница 2: ...con las leyes y regulaciones locales Do not install the unit in places where inflammablegas fumesorsootmaybegenerated No instale la unidad cerca de lugares donde puedan ser producidos gases inflamabl...

Страница 3: ...cionador de aire y quite el enchufe principal Do not remove the power plug by pulling the cord Do not use the unit for any other purpose than its intended use Do not block the air intake and outlet va...

Страница 4: ...LLOS SUMININSTRADOS Type A Type B Type C Tipo A Tipo B Tipo C Type Part no Remarks Qty Tipo Parte no Comentario Cantidad A CWH55207A Wood Screw 6 Tornillo para madera B CWH55330 Tapping Screw 4 Tornil...

Страница 5: ...7 16 PREPARATION OF AIR CONDITIONER CHASSIS PREPARACI N DEL CHASIS DEL ACONDICIONADOR DE AIRE 1Remove the front intake grille Quite la rejilla frontal de la toma de aire Push and release Presione y s...

Страница 6: ...the top and bottom brackets Inserte los paneles expansibles en los soportes de arriba abajo Attach a panel retainer on the first fold of each expansion panel and secure panel retainers to cabinet usin...

Страница 7: ...agua de condensaci n gotee dentro el caja debe ser instalada al nivel o con una muy ligera inclinaci n desde adentro hacia fuera 3Secure the cabinet using screws Fije la caja usando los tornillos Type...

Страница 8: ...O DE AIRE OFF ON OPERATION TEMP TIMER COOL FAN HIGH MED LOW MODE FAN SPEED SET TIMER SET CANCEL hr F ECONOMY Wireless Remote Control Clockwise En el sentido del reloj Attach the part no CZ SF6P to the...

Страница 9: ...frontal de la toma de aire es empujada hacia abajo Note The drain pan part no CWH40175 can be obtained from nearest servicenter Nota La bandeja de drenaje serie no CWH40175 puede ser obtanido en su se...

Страница 10: ...e the air upwards downwards or straight out b Horizontal Airflow Direction Adjustment Side to Side The horizontal airflow direction vane is controlled by positioning the vane to discharge the air to t...

Страница 11: ...to No caer ni tirar el telecontrol No poner el telecontrol donde esta expuesto a la luz del sol ni cerca de une fuente de calor OFF ON OPERATION TEMP TIMER COOL FAN HIGH MED LOW MODE FAN SPEED SET TIM...

Страница 12: ...or an electric shock Aseg rese de que el enchufe est adecuadamente insertado Un enchufe flojo puede causar un incendio o una descarga el ctrica PREPARATIONS BEFORE OPERATION PRERAPACI N ANTES DEL FUN...

Страница 13: ...60 F and 86 F 5 Press to increase temperature Press to decrease temperature 1 Empuja el bot n TEMP TIMER 5 o para seleccionar la temperatura de visualizaci n La temperatura puede estar arreglada desd...

Страница 14: ...strumentos Remote control Telecontrol ECONOMY ECONOMY ECONOMY Recommended for electricity cost saving When economy button is pressed target temperature is shifted up 1 F this will reduce operating tim...

Страница 15: ...acondicionado est en funcionamiento 1 Press theTIMER button The SET CANCEL indicator light will blink awaiting for setting 1 Empuja el bot n TIMER La luz del indicador SET CANCEL oscila significando...

Страница 16: ...10 segundos 1 Press the SET CANCEL button to cancel the timer setting The temperature reading and SET CANCEL indicator light will turn off simultaneously Temperature setting will be displayed again 1...

Страница 17: ...ijo en vez de parpadear 4 The display will show the remaining hour to the start of the operation if you set to turn on 3 hours from now the timer will show 2 at an hour later 4 La pantalla mostrar la...

Страница 18: ...l Tablero de instrumentos Remote control Telecontrol AIR CONDITIONER OPERATION OPERACI N DEL ACONDICIONADOR DE AIRE AIR CONDITIONER OPERATION OPERACI N DEL ACONDICIONADOR DE AIRE ChangeTEMPERATURE MOD...

Страница 19: ...ZADOR con el TEMPORIZADOR ACTIVADO Display Pantalla de visualizaci n Touch Control Panel Tablero de instrumentos Remote control Telecontrol SET SET CANCEL SET CANCEL hr F Timer Details Detalles del pr...

Страница 20: ...t Ensure that curtains and drapes are always closed to keep out direct sunlight during cooling operation Avoid heat Evite la luz solar directa y el calor Aseg rese que cortinas est n siempre cerradas...

Страница 21: ...ede ser f cilmente limpiado usando una aspiradora Para remover el filtro de aire por favor rem tase a la p gina 22 en Procedimientos de c mo quite la filtro de aire Aspire el frente del filtro y luego...

Страница 22: ...da para operar el acondicionador de aire Desperdiciado AIR FILTER REMOVAL PROCEDURES In order to clean the air filter just lift up the front intake grille until it is supported by the stopper Tilt up...

Страница 23: ...nfriamiento RECOMMENDED INSPECTION INSPECCI N DE RECOMENDADO Pre season Inspection Inspecci n pre estaci n COOL MODE OFF ON OPERATION TEMP TIMER SET TIMER hr C JET MODE FAN SPEED AIR SWING SET CANCEL...

Страница 24: ...ot cool properly Si la unidad no enfr a correctamente If water drips from the rear of the unit Si agua gotea detr s de la unidad POSSIBLE CAUSES OFTHE ABOVE PROBLEMS POSIBLES CAUSAS DE LOS PROBLEMAS A...

Страница 25: ...rt no CWH40175 obtained from your nearest servicenter La humedad es alta El agua condensada se est desbordando Para solucionar el problema monte un bandeja de drenaje opcional a la unidad serie no CWH...

Страница 26: ...e Monof sico LA ELECTRICIDAD Frequency Hz 60 Frecuencia 60 Voltage V 115 Voltaje 115 Current Amps 6 6 Corriente 6 6 Input W 730 Potencia 730 EER Btu W h 10 7 EER 10 7 MOISTURE REMOVAL Pints h 1 9 DESH...

Страница 27: ...ilures which are caused by products not supplied by the warrantor or failures which result from accident misuse abuse neglect mishandling misapplication faulty installation maladjustment of customer c...

Отзывы: