Operating Instructions
21
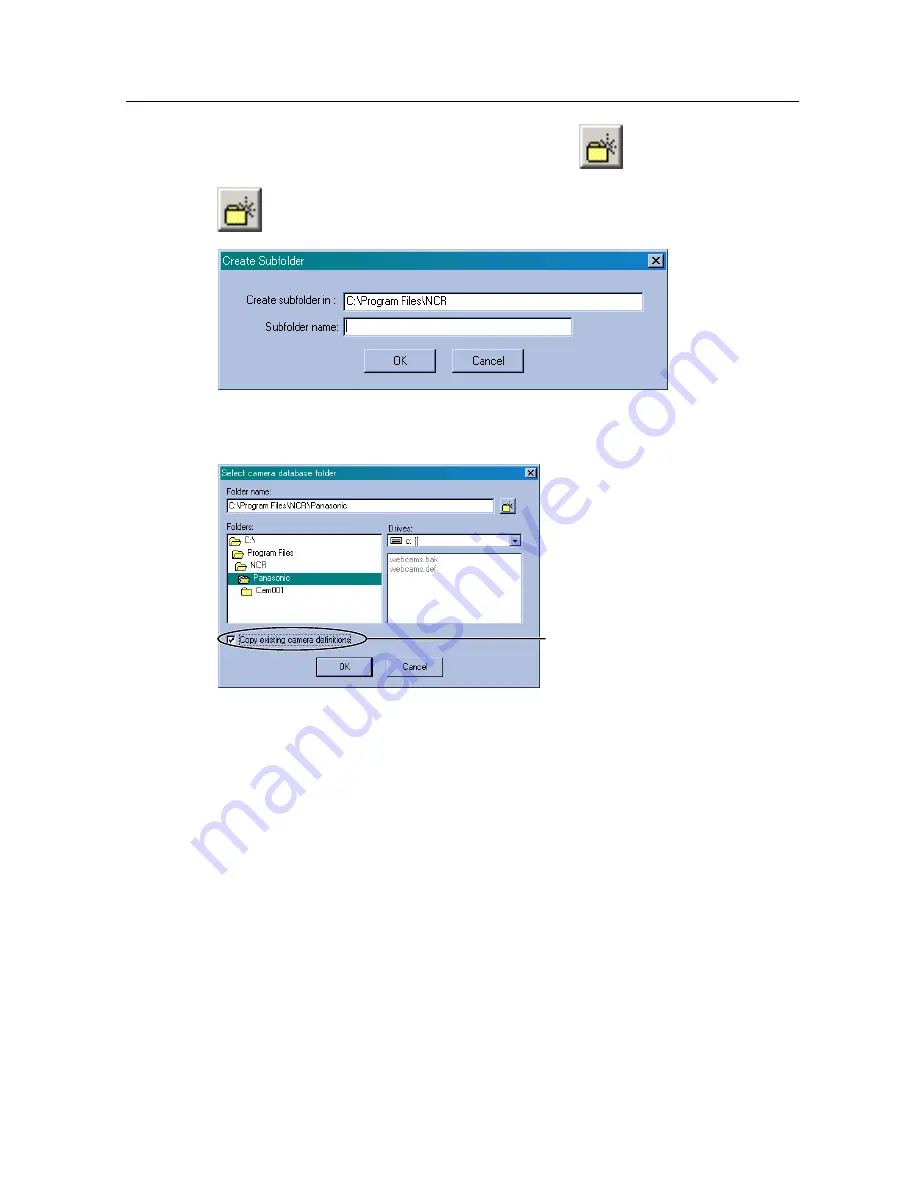
2.
Select your destination drive and folder and click
.
•
button creates a subfolder under the selected folder.
3.
Enter a new subfolder name and click
[OK]
.
•
A subfolder will be created under the selected folder.
4.
Click
[OK]
.
Notes
•
When you monitor Network Camera or play back recorded images that is
specified to the different folder, specify the same folder by selecting
[Select Camera Database]
.
•
When having created a folder without checking
[Copy existing camera
definitions]
, Network Camera must be registered newly. Refer to page 33
and page 34 to configure a Network Camera.
Once you configured Network
Camera, check box appears.
Checking it holds all the camera
definitions (Camera Name, IP
address, Camera Type and etc.)
to the newly created folder.
Содержание BB-HNP60
Страница 8: ...Operating Instructions 8 Section 1 Product Introduction ...
Страница 23: ...Operating Instructions 23 Section 2 Network Camera Recorder Screen ...
Страница 63: ...Operating Instructions 63 Section 3 Practical Operation ...
Страница 76: ...Operating Instructions 76 Section 4 Default Setting and Troubleshooting ...
Страница 84: ...Operating Instructions 84 Index ...


