background image

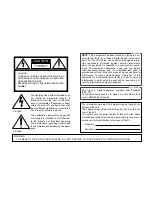
This Class A digital apparatus complies with Canadian
ICES-003.
Cet appareil numérique de la classe A est conforme à la
norme NMB-003 du Canada.

WARNING:

TO PREVENT FIRE OR SHOCK HAZARD, DO NOT EXPOSE THIS APPLIANCE TO RAIN OR MOISTURE.

The lightning flash with arrowhead sym-
bol, within an equilateral triangle, is
intended to alert the user to the pres-
ence of uninsulated "dangerous voltage"
within the product's enclosure that may
be of sufficient magnitude to constitute a
risk of electric shock to persons.

The exclamation point within an equilat-
eral triangle is intended to alert the user
to the presence of important operating
and maintenance (servicing) instructions
in the literature accompanying the appli-
ance.

The information marking of this product may be found on the
bottom of the unit.
The serial number of this product may be found on the bot-
tom of the unit.
You should note the serial number of this unit in the space
provided and retain this book as a permanent record of your
purchase to aid identification in the event of theft.

Model No.

Serial No.

CAUTION:
TO REDUCE THE RISK OF ELECTRIC SHOCK, DO
NOT REMOVE COVER (OR BACK). NO USER SER-
VICEABLE PARTS INSIDE.
REFER SERVICING TO QUALIFIED SERVICE PER-
SONNEL.

CAUTION

RISK OF ELECTRIC SHOCK

DO NOT OPEN

SA 1965

SA 1966

For CANADA

NOTE: This equipment has been tested and found to com-
ply with the limits for a Class A digital device, pursuant to
part 15 of the FCC Rules. These limits are designed to pro-
vide reasonable protection against harmful interference
when the equipment is operated in a commercial environ-
ment. This equipment generates, uses, and can radiate
radio frequency energy and, if not installed and used in
accordance with the instruction manual, may cause harmful
interference to radio communications. Operation of this
equipment in a residential area is likely to cause harmful
interference in which case the user will be required to cor-
rect the interference at his own expense.

For U.S.A

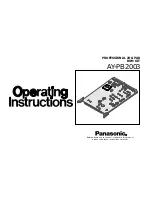
Содержание AY-PB2003

Страница 1: ...U C 1 A O 1 4 A PROFESSIONAL JOG PAD ROM KIT AY PB2003 Before attempting to connect or operate this product please read these instructions carefully ...

Страница 2: ...note the serial number of this unit in the space provided and retain this book as a permanent record of your purchase to aid identification in the event of theft Model No Serial No CAUTION TO REDUCE THE RISK OF ELECTRIC SHOCK DO NOT REMOVE COVER OR BACK NO USER SER VICEABLE PARTS INSIDE REFER SERVICING TO QUALIFIED SERVICE PER SONNEL CAUTION RISK OF ELECTRIC SHOCK DO NOT OPEN SA 1965 SA 1966 For C...

Страница 3: ... JP2000 it is not necessary to replace the ROM Important Before replacing the ROM be sure to press the power switch off and pull out the power plug from the electrical outlet Before handling the board touch a metal part of it with your hand to discharge static from your body Touching the board while you still have static in your body may cause the board to fail It would be safer to wear an antista...

Страница 4: ...ARD REMOVAL q Quit system operation switch power off and pull out the power plug from the electrical outlet Be sure to read the Installation Manual for the Main Kit WJ MX1000 and WJ MX1200 series for how to quit system operation w Push down the hook button on the right and left sides of the main unit and remove the front panel e Loosen the screws and remove the protective cover Be careful not to l...

Страница 5: ...er as shown in Figure 2 Never forcibly pull the remover upwards The ROM can be removed by lifting it out of the socket Mark the removed ROM with red ink for example so it will not be mistaken for a new ROM Replacing the ROM t With the shielding plate down place the removed input board on an antistatic mat or the like and remove the ROM from the input board Caution Insert the hooks at the ends of t...

Страница 6: ...sition Push the tabs to fasten the board Be sure to push the tabs all the way i Fasten the protective cover with the screws o Push down the hook buttons on the right and left sides of the main unit 0 Hold the front panel where it should be then mount it back The hook buttons come up to fasten the front panel 1 Make sure that the front panel is securely fastened 2 Insert the power plug back into th...

Страница 7: ...Accessories Remover 1 Warranty 1 7 ...

Страница 8: ...Parkway Ste 1 160 Suwanee GA 30024 770 338 6845 Central Region 1707 N Randall Road E1 C 1 Elgin IL 60123 847 468 5200 WESTERN ZONE 3330 Cahuenga Blvd W Los Angeles CA 90068 323 436 3500 Dallas Region 6226 Abington Way Houston TX 77008 713 802 2726 Government Marketing Department 52 West Gude Drive Rockville MD 20850 301 738 3840 PANASONIC CANADA INC 5770 Ambler Drive Mississauga Ontario L4W 2T3 90...

Отзывы: