background image

4

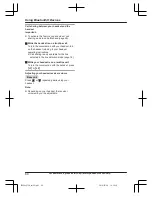
Proceed with the operation for your unit.

Handset:


M

OFF

N

Base unit:


M

EXIT

N

Note:

R

After you copy the entries, confirm that the
numbers were transferred correctly.

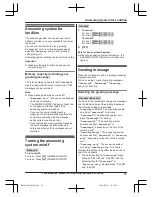
Text message (SMS) alert

This feature sets the handset and base unit to
notify the arrival of a new text message on a
cellular phone that is paired with the base unit.
This notification is displayed momentarily on both
the handset and the base unit, and announced.
The announcement is in English only.
The default setting is 

Off

.

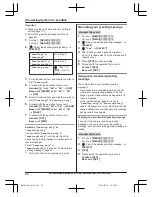
Important:

R

To use the text message alert feature, you need
to pair your cellular phone to the base unit
(page 19), then turn it on.

R

Your cellular phone must support Message
Access Profile (MAP) specification. We
recommend that you confirm if your cellular
phone supports MAP in advance.

R

For more details and the list of compatible
cellular phones, please visit our Web site:
http://www.panasonic.com/link2cell

R

Text message alerts can be made by CELL 1,
CELL 2, and CELL 3.

For those whose devices do not support the
Message Access Profile (MAP):

By installing the app “Text Message Alert”, you
can use the text message alert feature. Please
visit our Web site:
http://www.panasonic.net/pcc/support/tel/sms/

R

Refer to your cellular phone operating
instructions for information on how to install
applications.

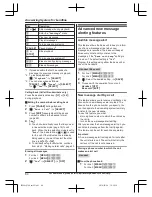
Setting text message (SMS) alert

Program this setting using either the base unit or
one of the handsets.

Your cellular phone

To use this text message alert feature, you may
need to turn on the notification of Bluetooth setting
on your cellular phone.

Handset / Base unit

1

For CELL 1: 

M

MENU

N#6101

For CELL 2: 

M

MENU

N#6102

For CELL 3: 

M

MENU

N#6103

2

MbN

: Select the desired setting.

3

M

SAVE

N

4

Proceed with the operation for your unit.

Handset:


M

OFF

N

Base unit:


M

EXIT

N

Note:

R

If the text message alert feature does not work,
you must turn on notifications in the Bluetooth
settings of your cellular phone. Then, unplug the
base unit’s AC adaptor and reconnect it to
activate the text message alert feature. For
instructions on how to do this, visit our Web site:
http://www.panasonic.net/pcc/support/tel/sms/

R

The unit cannot display or announce that a text
message has been received during a call.

R

This feature may not pronounce all names
correctly.

R

Text message alerts are not logged in the caller
list of your unit.

Using a Bluetooth wireless
headset (optional) for
landline calls

By pairing a Bluetooth headset to the base unit,
you can have a hands-free conversation wirelessly
for landline calls.

Important:

R

Your Bluetooth wireless headset must support
the HeadSet Profile (HSP) specification.

R

1 headset can be paired to the base unit.
However, only one Bluetooth device (cellular
phone or headset) can be connected to the
base unit at a time.

R

For best performance, we recommend using a
Bluetooth headset within 1 m (3.3 feet) of the
base unit. A headset can communicate with the
base unit within a range of approximately 10 m
(33 feet).

58

For assistance, please visit http://www.panasonic.com/help

Using Bluetooth® Devices

TG958x_0704_ver031.pdf   58

2014/07/04   10:32:28

Содержание 2LINE KX-TG9581 Series

Страница 1: ...u for purchasing a Panasonic product Please read these operating instructions before using the unit and save them for future reference Consulte Guía Rápida Española página 82 For assistance visit our Web site http www panasonic com help for customers in the U S A or Puerto Rico Please register your product http www panasonic com prodreg TG958x_0704_ver031 pdf 1 2014 07 04 10 32 24 ...

Страница 2: ...dial from Outlook 35 Answering calls from Outlook 36 Telephone Plug in toolbar settings 36 Phonebook Phonebook 37 Speed dial 40 One touch dial buttons 41 Programming Menu list 43 Alarm 50 Silent mode 50 Call block 51 Other programming 52 Registering a unit 52 Caller ID Service Using Caller ID service 54 Caller list 54 Using Bluetooth Devices Copying phonebook from a cellular phone phonebook transf...

Страница 3: ...Corded handset PNLXP1005Y 1 1 F Corded handset cord PQJA212V 1 1 G Rechargeable batteries 4 4 6 H Handset cover 5 PNYNTGA680BR 1 2 I Belt clip PNKE1268Z1 1 2 J Charger PNLC1040ZB 1 2 K mini USB cable PQJA10166Z 1 1 L CD ROM PNJX1051Z 1 1 1 PQJA10088Y Black cord PQJA10088Z Transparent cord 2 PQJA10075Y Black cord PQJA10075Z Transparent cord 3 The desk stand wall mounting adaptor comes attached to t...

Страница 4: ...Extender 3 By registering the key detector 4 max to a Panasonic Digital Cordless Phone and attaching it to an easy to lose item in advance you can locate and find the mislaid item to which the key detector is attached Please visit our Web site http panasonic net pcc products telephone p tga20 Other information R Design and specifications are subject to change without notice R The illustrations in ...

Страница 5: ...e the property of their respective owners System capabilities The unit can accommodate up to 2 external telephone lines and the following operations are available at the same time How many units can be in use at one time n A maximum of 4 parties are available Line 1 Outside call including 1 extension and 1 outside party Line 2 Outside call including 1 extension and 1 outside party e g Outside call...

Страница 6: ...ing number may decrease depending on the state of usage for example when the answering system is taking a call 6 For assistance please visit http www panasonic com help Introduction TG958x_0704_ver031 pdf 6 2014 07 04 10 32 24 ...

Страница 7: ...s pacemakers or hearing aids to determine if they are adequately shielded from external RF radio frequency energy The product operates in the frequency range of 1 92 GHz to 1 93 GHz and the RF transmission power is 115 mW max R Do not use the product in health care facilities if any regulations posted in the area instruct you not to do so Hospitals or health care facilities may be using equipment ...

Страница 8: ...age and voice quality depends on the local environmental conditions R If the reception for a base unit location is not satisfactory move the base unit to another location for better reception Environment R Keep the product away from electrical noise generating devices such as fluorescent lamps and motors R The product should be kept free from excessive smoke dust high temperature and vibration R T...

Страница 9: ...ooth R RF transmission power 115 mW max R Power source 120 V AC 60 Hz R Power consumption Base unit Standby Approx 1 1 W Maximum Approx 3 5 W Charger Standby Approx 0 1 W Maximum Approx 1 8 W R Operating conditions 0 C 40 C 32 F 104 F 20 80 relative air humidity dry For assistance please visit http www panasonic com help 9 Important Information TG958x_0704_ver031 pdf 9 2014 07 04 10 32 24 ...

Страница 10: ... to set up the unit n Charger Connect the AC adaptor to the power outlet 1 Connecting the telephone line cord Refer to one of the following methods depending on your situation To connect to a 2 line telephone jack page 10 To connect to 2 single line telephone jacks page 11 If you use the unit as a single line telephone only page 11 Connect the telephone line cord until it clicks into the base unit...

Страница 11: ...1 If you subscribe to a DSL ADSL service Please attach a DSL ADSL filter contact your DSL ADSL provider to the telephone line between the base unit and the telephone line jack in the event of the following noise is heard during conversations Caller ID features do not function properly To connect to a 2 line telephone jack For this connection please purchase a Panasonic 2 line splitter page 4 Examp...

Страница 12: ...H batteries AAA R03 size 1 R Do NOT use Alkaline Manganese Ni Cd batteries R Confirm correct polarities 1 R Follow the directions on the display to set up the unit Handset battery charging Charge for about 7 hours R Confirm Charging is displayed 1 R When the batteries are fully charged Fully charged is displayed 1 Handset battery level Icon Battery level High Medium Low Needs charging Empty Panaso...

Страница 13: ...is on Battery power is low 1 1 If is flashing on the base unit replace the batteries with new ones Alkaline as soon as possible for temporary use When using Alkaline batteries dispose old ones When using Ni MH rechargeable batteries you may replace the used batteries into the base unit to charge them after a power failure is recovered Panasonic Ni MH battery performance supplied batteries during p...

Страница 14: ...ssion power when the handset is close to the base unit R When this feature is activated is displayed However during a call is not displayed even though this feature is activated R Eco mode is turned off when the clarity booster is activated page 25 Controls Handset A A B D C H I J G K B E F L M N O P A Belt clip hole Speaker Headset jack Dial keypad TONE MZN SP PHONE Speakerphone Microphone Receiv...

Страница 15: ...ator MSPEED DIALN MFLASHN MCALL WAITN MHOLDN MLOCATORN MINTERCOMN R You can locate a misplaced handset by pressing MLOCATORN Dial keypad TONE MEXITN MERASEN MREDIALN MPAUSEN MZN SP PHONE Speakerphone SP PHONE indicator Corded headset indicator ML1N Line 1 ANSWER ON OFF L1 ANSWER ON OFF indicator ML2N Line 2 ANSWER ON OFF L2 ANSWER ON OFF indicator M N PLAY1 Stop Message indicator M N PLAY2 Stop Me...

Страница 16: ... Corresponding landline number s is are indicated next to the item 2 During a call the item is not displayed even though the feature is activated 3 Corresponding cellular line s is are indicated next to the item 4 Corresponding lines 1 2 landline C cellular line are indicated next to the item If all lines are turned off no line is indicated Base unit display items Item Meaning Silent mode is on pa...

Страница 17: ...w the status of each line respectively as follows Status Meaning Light off The line is available Light on The line is in use Flashing rapidly A call is being received Status Meaning Flashing A call is put on hold or the answering system is answering a call Language settings Display language You can select either English or Español as the display language The default setting is English Handset Base...

Страница 18: ...Program this setting using either the base unit or one of the handsets Handset Base unit 1 MMENUN 120 2 MbN Select the desired setting a MSAVEN 3 Proceed with the operation for your unit Handset MOFFN Base unit MEXITN Line selection mode for landline The line selection mode determines which line is selected when you lift the corded handset you press M N MZN on the handset when making answering cal...

Страница 19: ...ELL 2 MMENUN 6242 For CELL 3 MMENUN 6243 For CELL 4 MMENUN 6244 R After the corresponding CELL indicator on the base unit starts flashing the rest of the procedure must be completed within 5 minutes 2 Your cellular phone While the corresponding CELL indicator is flashing follow the instructions of your cellular phone to enter the pairing mode R Depending on your cellular phone it may ask you to en...

Страница 20: ... is announced even if the Talking Caller ID is turned off On without Talking CID The handset and base unit use your cellular phone s ringer tone Caller information is not announced even if the Talking Caller ID is turned on Program this setting using either the base unit or one of the handsets Important R To use this feature your cellular phone must support Bluetooth in band ringtone Refer to your...

Страница 21: ... it will automatically be connected to the base unit in 30 minutes If you do not use the link to cell feature anymore unpair the cellular phone page 20 R A disconnected cellular phone is not unpaired from the base unit so pairing it to the base unit again is unnecessary Handset Base unit 1 To connect disconnect For CELL 1 MMENUN 6251 For CELL 2 MMENUN 6252 For CELL 3 MMENUN 6253 For CELL 4 MMENUN ...

Страница 22: ...ts Important R Please make note of your new PIN The unit does not reveal the PIN to you If you forget your PIN see page 78 Handset Base unit 1 MMENUN 619 R If the unit prompts you to enter the old PIN when the default has been changed enter the current 4 digit PIN 2 Enter the new 4 digit PIN a MOKN 3 Enter the new 4 digit PIN again a MSAVEN 4 Proceed with the operation for your unit Handset MOFFN ...

Страница 23: ...MSELECTN 4 MOFFN Making landline calls 1 Lift the handset and dial the phone number R To correct a digit press MCLEARN 2 M N R An available line is automatically selected To change the line selection mode see page 18 R You can also select the line manually by pressing ML1N or ML2N 3 When you finish talking press MOFFN or place the handset on the charger Note R The LINE 1 indicator or LINE 2 indica...

Страница 24: ...t user can take the call by press the corresponding landline key MLINE 1N or MLINE 2N a Lift the corded handset Note R After holding for 10 minutes the call is disconnected Mute 1 Press MMUTEN during a call 2 To return to the call press MMUTEN Note R MMUTEN is a soft key visible on the display during a call Flash for landline calls MFLASHN allows you to use the special features of your host PBX su...

Страница 25: ...ation when only 1 cellular phone is paired a specific line is set to make cellular calls page 21 2 MbN Select the corresponding cellular phone a MSELECTN n While another unit is on a landline call To join the conversation press ML1N or ML2N to select the line that is being used by another extension for an outside call Note R A maximum of 3 parties including 1 outside party can join a conversation ...

Страница 26: ...if your cellular phone has a top cover open it beforehand R You can also transferring a cellular call as follows Press and hold MCELLN Transferring a cellular call from a cellular phone to the handset During a conversation using a cellular phone the call cannot be transferred to the handset by the cellular phone Perform the following with the handset 1 During a conversation using a cellular phone ...

Страница 27: ...lect the desired phone number a MERASEN 3 MbN Yes a MSELECTN 4 MEXITN Making landline calls 1 Dial the phone number R To correct a digit press MCLEARN 2 Lift the corded handset R An available line is automatically selected and either the LINE 1 indicator or LINE 2 indicator lights up To change the line selection mode see page 18 R You can also select the line manually by pressing MLINE 1N or MLINE...

Страница 28: ...nceling music see page 48 2 To release hold on the cellular line Press the corresponding cellular line key MCELL 1N to MCELL 4N R A handset user can take the call MCELLN 1 a MbN Select the corresponding cellular phone a MSELECTN 1 The call is taken when only 1 cellular phone is paired a specific line is set to make cellular calls page 21 To release hold on the landline Press the corresponding land...

Страница 29: ...calls 3 people can establish a conference call Conference call with 2 outside calls While you are talking with an outside caller you can make or answer a 2nd call on the other line and then combine the calls to establish a conference call 1 During an outside call press MHOLDN 2 To make a 2nd call Press MLINE 1N or MLINE 2N then dial the phone number To answer a 2nd call Press MLINE 1N or MLINE 2N ...

Страница 30: ...and the 2nd caller s information is displayed if you subscribe to Caller ID service page 54 Answering a 2nd call during a landline call Example If you are using line 1 1 Press MHOLDN during a landline call 2 To answer the 2nd call Press the line button MLINE 2N or MCELL 1N to MCELL 4N which the 2nd call is being received 3 To hang up the 2nd call and return to the 1st call landline call press the ...

Страница 31: ...ish talking press MOFFN 1 If there is a new message in the answering system MINTN is not displayed Base unit 1 Press MINTERCOMN When 2 or more handsets are registered MbN Select the desired unit a MSELECTN R To page all handsets press 0 or wait for a few seconds R Lift the corded handset if needed 2 When you finish talking press MINTERCOMN or place the corded handset on the cradle Answering an int...

Страница 32: ... subject to change without notice Installing the Telephone Plug in Before installing Telephone Plug in make sure of the following Microsoft Office Outlook is installed on your computer The base unit is not connected to your computer with the mini USB cable until instructed to do so 1 Start Windows and exit all other applications R You must be logged in as an administrator in order to install Telep...

Страница 33: ...by entering a phone number in the toolbar Note R Make sure that the corded handset is placed on the cradle of base unit before making calls from Outlook When the base unit is in use you cannot use the feature of Call from Outlook Telephone Plug in Making a call from the Microsoft Outlook contact list n Microsoft Office Outlook 2013 users 1 3 3 2 n Microsoft Office Outlook 2007 2010 2013 users 1 2 ...

Страница 34: ...ired the device name is displayed 2 Click Caller listC A 3 Click the phone number you want to call B Making a call from the redial list When you are using functions other than the contact list you can make a call from the redial list Confirm Dial number is displayed in the toolbar The last 20 phone numbers dialed are stored in the redial list each 24 digits max Microsoft Office Outlook 2010 2013 u...

Страница 35: ...ish a call press M N on the base unit or Using a landline Click Disconnect line1 or Disconnect line2 in the toolbar Using a cellular line Click Disconnect cellC in the toolbar and click the desired cellular line list Cell1 1 to Cell4 1 1 After the Bluetooth device is paired the device name is displayed Speed dial from Outlook You can add 10 names 32 characters max and phone numbers 24 digits max t...

Страница 36: ...aired the device name is displayed Simple window Click Answer After an answer key is clicked the base unit automatically turns on the speakerphone and answers via the speakerphone R When you receive a call from the phone number stored in the call block list Telephone Plug in does not display a pop up window R If the caller s phone number does not match a contact in the Microsoft Office Outlook con...

Страница 37: ...roceed with the operation for your unit Handset MEN REDIAL Base unit MREDIALN 2 MbN Select the desired phone number a MSAVEN 3 To store the name continue from step 3 Editing entries page 39 Storing caller information to the phonebook Handset 1 MCN CID 2 MbN Select the desired entry R To edit the number MMENUN a MbN Edit a MSELECTN Press MEDITN repeatedly until the phone number is shown in the desi...

Страница 38: ...e desired ringer tone a MSAVEN 5 MOFFN Finding and calling from a phonebook entry Once you have found the desired entry using one of the following 4 methods make a call with your unit n Using a cellular line Handset 1 MCELLN R The unit starts dialing when only 1 cellular phone is paired a specific line is set to make cellular calls page 21 2 MbN Select the desired cellular phone a MSELECTN Base un...

Страница 39: ...es 6 MEXITN Erasing entries Erasing an entry Handset 1 Find the desired entry page 38 2 MMENUN a MbN Erase a MSELECTN 3 MbN Yes a MSELECTN 4 MOFFN Base unit 1 Find the desired entry page 38 2 MERASEN a MbN Yes a MSELECTN 3 MEXITN Erasing all entries in a group Handset Base unit 1 Proceed with the operation for your unit Handset MFN a MMENUN Base unit M N a MMENUN 2 MbN Erase all a MSELECTN 3 MbN S...

Страница 40: ...ing phone numbers 1 MSPEED DIALN 2 MbN Select the desired speed dial key a MEDITN 3 Enter the party s name 16 characters max a MOKN 4 Enter the party s phone number 24 digits max a MOKN 5 MSELECTN a MEXITN n From the phonebook 1 MSPEED DIALN 2 MbN Select the desired speed dial key a M N 3 MbN Select the desired entry 4 MSAVEN a MEXITN Note for handset and base unit R If you edit a phonebook entry ...

Страница 41: ...You can transfer a call to a handset While you are on an outside call press the one touch dial button with an extension number stored The line is put on hold and the base unit pages the handset After the handset answers the page press MZN or place the corded handset on the cradle to complete the transfer Adding phone numbers for outside calls Base unit n By entering phone numbers 1 Press and hold ...

Страница 42: ... on R An available line is automatically selected To change the line selection mode see page 18 R You can also use the corded handset by lifting it up To make a call by selecting the specified line Base unit 1 Press the desired line button MLINE 1N MLINE 2N or MCELL 1N to MCELL 4N 2 Press the desired one touch dial button 1 to 10 Index card Use the index card to record the names phone numbers or h...

Страница 43: ... and base unit can program the item R To exit the operation press MOFFN on the handset or MEXITN on the base unit R In the following table indicates the default settings R In the following table indicates the reference page number R Display menu order and sub menu may vary depending on your model Display menu tree and direct command code table Main menu Phonebook Operation Code Unit Viewing the ph...

Страница 44: ... Greeting only 3041 1 62 3042 2 New message alert 3 By calling On Off On Off 3381 1 64 3382 2 By calling Alert to 3381 1 3382 2 By calling Remote code Activate Inactivate 3381 1 3382 2 Base unit beep On Off 3391 1 64 3392 2 Settings Ring count 3 2 7 rings 4 rings Toll saver 2111 1 67 2112 2 Recording time 3 1 min 3 min 3051 1 68 3052 2 Remote code 3 111 3061 1 66 3062 2 Screen call On Off 3101 1 6...

Страница 45: ... 6 6 Base unit Off 6 1 6281 5 24 28 6282 6 6283 7 6284 8 Ringer tone 9 Tone 4 6291 5 6292 6 6293 7 6294 8 Select unit to ring 3 Handset 1 12 All 6271 5 20 6272 6 6273 7 6274 8 Ring as cell limited 3 On with Talking CID On without Talking CID Off 6141 5 20 6142 6 6143 7 6144 8 Text message alert 3 On Off 6101 5 58 6102 6 6103 7 Pair 6241 5 19 6242 6 6243 7 6244 8 Unpair 6111 5 19 6112 6 6113 7 6114...

Страница 46: ...b menu 2 Settings Code Unit Date and time 3 101 17 Alarm Once Daily Off 720 50 Time adjustment 3 10 Caller ID auto Manual 226 Main menu Initial setting Sub menu 1 Sub menu 2 Settings Code Unit Ringer setting Ringer volume Line1 Line2 Handset Off 6 6 Base unit Off 6 1 160 24 28 Ringer tone 9 11 Line1 Line2 Tone 1 1 Tone 2 2 161 Interrupt tone 12 On Off 201 26 30 Silent mode On Off On Off 238 50 Sil...

Страница 47: ... for Detector3 4 Add new device for Detector4 Change name 3 Detector1 6561 Detector2 15 6562 15 Detector3 15 6563 15 Detector4 15 6564 15 Registration 6571 6572 15 6573 15 6574 15 Deregistration 6581 6582 15 6583 15 6584 15 Call block 3 217 51 First ring On Off 173 52 Block w o num 16 17 Block calls without phone number On Off 240 51 One touch dial 247 41 Speed dial 261 40 VM tone detect 3 VM Voic...

Страница 48: ...f 200 24 Line select for landline Auto Line1 Line2 250 18 Set tel line 3 Set dial mode Pulse Tone 120 18 Set flash time 20 Line1 Line2 900 ms 700 ms 600 ms 400 ms 300 ms 250 ms 200 ms 160 ms 110 ms 100 ms 90 ms 80 ms 121 24 Set line mode 21 Line1 Line2 A B 122 Call sharing 3 On Off 194 25 29 Registration Register handset 130 52 Deregistration 17 131 53 Deregistration 17 131 53 48 For assistance pl...

Страница 49: ...f you select a melody you cannot distinguish lines by their ringers 12 This tone lets you know when you receive an outside call while you are on another line or an intercom call If you select On the tone sounds 2 times 13 This setting is available when you have the key detector KX TGA20 Read the installation guide for more information on the key detector 14 For models with supplied key detectors t...

Страница 50: ...ode Silent mode Silent mode allows you to select a period of time during which the handset and or base unit will not ring for outside calls This feature is useful for time periods when you do not want to be disturbed for example while sleeping Silent mode can be set for each unit Important R Make sure the unit s date and time setting is correct page 17 R If you have set the alarm the alarm sounds ...

Страница 51: ...ry to be blocked R To edit the number MMENUN a MbN Edit a MSELECTN Press MEDITN repeatedly until the phone number is shown in the 10 digit format And then press MSAVEN Go to step 5 3 MMENUN 4 MbN Save CID a MSELECTN 5 MbN Call block a MSELECTN 6 MbN Yes a MSELECTN 7 Edit the phone number if necessary 24 digits max 8 MSAVEN a MOFFN Base unit 1 MCIDN 2 MbN Select the entry to be blocked R To edit th...

Страница 52: ... Handset or MEXITN Base unit 1 Handset 2 Base unit Other programming Changing the handset name Each handset can be given a customized name Bob Kitchen etc This is useful when you make intercom calls between handsets You can also select whether or not the handset name is displayed in standby mode The default setting is No If you select Yes without entering any handset name Handset 1 to Handset 12 i...

Страница 53: ...andset to end its wireless connection with the system Handset Base unit 1 MMENUN 131 R All handsets registered to the base unit are displayed 2 MbN Select the handset you want to cancel a MSELECTN 3 MbN Yes a MSELECTN 4 Proceed with the operation for your unit Handset MOFFN Base unit MEXITN For assistance please visit http www panasonic com help 53 Programming TG958x_0704_ver031 pdf 53 2014 07 04 ...

Страница 54: ... the phonebook is displayed and logged in the caller list Talking Caller ID Handset Base unit This feature lets you know who is calling without looking at the display To use this feature you must subscribe to a Caller ID service of your service provider telephone company turn this feature on page 47 When caller information is received the handsets and or base unit announce the caller s name or pho...

Страница 55: ...ENUN a MbN Edit a MSELECTN 4 Press MEDITN repeatedly until the phone number is shown in the desired format 5 Using a cellular line To make a cellular call continue from step 3 Viewing the caller list and calling back page 54 Using a landline Press M N Base unit 1 MCIDN 2 MbN Select the desired entry 3 Press MEDITN repeatedly until the phone number is shown in the desired format 4 Using a cellular ...

Страница 56: ...numbers from the 4 most recently edited area codes are automatically edited Erasing selected caller information Handset Base unit 1 Proceed with the operation for your unit Handset MCN CID Base unit MCIDN 2 MbN Select the desired entry 3 MERASEN a MbN Yes a MSELECTN 4 Proceed with the operation for your unit Handset MOFFN Base unit MEXITN Erasing all caller information Handset Base unit 1 Proceed ...

Страница 57: ...ion on the cellular phone even if you select Auto 4 Cellular phone Follow the instructions of your cellular phone to copy phonebook entries R For other cellular phones not paired you need to search for and select the base unit The Bluetooth PIN default 0000 may be required If your cellular phone shows PassKey confirmation on its display follow the directions to proceed R The entries being copied a...

Страница 58: ...his text message alert feature you may need to turn on the notification of Bluetooth setting on your cellular phone Handset Base unit 1 For CELL 1 MMENUN 6101 For CELL 2 MMENUN 6102 For CELL 3 MMENUN 6103 2 MbN Select the desired setting 3 MSAVEN 4 Proceed with the operation for your unit Handset MOFFN Base unit MEXITN Note R If the text message alert feature does not work you must turn on notific...

Страница 59: ...ress MHEADSETN To disconnect Press and hold MHEADSETN until a long beep sounds Unpairing a headset You can cancel a pairing of the headset that is stored to the base unit Handset Base unit 1 MMENUN 612 2 MbN Yes a MSELECTN R When the headset is unpaired the HEADSET indicator on the base unit is turned off 3 Proceed with the operation for your unit Handset MOFFN Base unit MEXITN Operating a Bluetoo...

Страница 60: ... R Call sharing is only available for the line selected in the line selection mode page 18 n While your headset is on a landline call To join the conversation with the handset press ML1N or ML2N Adjusting your headset receiver volume Base unit Press MDN or MCN repeatedly while using your headset Note R Depending on your headset the receiver volume may not be adjustable 60 For assistance please vis...

Страница 61: ...For line 1 MMENUN 3271 For line 2 MMENUN 3272 To turn off For line 1 MMENUN 3281 For line 2 MMENUN 3282 2 MOFFN Note for base unit and handset R When the answering system is turned on the ANSWER ON OFF indicator on the base unit lights up Greeting message When the unit answers a call a greeting message is played to callers You can use the 3 types of greeting messages Greeting1 Greeting2 Greeting o...

Страница 62: ...your greeting message Handset Base unit 1 For line 1 MMENUN 3021 For line 2 MMENUN 3022 2 MbN Select the desired greeting message a MSELECTN 3 MbN Yes a MSELECTN 4 After a beep sounds speak clearly about 20 cm 8 inches away from the microphone 2 minutes max 5 Press MSTOPN to stop recording 6 Proceed with the operation for your unit Handset MOFFN Base unit MEXITN Using a pre recorded greeting messa...

Страница 63: ...ode page 18 to call back When the line selection mode is set to Auto the indicated line or is used for the call If the indicated line is already being used or you want to select the other line press MLINE 1N or MLINE 2N then lift the corded handset R To call back using a cellular line continue from step 2 Making cellular calls page 27 Erasing all messages for the desired line 1 MERASEN 2 MbN Selec...

Страница 64: ...ting features Audible message alert This feature allows the base unit to beep to inform you of a new message arrival when new messages are recorded The base unit beeps 2 times every minute until you listen to the messages if the Base unit beep setting is turned on The default setting is Off Program this setting using either the base unit or one of the handsets Handset Base unit 1 For line 1 MMENUN...

Страница 65: ...e name if necessary 16 characters max a MOKN 5 Edit the phone number if necessary 24 digits max a MOKN a MSELECTN a MOFFN Base unit 1 For line 1 MMENUN 3381 For line 2 MMENUN 3382 2 MbN Alert to a MSELECTN a MEDITN 3 Edit the name if necessary 16 characters max a MOKN 4 Edit the phone number if necessary 24 digits max a MOKN a MSELECTN a MEXITN Erasing the set phone number Handset 1 For line 1 MME...

Страница 66: ... from listening to your messages remotely The default setting is 111 Program this setting using either the base unit or one of the handsets Important R To prevent unauthorized access to this product we recommend that you regularly change the remote code Handset Base unit 1 For line 1 MMENUN 3061 For line 2 MMENUN 3062 2 Enter the desired 3 digit remote access code 3 MSAVEN 4 Proceed with the opera...

Страница 67: ... setting is On 1 For line 1 MMENUN 3101 For line 2 MMENUN 3102 2 MbN Select the desired setting a MSAVEN 3 Proceed with the operation for your unit Handset MOFFN Base unit MEXITN Number of rings before the unit answers a call You can change the number of times the phone rings Ring count before the unit answers calls You can select 2 to 7 rings or Toll saver The default setting is 4 rings Toll save...

Страница 68: ...r service provider telephone company before changing this setting Change the number of rings of the voice mail service so that the answering system can answer the call first To do so contact your service provider telephone company Caller s recording time You can change the maximum message recording time allowed for each caller The default setting is 3 min Program this setting using either the base...

Страница 69: ...icate there are new messages even after you have listened to all new messages turn it off by pressing and holding until the handset or base unit beeps Voice mail VM tone detection Handset Base unit Your service provider telephone company sends special signals sometimes called voice mail tones or stutter tones to the unit to let you know you have new voice mail messages If you hear a series of dial...

Страница 70: ...rd 2 3 1 3 Insert the lower tabs of the adaptor into the unit s bottom slots A then insert by pushing down the levers of the adaptor into the upper slots B R The words UP WALL should be facing up A A B B 4 Mount the unit on a wall then slide down to secure in place R This product is compliant with the following wall phone plate sizes 2 types 1 83 mm 3 1 4 inches 2 102 mm 4 inches Fit the slots of ...

Страница 71: ...se again as above Error R Recording was too short Try again R Someone is using a cellular line or headset Try again later R The phonebook copy is incomplete page 57 The cellular phone is disconnected from the base unit Make sure that other Bluetooth devices are not connected to the cellular phone and try again Failed R Although the unit tried to connect to the cellular phone or headset the connect...

Страница 72: ... your cellular phone R If your cellular phone is already connected to another Bluetooth device such as a Bluetooth headset turn it off or disconnect it from your cellular phone R Some cellular phones may require you to enter the Bluetooth PIN to pairing Confirm that you entered the correct PIN I cannot connect a cellular phone to the base unit R Confirm that your cellular phone is turned on R Conf...

Страница 73: ...set beeps and or flashes R Battery charge is low Fully charge the batteries page 12 I fully charged the batteries but still flashes is displayed or the operating time seems to be shorter R Clean the battery ends and the charge contacts with a dry cloth and charge again R It is time to replace the batteries page 12 Making answering calls intercom Problem Cause solution is displayed R The handset is...

Страница 74: ...n off and on your cellular phone R Disconnect and reconnect the base unit AC adaptor and try again I cannot switch cellular calls from the unit to the cellular phone R Your cellular phone may not support this feature Refer to the operating instructions of your cellular phone I cannot make a call using the landline R The dialing mode may be set incorrectly Change the setting page 18 I cannot make l...

Страница 75: ...l off page 47 The 2nd caller s information is not displayed during an outside call R In order to use Caller ID call waiting or Call Waiting Caller ID CWID you must first contact your service provider telephone company and subscribe to the desired service After subscribing you may need to contact your service provider telephone company again to activate this specific service even if you already sub...

Страница 76: ... the Bluetooth feature R The Bluetooth feature cannot be accessed immediately after connecting the AC adaptor to the base unit Wait a few seconds and try again R The headset has not connected to the base unit yet even though you performed the connecting procedure setting Wait a few seconds and try again Text message SMS alert is not announced R The text message SMS alert announcement depends on th...

Страница 77: ...e number of rings decreases by 1 from the specified number of rings Call from Outlook Telephone Plug in Problem Cause solution If the installer program does not start automatically R Double click Setup exe in your CD ROM drive folder to start installing A pop up window Microsoft Office Outlook contact list is not displayed when a call is received R Caller information indication in the Telephone Pl...

Страница 78: ... in the Microsoft Office Outlook contact list Bluetooth PIN Problem Cause solution I cannot remember the PIN R Change the PIN using the following method Handset Base unit 1 MMENUN 619 2 7000 3 Enter the new 4 digit PIN a MOKN 4 Enter the new 4 digit PIN again a MSAVEN a MOFFN MEXITN Voice mail Problem Cause solution Voice Mail and or Voice Mail is shown on the handset display How do I remove this ...

Страница 79: ... 3 days After the handset base unit are completely dry reconnect the AC adaptor and telephone line cord Insert the batteries and charge fully before use If the unit does not work properly contact an authorized service center Caution R To avoid permanent damage do not use a microwave oven to speed up the drying process For assistance please visit http www panasonic com help 79 Useful Information TG...

Страница 80: ...or other Authorized Servicer If the equipment is causing harm to the telephone network the telephone company may request that you disconnect the equipment until the problem is resolved Connection to party line service is subject to state tariffs Contact the state public utility commission public service commission or corporation commission for information If your home has specially wired alarm equ...

Страница 81: ... TG9581 Responsible Party Panasonic Corporation of North America Two Riverfront Plaza Newark NJ 07102 5490 http www panasonic com contactinfo FCC Warning To ensure compliance with FCC emissions limits use only the provided USB cable with ferrite core when connecting the unit to a computer Notice L FCC ID can be found inside the battery compartment or on the bottom of the units Compliance with TIA ...

Страница 82: ... con 4 alambres 1 a la unidad y después a la toma de las 2 líneas telefónicas RJ14C 2 hasta que escuche un clic N Para conectarlo a 2 tomas telefónicas de una sola línea 1 Para la línea 1 Conecte el enchufe del cable de la línea telefónica transparente cable con 2 alambres 1 a la unidad y después a la toma única de la línea telefónica 1 RJ11C 2 hasta que escuche un clic 2 Para la línea 2 Conecte e...

Страница 83: ...nte encima de ella en la pantalla Preste atención a la pantalla para ver qué funciones están asignadas a las teclas de función durante la operación Tecla navegadora Auricular V o Navegue por diversas listas y elementos Volumen o V Ajuste el volumen del receptor o el altavoz mientras habla k Ver la entrada del directorio telefónico REDIAL Remarcación Vea la lista de remarcación V CID Identificador ...

Страница 84: ...s OK 3 Introduzca la hora y minuto actuales formato de reloj de 24 horas 4 GUARDA 5 Continúe operando su unidad Auricular OFF Unidad base EXIT Cómo grabar el mensaje de saludo del contestador de llamadas para la línea terrestre Auricular Unidad base Si utiliza un mensaje de saludo pregrabado no es necesario que grabe su propio mensaje de saludo 1 Para la línea 1 MENU 3 21 Para la línea 2 MENU 3 22...

Страница 85: ...Dependiendo de su teléfono celular es posible que le pida que introduzca el NIP de Bluetooth predeterminado 0000 Si su teléfono celular muestra la confirmación de la PassKey en su pantalla siga las instrucciones para continuar 3 Espere a que se emita un pitido largo L Es posible que tarde más de 10 segundos en completar el emparejamiento L Cuando el indicador de CELL correspondiente se ilumina est...

Страница 86: ...ecta a los dispositivos Bluetooth a intervalos regulares si se pierde la conexión Consulte las instrucciones de operación para cambiar el intervalo predeterminado 1 min L Cuando está usando una línea celular o un audífono con Bluetooth la unidad base pierde la conexión de otros dispositivos con Bluetooth teléfono celular o audífono Para restablecer la conexión a los dispositivos Bluetooth automáti...

Страница 87: ... Marque el número telefónico s Oprima la tecla de la línea celular deseada CELL 1 a CELL 4 s Levante el auricular alámbrico Para hacer llamadas por la línea terrestre Marque el número telefónico s Levante el auricular alámbrico u oprima s Para contestar llamadas Levante el auricular alámbrico u oprima s Para colgar Coloque el auricular alámbrico en la base Cuando utilice el altavoz oprima s Para a...

Страница 88: ...ccione el grupo deseado s SELEC 2 veces s EXIT Para hacer llamadas 1 k s r Seleccione la entrada deseada 2 Para hacer una llamada celular Oprima la tecla de la línea celular deseada CELL 1 a CELL 4 s Levante el auricular alámbrico Para hacer una llamada terrestre Levante el auricular alámbrico Contestador de llamadas de la línea terrestre Unidad base Contestador encendido apagado Para encenderlo a...

Страница 89: ...2 Haga clic en el número telefónico al que desea llamar 3 Usando una línea fija Haga clic Llamar línea 1 o Llamar línea 2 para seleccionar la línea deseada Usando una línea de celular Haga clic en Llamar cel V y haga clic en la lista de líneas de celular deseada Cel 1 1 de Cel 4 1 1 Cuando el dispositivo con Bluetooth está vinculado se muestra su nombre Cómo hacer una llamada usando la lista de re...

Страница 90: ...clic en Llamar cel V y haga clic en la lista de líneas de celular deseada Cel 1 1 de Cel 4 1 1 Cuando el dispositivo con Bluetooth está vinculado se muestra su nombre 2 Haga clic en V que está a la derecha de Marcar núm 3 Haga clic en el número telefónico al que desea llamar Cómo hacer llamadas al introducir un número telefónico en la barra de herramientas 1 Usando una línea fija Haga clic Llamar ...

Страница 91: ...os elementos copiados se almacenan en el grupo Cel 1 a Cel 4 en el que está emparejado el teléfono celular Para copiar desde otros teléfonos celulares no emparejados r Otro celular s SELEC s r Seleccione el grupo al que desea copiar s SELEC 3 Cuando aparezca Transf datos del directorio del celular Vaya al paso 4 Cuando aparezca el menú Selec modo r Seleccione Auto o Manual s SELEC Auto Descargue t...

Страница 92: ...e el audífono estará listo para usarse Cómo operar un audífono inalámbrico con Bluetooth usando una línea terrestre Unidad base Consulte las instrucciones de operación de su audífono para ver cómo funciona N Cómo contestar llamadas de la línea terrestre con su audífono Para contestar una llamada de línea terrestre encienda su audífono Para ello consulte las instrucciones de operación de su audífon...

Страница 93: ...ular esté conectado a la unidad base L El teléfono celular no se ha emparejado con la unidad base Empareje el teléfono celular Cómo se incrementa el nivel de volumen del auricular L Oprima la tecla de navegación repetidamente mientras habla Por qué hay ruido o se corta la conversación L Trate de reubicar la unidad base de forma que se minimice la distancia al auricular L Si ocurre el mismo problem...

Страница 94: ... For hearing or speech impaired TTY users TTY 1 866 605 1277 Purchase Parts Accessories and Owner s Manual online for all Panasonic Products by visiting our Web Site at http www pstc panasonic com or send your request by E mail to npcparts us panasonic com You may also contact us directly at 1 800 237 9080 Fax Only Monday Friday 9 am to 9 pm EST Panasonic National Parts Center 20421 84th Avenue S ...

Страница 95: ...d States or Puerto Rico This Limited Warranty is extended only to the original purchaser and only covers products purchased as new Online Repair Request To submit a new repair request and for quick repair status visit our web site at http www panasonic com repair When shipping the unit carefully pack in a padded shipping carton include all accessories and send it prepaid Include a letter detailing...

Страница 96: ...able to acts of God THERE ARE NO EXPRESS WARRANTIES EXCEPT AS LISTED UNDER LIMITED WARRANTY COVERAGE THE WARRANTOR IS NOT LIABLE FOR INCIDENTAL OR CONSEQUENTIAL DAMAGES RESULTING FROM THE USE OF THIS PRODUCT OR ARISING OUT OF ANY BREACH OF THIS LIMITED WARRANTY As examples this excludes damages for lost time lost calls or messages cost of having someone remove or re install an installed unit if ap...

Страница 97: ...s 23 27 Cellular phone Pairing 19 Unpairing 19 Chain dial 39 Check tel line 1 71 Check tel line 2 11 71 CID Caller ID 54 55 Conference calls 25 29 Control type 14 15 Customer support 49 D Date and time 17 Dialing mode 18 Direct command code 43 Display Contrast 48 Language 17 E Eco mode 14 Equalizer 25 Error messages 71 F Flash 24 28 48 G Groups 38 H Handset Deregistration 53 Name 52 Registration 5...

Страница 98: ...ng calls 25 29 Troubleshooting 72 TTY 94 V VM Voice mail 69 Voice guidance language 17 Voice mail 67 69 Volume Receiver 23 Ringer Base unit 28 45 46 Ringer Handset 24 45 46 Speaker 23 27 W Wall mounting 70 98 Index TG958x_0704_ver031 pdf 98 2014 07 04 10 32 30 ...

Страница 99: ...99 Notes TG958x_0704_ver031 pdf 99 2014 07 04 10 32 30 ...

Страница 100: ...s are available If your product is not working properly IMPORTANT For your future reference We recommend keeping a record of the following information to assist with any repair under warranty Serial No Date of purchase found on the bottom of the base unit Name and address of dealer Attach your purchase receipt here Two Riverfront Plaza Newark NJ 07102 5490 Panasonic System Networks Co Ltd 2014 Pri...

Отзывы: