2
PLEASE NOTE:
The lights’ status is obvious, when the outlet is just plain “
ON
” or just plain “
OFF
”. However, there are transition states that cause the lights to
blink. The lights will blink when performing a triggered cycle, but when a server initiated cycle command occurs, it just goes “
OFF
”,
delays
, then “
ON
”.
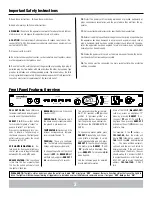
1 2 3 4 5 6 7 8
UNSAFE VOLTAGE
BREAKER
WIRING FAULT
TEMPERATURE
15 A
BRIGHTNESS
OUTLET STATUS
REBOOT 1 REBOOT 2
M4315-PRO
B LT
Blue
™
ENABLED
VOLTS
ALWAYS ON
1.
Read these instructions.
2.
Keep these instructions.
3.
Heed all warnings.
4.
Follow all instructions.
5. WARNING:
Do not use this apparatus near water. To reduce the risk of fire or
electric shock, do not expose this apparatus to rain or moisture.
6. CAUTION
- Contains Always On Receptacles. To reduce risk of shock - Dis-
connect M4315-PRO from power source before servicing any equipment con-
nected to M4315-PRO.
7.
Clean only with dry cloth.
8.
Do not install near any heat sources such as radiators, heat registers, stoves,
or other apparatuses that produce heat.
9.
Do not defeat the safety purpose of the polarized or grounding type plug. A
polarized plug has two blades, with one wider than the other. A grounding type
plug has two blades and a third grounding prong. The wide blade or the third
prong is provided for your safety. If the provided plug does not fit into your outlet,
consult an electrician for replacement of the obsolete outlet.
Important Safety Instructions
10.
Protect the power cord from being walked on or pinched, particularly at
plugs, convenience receptacles, and the point where they exit from the ap-
paratus
.
11.
Only use attachments/accessories specified by the manufacturer.
12.
Refer all servicing to qualified service personnel. Servicing is required when
the apparatus has been damaged in any way, such as power-supply cord or
plug is damaged, liquid has been spilled or objects have fallen into the appa-
ratus, the apparatus has been exposed to rain or moisture, does not operate
normally, or has been dropped.
13.
Where the power cord is used as the main disconnect device, the discon-
nect device shall remain readily accessible.
14.
This device must be connected to a main socket outlet with a protective
earthing connection.
Front Panel Features Overview
PULL OUT CARD:
Quick reference
for default profile and device type list.
Located under the reboot buttons.
REBOOT 1 & 2:
Press either button
for 2 seconds to initiate a “reboot” se-
quence of outlet 1 or 2 (default).
Press both simultaneously for 2 sec-
onds to initiate a full power-up or
shut down sequence. The front panel
outlet is always on, unless the circuit
breaker is set to OFF.
VOLTS/AMPS/BRIGHTNESS:
Ro-
tate knob for front panel brightness
control, and press to toggle the meter
between VOLTS and AMPS mode.
UNSAFE VOLTAGE:
If the line voltage
is less than 100 Vac or greater than
134 Vac, the outlets will shut off and
this light will flash red.
The meter will show the current pro-
file: P1-P4 (presets), or
PP
(personal
profile). A “personal profile” is a
configuration that has been changed
from the presets by an external con-
trol (through the COMMUNICATIONS
CARD)
To change the preset profile, press
REBOOT 1
repeatedly until the de-
sired profile is displayed. To select
the displayed profile and exit, press
REBOOT 2
. To exit without changing
the profile, press
REBOOT 1
until
“
PE
” (profile exit) is displayed, then
press
REBOOT 2
. Turn breaker to
ON
when finished.
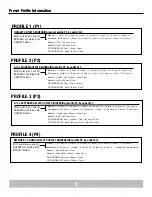
See the following page for detailed
preset profile information.
Users of the TCP/IP (
BlueBOLT-CV1
)
card may access an additional “IP”
menu by pressing
REBOOT 1
, cy-
cling past
PP
and P1-P4 until
IP
is
displayed. Then pressing
REBOOT 2
will display the unit’s
IP
address, one
octet at a time.
For example, if the
IP
address is
192.168.1.50,
then the meter will
display
192
, followed in 2 seconds by
168
, then
1
, then
50
, and terminated
by ---. The menu will then automati-
cally exit and the unit will return to
normal operation. If the unit has not
yet obtained an IP address, the user
should wait up to 2 minutes for DHCP
to assign the address, or for the Blue-
BOLT-CV1 card to assign the default
address (
192.168.1.169
) if DHCP
fails.
BREAKER:
Flashes red if the circuit
breaker is OFF.
WIRING FAULT:
Illuminates red if
the house wiring is reverse-wired or
the ground is not connected.
TEMPERATURE:
Flashes red if the
internal microprocessor tempera-
ture is greater than 60 ºC.
PROFILES:
These are configura-
tions that dictate outlet sequencing
timings and trigger assignments.
To change the profile, set the circuit
breaker to
OFF
(the
BREAKER
light
will flash red) and press
REBOOT 1
& 2
simultaneously for 8 seconds.


