


68
● User Management
You may maintain tenants, staffs and vendors information in User
Management module. The information you entered here is only for look up purpose
when issuing card which we will demo later. The benefit to create entries here is to
save you some typing when issue cards/keys.
Let’s create some user templates. We just provide basic information for demo
purpose.
User Type
Information
Tanant A
Kevin Huang, [email protected]
Tenant B
Tony Lin, [email protected]
Tenant C
Mark Chu, [email protected]
Tenant D
Jay Chen, [email protected]
Staff S1
Peter Liu, [email protected]
Staff S2
Ricky Chang, [email protected]
Vendor V
Company Name : Dust Buster
Employee name : Vincent Chou, [email protected]
❖
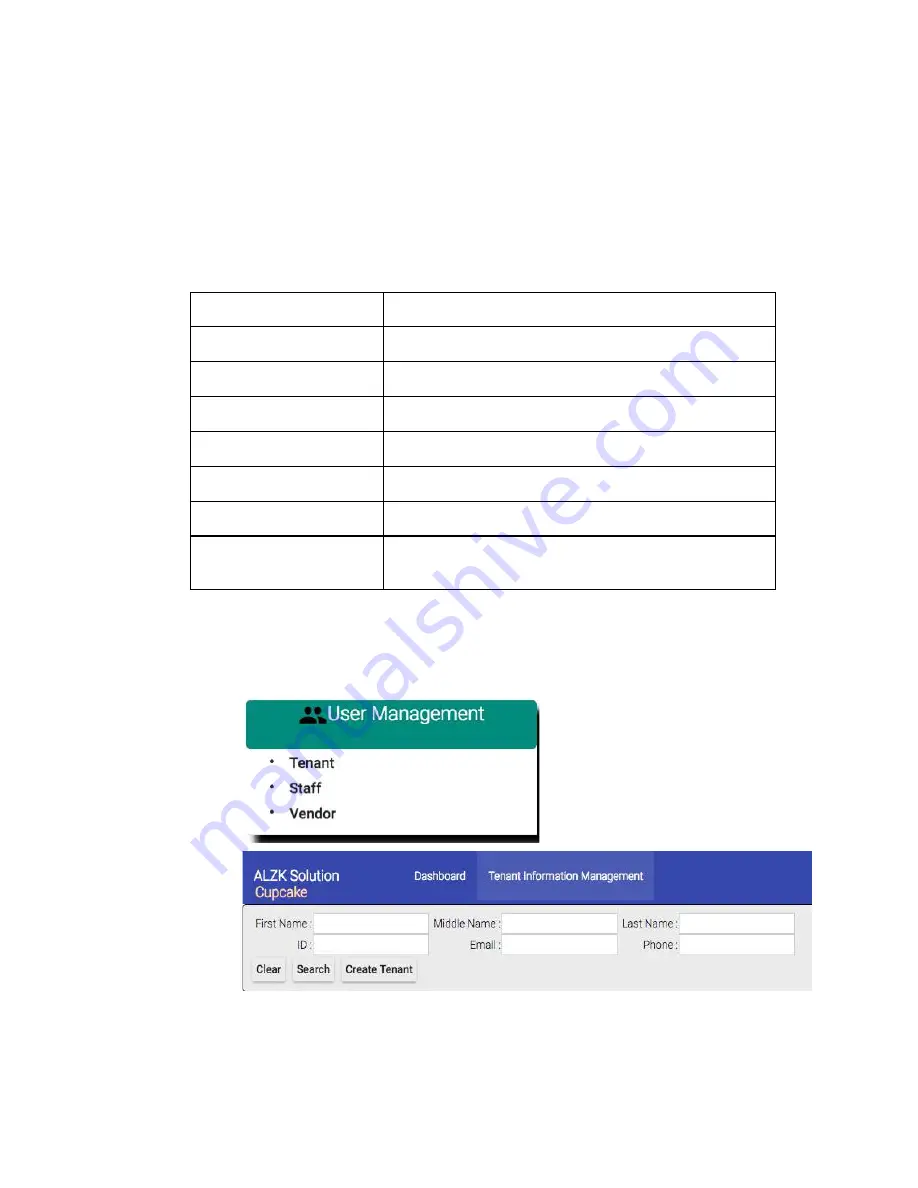
Steps to create tenants
Navigate to create tenants page.
User Management
=>
Tenant
Содержание Kapture KA-WR1S
Страница 1: ...Pamex Kapture Series A Multi Family Door Access Control Solution User Manual Implementation Guide...
Страница 10: ...9 Front View Figure 3 Kapture KA WR1S Front Kapture KA WR1N Front...
Страница 11: ...10 Back View Figure 4 Kapture KA WR1S Back Kapture KA WR1N Back...
Страница 12: ...11 Wiring Pigtail Rated note Figure 5 Kapture KA WR1S Kapture KA WR1N Wiring Pigtail Rated note...
Страница 13: ...12 Basic Door Installation Figure 6 Kapture KA WR1S N Basic Door Installation...
Страница 14: ...13 Basic Door Installation Wiring Figure 7 Kapture KA WR1S N Basic Door Installation Wiring...
Страница 15: ...14 Solid State Output Figure 8 Kapture KA WR1S N Solid State Output...
Страница 16: ...15 Surface Mounting Figure 9 Kapture KA WR1S N Surface Mounting...
Страница 18: ...17 Dimensions Figure 11 Kapture KA WR1S Front Figure 12 Kapture KA WR1N Front...
Страница 19: ...18 Back Figure 13 Kapture KA WR1S Back...
Страница 20: ...19 Figure 14 Kapture KA WR1N Back...
Страница 24: ...23 Pull down the Wall Reader See picture 6 Tiighten up the Wall Reader with one 4mm 8mm screw See picture 7...
Страница 27: ...26 Product Photo Mark...
Страница 28: ...27 Dimensions Mark...
Страница 29: ...28 Installation Guide...
Страница 32: ...31 Product Photo Mark...
Страница 33: ...32 Dimensions Mark...
Страница 34: ...33 Installation Guide D1 Installation Guide...
Страница 37: ...36 Product Photo Mark...
Страница 38: ...37 Dimensions Mark...
Страница 39: ...38 Installation Guide...
Страница 42: ...41 Product Photo Mark...
Страница 43: ...42 Installation Guide...
Страница 46: ...45 Product Photo Mark...
Страница 47: ...46 Installation Guide...
Страница 63: ...62 Place key card on reader first Click Read Key From Reader to get Key s UID...
Страница 81: ...80 Place key card on reader first Click Read Key From Reader to get Key s UID...
Страница 91: ...90 Check the box on Group Area M and click time control button to edit...
Страница 93: ...92 Click Issue Write Key to issue the vendor key Place key card on reader first...
Страница 99: ...98 Place key card on reader first Click Read Key From Reader to get Key s UID...
Страница 113: ...112 can be controlled by the parameter ALERT_SEVERITY_THRESHOLD parameter in the Misc tab of system parameters function...
Страница 118: ...117 Factory default settings Deadbolt Same as Wall Reader...
Страница 119: ...118 Factory default settings Leverset Same as Wall Reader...
Страница 120: ...119 Factory default settings Interconnect Same as Wall Reader...
Страница 126: ...125 Lock Real Time Events 1 Lock Out 2 Cylinder Cover Opened 3 Invalid Key Mifare Desfire Key 4 Single Pass Success...
Страница 129: ...128 NCC Statement NCC Statement Taiwan Regulatory Information NCC...


