background image

O N   I N I T I A L   P O W E R - U P

D i s p l a y   w i l l   i n d i c a t e   r e v   l e v e l   o f   s o f t w a r e   a n d   P a l s t a r  
c o p y r i g h t   i n f o r m a t i o n .

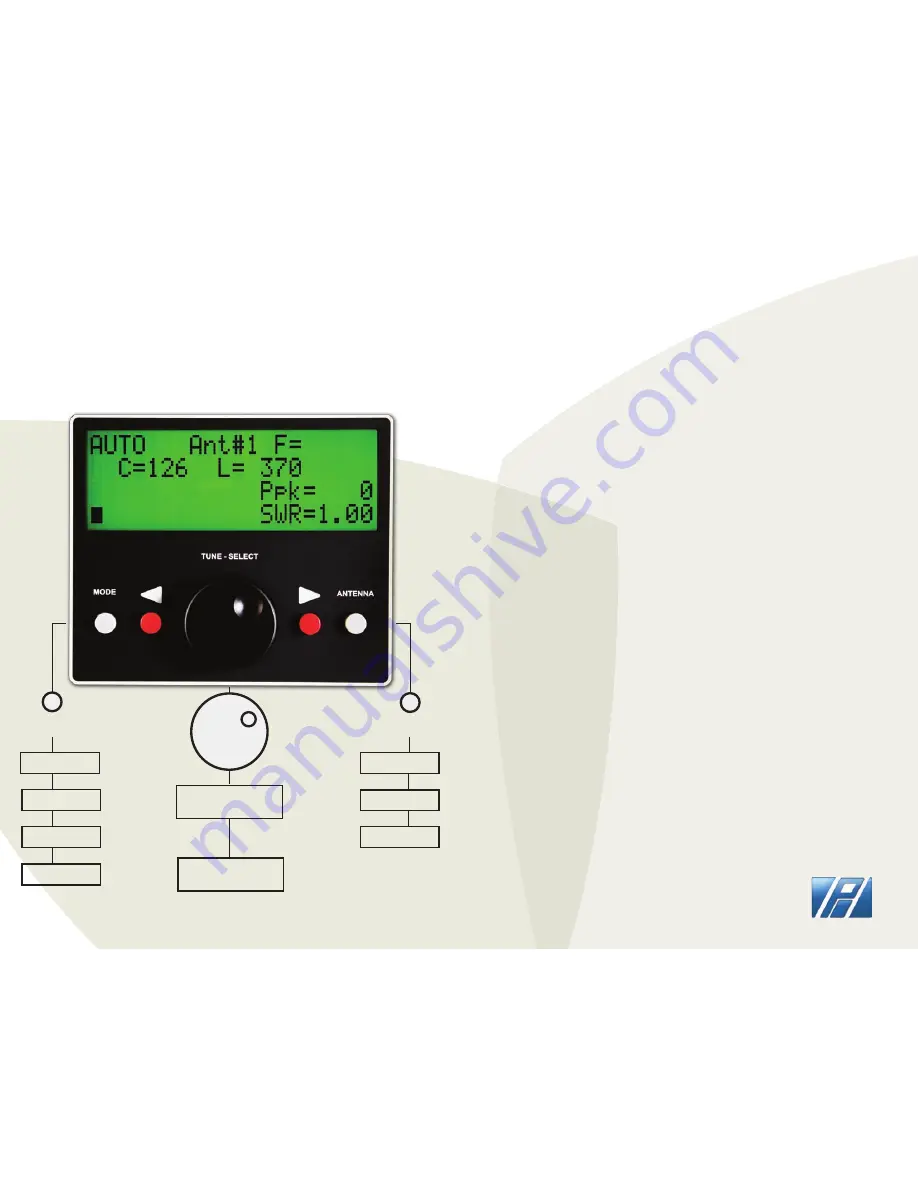
SCREEN DISPLAY ON POWER-UP

Page 12

Page 3

HOW-TO UPDATE SOFTWARE

PRESS

TO SELECT

C AND L

TO SELECT

SETUP ITEM

D O W N LO A D I N G   H F - AU TO   F I R M WA R E

CREATE a folder on your computer’s hard drive (but not desktop)


NAME the folder HF_AUTOUPGRADE

DOWNLOAD the Firmware file (Zip format) from the Palstar website - 

http://www.palstar.com/en/hf-auto/ - it is near the bottom of the page . 

  The link to the file is named “HF-AUTO Firmware 1.x”

SAVE the file to the folder you created in Step 1

OPEN the folder by right-clicking on the Zip file and select “Extract All” - 

follow the steps in the Extraction wizard

l


TURN-OFF the HF-AUTO

CONNECT the RS-232 cable to the rear panel

CONNECT the other end of the RS-232 cable to Com 1 or your computer

TURN-ON the HF-AUTO

SET Switch at rear of the HF-AUTO to “PROGRAM”

Note: LED (PROGRAM MODE) on Front Panel is illuminated

DOUBLE-CLICK “LOAD_HF_9600” from your HF_AUTOUPGRADE folder that 

you created in Step 2

DOS Window appears - wait until DOS Window closes (approx. 1 min)

TURN “PROGRAM” Switch to “NORMAL”


REMOVE the RS-232 cable

TURN HF-AUTO OFF and then ON again

LOOK at HF-AUTO display to see new REV level at top-right corner when 

you first turn it on

COMPLETE - you have now completed the update of the firmware


NOTE:

I N S TA L L I N G  T H E   F I R M WA R E   U P G R A D E

ANT #1

ANT #2

ANT #3

AUTO

MANUAL

BYPASS

SETUP

The  HF-AUTO  ships with a  DB9 serial cable. 

You   can   order   a   USB  to  DB9 serial cable 

from Palstar for use with  computers with no 

DB9 serial port to update the firmware.

MODE

TUNE KNOB

PRESS

PRESS

ANTENNA

PALSTAR

Содержание HF-AUTO

Страница 1: ...O Automatic Antenna Tuner l 2 watts to 1800 watts PEP l 160 m to 6m l Tuning time 10 secs or less l Large 4 line display l 12 5 x 6 5 x 16 5 9676 N Looney Rd Piqua OH 45356 USA 937 773 6255 800 773 79...

Страница 2: ...ic all y 1 0 se cs 8 0 m to 6m 3 5 se cs 8 0 m to 160m l DUT Y C YCLE 1 00 S S B A ND C W l DIGITAL DISPL AY RF Power S WR Freq u en c y Anten n a selec t ion Posit ion of L a nd C M ode s Auto M anu...

Страница 3: ...Tuneable Auto T Network tuner It is completely independent of data from an external source to determine frequency of tracking from Band to Band As a result of this feature the HF AUTO will function wi...

Страница 4: ...NNECT the RS 232 cable to the rear panel l CONNECT the other end of the RS 232 cable to Com 1 or your computer l TURN ON the HF AUTO l SET Switch at rear of the HF AUTO to PROGRAM l Note LED PROGRAM M...

Страница 5: ...ce the time needed to find the C and L tune positions when a given frequency is first applied v1 26 corrected a problem where some units were incorrectly reading EEPROM calibration and setting values...

Страница 6: ...llow the tuner to pretune to a memory segment containing the desired frequency ANOTHER application of RF Power must be applied to complete the final tune condition where high power may be applied You...

Страница 7: ...HZ OF SETTINGS SPACED 1 8 MHZ to 20 MHZ 51 4 Khz 3 5 MHZ to 4 0 MHZ 51 10 Khz 7 0 MHZ to 7 3 MHZ 36 50 Khz 10 1 MHZ to 10 150 MHZ 2 50 Khz 14 0 MHZ to 14 350 MHZ 18 40 Khz 18 068 MHZ to 18 168 MHZ 3 5...

Страница 8: ...DC 10 pin 8 pin 6 pin P2 P2 P3 P3 P4 P4 P5 P5 P6 P7 P8 P9 P10 P11 SW1 Program Run J1 J4 SO 239 J5 DE 9 Female SW1 SPST recessed switch open RUN J6 J7 RCA Phono Female P1 DC male connector 5A PCB conne...

Отзывы: