background image

MENU

VOL -

SOURCE

CH +

CH -

VOL +

-

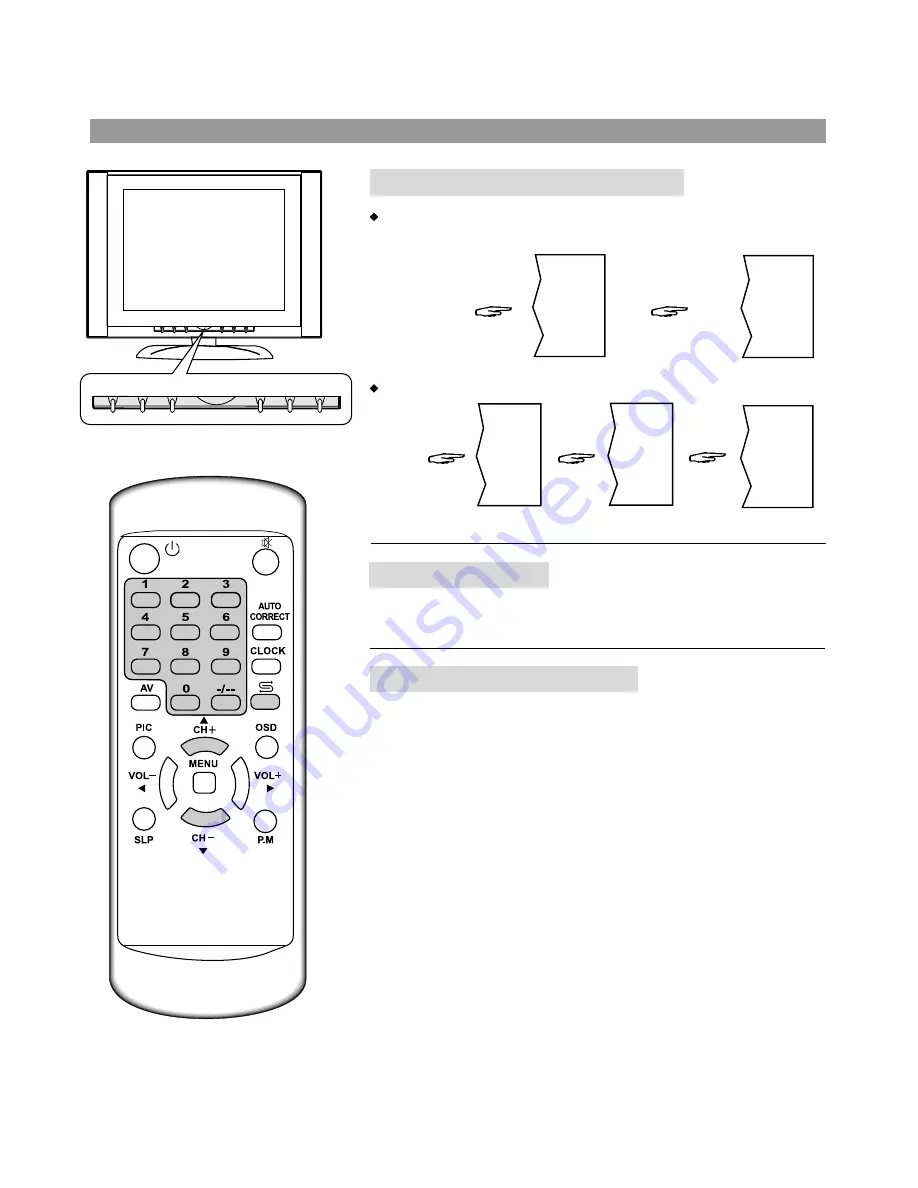
Using CH+/- button

Channel Select

17

Use 0~9 digit buttons to select one-digit channel number.

Press 0-9 direct
channel selector.

Press -/-- button
to display "-".

To select two-digit channel:

Press 

CH+ 

button, the channel number increases;

Press 

CH- 

button, the channel number decreases. 

Press this button to switch between the current channel and
previous channel.

Use 0~9 digit buttons and -/-- button

Use previous channel button

Press -/-- button
repeatedly to
display "--".

Press 1-9
buttons.

Press 0-9
buttons.

8

- -

1 -

18

2

Содержание TFTV-380

Страница 1: ...ALIA TEL 02 9313 7111 FAX 02 9313 7555 www palsonic com au PALSONIC CUSTOMER SERVICE TELEPHONE AUSTRALIA 1300 657 888 38CM CORDLESS REMOTE LCD TV MONITOR MODEL TFTV 380 OWNER S MANUAL Type Tested Elec...

Страница 2: ...ation Connecting video audio equipment VGA interface connection Elevation adjustment Menu introduction Turning On Off Turning On Turning Off Selecting input signal Channel Preset To enter into PRESET...

Страница 3: ...other openings in the cabinet are designed for ventilation Do not cover or block these vents and openings since insufficient ventilation can cause overheating and or shorten the life of the product Do...

Страница 4: ...r convenience receptacles on other equipment as this can result in a risk of fire or electric shock High Voltage exists in this TV set Do not remove the cover In case the product needs replacement par...

Страница 5: ...To select input signal Channel up Channel down Volume up Volume down enter into MENU Identification of controls 4 Front SOURCE CH CH VOL MENU VOL...

Страница 6: ...Power switch AV input VIDEO AUDIO L MONO R Antenna input Earphone jack PC audio line in S video input VGA input DC power input 5 Back...

Страница 7: ...nal input select Direct channel select Power on Standby Channel down Picture mode select Volume up On screen display Channel up Previous channel Clock Timer setting Auto correct picture in VGA input m...

Страница 8: ...spose of used batteries in the specified manner Do not drop dampen or disassemble the remote control Notes There should be no obstacle between the TV and the transmitter Use the remote control within...

Страница 9: ...of the aerial will depend upon your particular area Notes Turn off the power firstly when you connect a outdoor antenna to the Antenna input terminal When installing an outside antenna system extreme...

Страница 10: ...Tovideo output To ANT output Video equipment without S video terminal Video equipment with S video terminal To ANT output Connecting video audio equipment To ANT input Y Yellow video White audio L MON...

Страница 11: ...Installation continued 10 VGA interface connection To VGA output To VGA input To line out To line in Equipment with VGA interface...

Страница 12: ...11 Elevation adjustment You can adjust the angle of the LCD TV Monitor as follows The elevation can be adjusted from 50 to 900 900 50...

Страница 13: ...ys in white Press MENU button three times Press MENU button once Press MENU button twice Press MENU button in PC mode Note There is only one MENU page in PC mode Menu Introduction 12 Press MENU button...

Страница 14: ...t the colour temperature The item switches between User 9300K 7300K 6500K and 5000K To adjust the back light To enter into auto search To enter into fine tuning menu To enter into channel search menu...

Страница 15: ...nput of the unit 2 Press the power switch and the red indicator lights up the TV MONITOR is in STANDBY mode 3 Press the SOURCE button on the unit s control panel or the button on the remote control th...

Страница 16: ...L button to confirm or adjust selected item Notes Please enter into PRESET menu and select Auto Search item Press VOL button to start Auto Search and all active programs will be memorised During the p...

Страница 17: ...this channel will be skipped when you browse channels with CH button To resume the skipped channel please select the skipped channel with 0 9 digit buttons and then enter the PRESET menu select Skip...

Страница 18: ...s button to display To select two digit channel Press CH button the channel number increases Press CH button the channel number decreases Press this button to switch between the current channel and pr...

Страница 19: ...et picture mode Press P M button to select a picture mode according to your favourites Bright Contrast Saturation Sharpness Color Hue Backlight Item VOL VOL lighter stronger deeper sharper greenish da...

Страница 20: ...Enable the TV set can turn off automatically when there is no signal for 15 minutes From the SYSTEM menu select Language item by CH button Press VOL or VOL button to select English or Chinese From the...

Страница 21: ...CK button twice the Turn on menu appears Use CH to select item and use VOL to adjust on time and on time status Off Today or Everyday If you select Today the Turn on function only effect today If you...

Страница 22: ...768 75Hz We recommend you to use 1024 x 768 60Hz so that the set can obtain the best picture When PC signal format changes or when you switch to PC mode by AV button the set corrects picture automatic...

Страница 23: ...or many times Now you can adjust phase and frequency to obtain the best display Adjusting horizontal vertical position Adjusting phase and frequency When there is correct input signal press MENU butto...

Страница 24: ...m another TV set a computer an electronics game machine a broadcast station etc This may be caused by reflections from nearby mountains or buildings Check the antenna direction Double images or ghosts...

Страница 25: ...CAM B G SECAM D K Colour system Sound output Accessories AC 35W 585 W x 515 H x 257 D 7 5 38 240V 50Hz DC 12V VHF 1 12 2 12 2 12 2 13 2 12 1 12 UHF 13 57 21 69 21 69 14 79 21 69 21 69 CATV Z1 Z37 X Z...

Страница 26: ...PALSONIC CORPORATION PTY LTD 1 JOYNTON AVENUE WATERLOO NSW 2017 AUSTRALIA TEL 02 9313 7111 FAX 02 9313 7555 www palsonic com au PALSONIC CUSTOMER SERVICE TELEPHONE AUSTRALIA 1300 657 888 604 L1513 01...

Отзывы: